Table of Contents
Advertisement
Quick Links
Advertisement
Table of Contents

Related Manuals for Advantech FPM-3150 Series


Summary of Contents for Advantech FPM-3150 Series
- Page 1 FPM-3150 Series Flat Panel Monitor with 15" Color TFT/LCD Display User's Manual...
- Page 2 Copyright Notice This document is copyrighted by Advantech Co., Ltd. All rights are reserved. Advantech Co., Ltd. reserves the right to make improvements to the products described in this manual at any time. Specifications are thus subject to change without notice.
- Page 3 If any of these items are missing or damaged, contact your distributor or sales representative immediately. Additional Information and Assistance 1. Visit the Advantech web site at www.advantech.com where you can find the latest information about the product. 2. Contact your distributor, sales representative, or Advantech's customer service center for technical support if you need additional assistance.
- Page 4 The sound pressure level at the operator's position according to IEC 704-1:1982 is no more than 70dB(A). DISCLAIMER: This set of instructions is given according to IEC 704-1. Advantech disclaims all responsibility for the accuracy of any statements contained herein.
- Page 5 - Wenn das Gerät deutliche Anzeichen eines Defektes aufweist. Der arbeitsplatzbezogene Schalldruckpegel nach DIN 45 635 Teil 1000 beträgt 70dB(A) oder weiger. DISCLAIMER: This set of instructions is given according to IEC704-1. Advantech disclaims all responsibility for the accuracy of any statements contained herein.
-
Page 6: Table Of Contents
Contents CHAPTER 1 Introduction ..........1 1.1 Introduction ................2 1.2 Specifications ................2 1.3 LCD Specification ..............3 1.4 Power Consumption ..............3 1.5 Connectors ................4 1.6 Dimensions ................5 CHAPTER 2 System Setup ..........7 2.1 Mounting the Monitor ............... 8 2.1.1 Wall Mounting ................ - Page 7 Set Serial Data for Expansion ....B.1 Setting serial data for expansion ..........24 APPENDIX C OSD Selection........27 C.1 Introduction: ................28 C.2 Menu:..................28 C.3 Auto Adjust ................28 C.4 Brightness ................29 C.5 Clock ..................29 C.6 Position .................. 29 C.7 Contrast .................
- Page 8 Figure 2-2: Panel Mounting (cut out dimension: 434mm x 316mm) ..9 Figure 2-3: Rack Mounting by rackmount brackets ......... 10 Figure 2-4: Desktop Stand for the FPM-3150 series ......... 11 Figure 2-5: Swing-ARM for the FPM-3150 series ........12...
- Page 9 Introduction This chapter includes: • Introduction • Specifications • LCD Specification • Power Consumption • Connectors • Dimensions...
-
Page 10: Chapter 1 Introduction
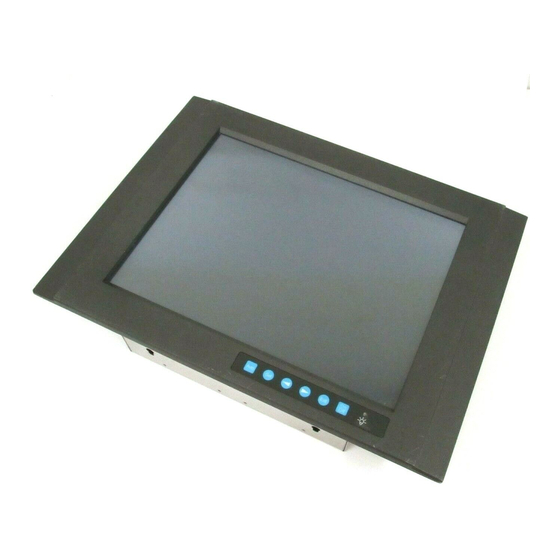
1.1 Introduction Advantech's FPM-3150 Series is a 15" color TFT LCD flat panel monitor built specifically for industrial applications. With the optional touchscreen, the FPM-3150 Series is an excellent and user-friendly system control interface. With a viewing size as large as 15", it represents an ample display area as well as vivid and sharp images for your HMI application. -
Page 11: Lcd Specification
• OS support: Windows 95/98, Windows NT,MS-DOS • Life span: 100 million touches 1.3 LCD Specification • Display type: XGA TFT LCD • Display size: 15" • Max. colors: 16.7M Full Color • Max. resolution: 1024 x 768 • Dot pitch: ..297 x 0.297 mm •... -
Page 12: Connectors
1.5 Connectors The following connectors are situated on the left hand side of the FPM-3150 Series: VGA Port (DB-15) This DB-15 connector can be connected to the system via the external 15-pin DB-15 connector locatd on the left side of the system unit. -
Page 13: Dimensions
1.6 Dimensions Figure 1-6: Dimensions Chapter 1 Introduction... - Page 14 FPM-3150 User's Manual...
-
Page 15: Chapter 2 System Setup
System Setup • Mounting the Monitor - Wall/Panel/Rack Mounting - Desktop Stand/Swing-ARM Mounting... -
Page 16: Mounting The Monitor
2.1 Mounting the Monitor The FPM-3150 Series can be placed as you require. The versatility of the FPM-3150 mounts enable it to be mounted on your desk or anywhere else. 2.1.1 Wall Mounting Thanks to wall brackets, the FPM-3150 can be mounted directly to a wall. -
Page 17: Panel Mounting
2.1.2 Panel Mounting If you need to install the FPM-3150 serieson a panel mount, please release the mounting brackets by detaching four screws on rear side and fix them on up and bottom side by screws. Figure 2-2: Panel Mounting (cut out dimension: 434mm x 316mm) Chapter 2 System Setup... -
Page 18: Rack Mounting
FPM-3150TV (Part Number is FPM-3150Rack-MT). Assemble the rack mount brackets on either side of FPM-3150TV with 12 screws, then affix the monitor on the rack. Figure 2.3: Rack Mounting by rackmount brackets FPM-3150 Series User's Manual... -
Page 19: Desktop, Swing-Arm For Fpm-3150Tv
2.2 Desktop, Swing-ARM for FPM-3150TV The FPM-3150 Series can be mounted in other ways. You can place the desktop stand for desktop use or attach it on a swing-arm bracket. 2.2.1 Desktop Stand The desktop stand bracket is attached to the rear of the FPM-3150. -
Page 20: Swing-Arm
2.2.2 Swing-ARM Detach the mounting brackets on the rear side, then attach the FPM- 3150TV onto the Swing-ARM mount (75mm or 100mm square bracket). Figure 2.5: Swing-ARM for the FPM-3150 series FPM-3150 Series User's Manual... -
Page 21: Appendix A Touchscreen Driver Installation
Touchscreen Driver Installation • Introduction • Specification • Installation - for Windows 95/98 - for Windows NT - for MS-DOS... -
Page 22: Introduction
A.1 Introduction The FPM-3150 Series’ optional touchscreen uses an advanced 8-wire resistive technology. It provides more accurate sensing capacity than other technologies. The touchscreen is specially designed for tough industrial environments, and has been approved to FCC Class A and Class B standards. -
Page 23: Installation Of Touchscreen Driver
• Storage temperature: -25 ~ 70° C (humidity 20 ~ 95% RH) A.3 Installation of Touchscreen Driver The touchscreen into the FPM-3150 Series provides a driver for use with Windows 95, Windows 98, or Windows NT 4.0. To facilitate installation of the touchscreen driver, you should read the instructions in this chapter carefully before you attempt installation. -
Page 24: Installation For Windows 95/98
A.3.1 Installation for Windows 95/98 FPM-3150 User's Manual... - Page 25 Appendix A Touchscreen Driver Installation...
-
Page 26: Installation Forwindows Nt
A.3.2 Installation for Windows NT FPM-3150 User's Manual... - Page 27 Appendix A Touchscreen Driver Installation...
-
Page 28: Installation For Dos
A.3.3 Installation for DOS A.3.3.1 Using "INSTALL.EXE" utility to install PenMount software driver. A.Insert the drive diskette to floppy disk drive. B. Type "INSTALL" (e.g.,A:\INSTALL). C. A pop-up window will display "Salt International Corp. PenMount Install Utilities. Press ENTER key to allow PenMount install the drivers to drive C or use keyboard to key-in the hard disk drive that you plan to install the driver."... -
Page 29: Do Calibration
If you do not need to detect IRQ5 and IRQ9, the command is: C:\PENMOUNT\PMDETECT -N5 -N9 A.3.3.3 Do Calibration A.To adjust touch screen mapping properly for the display, use PM.BAT (C:\PENMOUNT\PM ) tocalibration. B. Choose “1” DO CALIBRATION (adjust screen mapping). C. -
Page 30: Penmount Dos Driver Functions
“PENMOUNT” directory can also be applied. Now, the PenMount DOS driver is installed. A.3.3.6 PenMount DOS driver functions There are several functions in the PenMount DOS driver. The user is able to change the settings of the following utilities: ??Show Current Setting A.The current setting data could be found from PM.BAT file. -
Page 31: Appendix B Standard Timing
Standard Timing Set Serial Data for Expansion... -
Page 32: Setting Serial Data For Expansion
HS, Vsync, even in the case that the signals other than the preset timing that were entered. For instance, it is displayed with presetting number 6 in the case of 640×480 dot, HS: 37.861kGz, Vsync: 72.809Hz an example). Adopt the evaluation, FPM-3150 Series User's Manual... - Page 33 Note 3: because adjustment may not fit, in the case that the magnifying ration differs or, in the case that you use it with except for the display timing that was preset. The display color scale may be difference between Sync on Green Input and others.
- Page 34 FPM-3150 Series User's Manual...
-
Page 35: Appendix C Osd Selection
OSD Selection • Introduction • Menu • Auto Adjust • Brightness • Clock • Position • Contrast • Color Level • Information • OSD Position • All Reset... -
Page 36: Introduction
The brightness value can not be stored while the variable volume resistor is selected. This function dose not work while in save mode. C.3 Auto Adjust You can press Yes of Auto Adjust to adjust the Clock and Position settings. FPM-3150 Series User's Manual... -
Page 37: Brightness
C.4 Brightness Adjust the brightness level of backlight control as needed. C.5 Clock Adjust the video signal performance for LCD display, choose the H. Size and Clock phase for video signal control. H. Size means "horizon- tal display period adjust." Clock Phase means "CLK-phase adjust." C.6 Position You can choose the position for adjusting vertical and horizontal positions. -
Page 38: Contrast
W: White-level of video signal synchronous color control. C.8 Color Level Adjust the color-level of the video signal for each color. W,R,G,B: Color level of video signals synchronous color and each color control. W: Color level of video signal synchronous color control. FPM-3150 Series User's Manual... -
Page 39: Information
C.9 Information It can show the video signal information, including the display multi- scan function, Hsync and Vsync frequency. C.10 OSD Position Adjust the OSD position in the center by pressing the function and the displaypoistion of OSD will move. C.11 All Reset Choose reset for factory default values. - Page 40 FPM-3150 Series User's Manual...
Need help?
Do you have a question about the FPM-3150 Series and is the answer not in the manual?
Questions and answers