Table of Contents
Advertisement
Quick Links
Download this manual
See also:
User Manual
Advertisement
Table of Contents

Related Manuals for Advantech FPM-3060G Series


Summary of Contents for Advantech FPM-3060G Series
-
Page 1: User Manual
FPM-3060G Series Flat Panel Monitor with 6" Color TFT/LCD Display User Manual... -
Page 2: Copyright Notice
Copyright Notice This document is copyrighted by Advantech Co., Ltd. All rights are reserved. Advantech Co., Ltd. reserves the right to make improvements to the products described in this manual at any time. Specifications are thus subject to change without notice. - Page 3 Product Warranty (1 year) Advantech warrants to you, the original purchaser, that each of its prod- ucts will be free from defects in materials and workmanship for one year from the date of purchase. This warranty does not apply to any products which have been repaired or...
- Page 4 • Increase the separation between the equipment and the receiver • Connect the equipment to a power outlet on a circuit different from that to which the receiver is connected • Consult the dealer or an experienced radio/TV technician for help FPM-3060G Series User Manual...
- Page 5 If any of these items are missing or damaged, contact your distributor or sales representative immediately. Additional Information and Assistance 1. Visit the Advantech web site at www.advantech.com where you can find the latest information about the product. 2. Contact your distributor, sales representative, or Advantech's cus- tomer service center for technical support if you need additional assis- tance.
- Page 6 The equipment has been exposed to moisture. d. The equipment does not work well, or you cannot get it to work according to the user's manual. e. The equipment has been dropped and damaged. f. The equipment has obvious signs of breakage. FPM-3060G Series User Manual...
- Page 7 The sound pressure level at the operator's position according to IEC 704- 1:1982 is no more than 70dB(A). DISCLAIMER: This set of instructions is given according to IEC 704-1. Advantech disclaims all responsibility for the accuracy of any statements contained herein. Wichtige Sicherheishinweise 1.
- Page 8 IEC-704-1 erstellt. Advantech lehnt jegliche Verantwortung für die Richtigkeit der in diesem Zusammenhang getätigten Aussagen ab. DISCLAIMER: This set of instructions is given according to IEC704-1. Advantech disclaims all responsibility for the accuracy of any statements contained herein. FPM-3060G Series User Manual...
-
Page 9: Table Of Contents
Panel Mounting .............. 9 Figure 2.2:Panel Mounting ..........9 2.1.3 Swing-ARM (VESA ARM standard compatible) ..9 Figure 2.3:Swing-ARM for the FPM-3060G series ..9 Power Adapter..............10 Mounted with MBPC-200 or UNO-2000 series .... 10 2.3.1 Mounted with MBPC-200 series product ....10 2.3.2... - Page 10 FPM-3060G Series User Manual...
- Page 11 Introduction This chapter includes: • Introduction • Specifications • LCD Specification • Power Consumption • Connectors • Dimensions...
-
Page 12: Chapter 1 Introduction
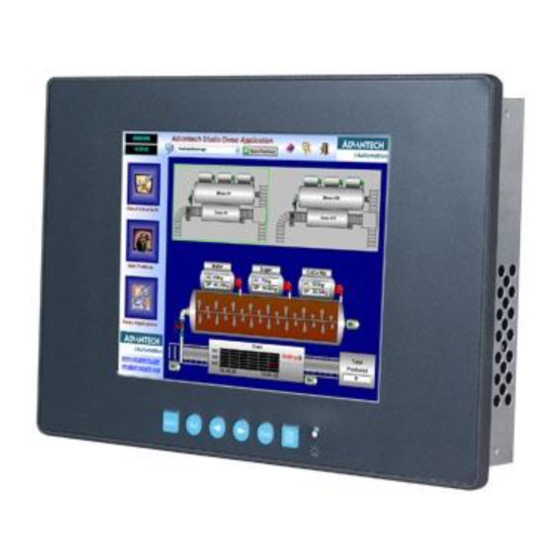
The whole chassis is made of stainless steel, and the front panel is of alu- minum with NEMA4/IP65 compliance. Products in the FPM-3060G Series can also be provided in touch screen versions (FPM-3060G-R and FPM-3060G-U). With a 4-wire resistive type touchscreen, this monitor can be immediately transformed into a remote control system. -
Page 13: Lcd Specifications
• Power Consumption: 2.2A(max.) @12V +/- 10% Touchscreen (Optional) • Type: 4 wire, analog resistive • Resolution: 1024 x 1024 • Light Transmission: 75% (Gouge Hardness is greater than 4H per ASTM D3363-92 for HCC01, HCG10 and HCG12) • Controller: RS-232 interface (for FPM-3060G-R version) or USB 1.1 (for FPM-3060G-U version) •... -
Page 14: Connectors
1.5 Connectors The following connectors are on the bottom of the FPM-3060G Series: VGA Port (DB15) This DB-15 connector can be connected to the system via the external 15- pin video signal cable. RS-232 Touchscreen Connector (DB9) (with FPM-3060G-R) This connector will only be present if a touchscreen is installed. It must be connected to the RS-232 port of the PC. -
Page 15: Dimensions
1.6 Dimensions Figure 1.1: FPM-3060G Chassis Dimensions Chapter 1... - Page 16 FPM-3060G Series User Manual...
- Page 17 System Setup • Mounting the Monitor • Wall / Panel / VESA Arm Mounting • Mounting with MBPC-200 or UNO- 2000 series...
-
Page 18: Chapter 2 System Setup
Chapter 2 System Setup 2.1 Mounting FPM-3060G The FPM-3060G Series can be flexibly mounted. The versatility of the FPM-3060G mounts enable it to be mounted almost anywhere. 2.1.1 Wall Mounting Please refer to figure 2.1 and follow the steps below to install FPM- 3060G on a wall. -
Page 19: Panel Mounting
Refer to figure 2.5. Attach the mounting brackets on the rear side, then attach the FPM-3060G onto the VESA ARM mount. The dimensions of the mount hole is M5, and the mounting bracket is optional. (P/N: FPM-3060VESA-MT) Figure 2.3: Swing-ARM for the FPM-3060G series Chapter 2... -
Page 20: Power Adapter
2.3.1 Mounted with MBPC-200 series product FPM-3060G can be directly mounted with MBPC-200 series products with four M3 screws (not included). 2.3.2 Mount with UNO-2000 series FPM-3060G can be easily mounted with UNO-2000 products by the optional kit FPM-3060VESA-MT. FPM-3060G Series User Manual... - Page 21 Display Timing Mode and OSD...
-
Page 22: Appendix A Display Timing Mode & Osd
Note 3: Because adjustments may not fit, such as differing magnifying ratios or, in the case that you use it except for the display timing that was preset. FPM-3060G Series User Manual... -
Page 23: Keypad Interface
A.2 Keypad Interface AUTO Press this button to execute auto-adjustment process. Press to show the OSD screen or select an item to change its setting. Press to move between items or increase/decrease item set- ting. EXIT Press to close the selected item or the whole OSD screen. ON/OFF Press the ON/OFF button to turn FPM-3060G’s backlight on and off. -
Page 24: Osd Function
V.Position Move the input image capture win- dow up or down Information Information System input mode information and maximum range supported by screen All Reset All Reset Reset menu parameters to factory default setting FPM-3060G Series User Manual... - Page 25 Touchscreen This appendix contains information on the touchscreen, and its installation.
-
Page 26: B.1 Introduction
Appendix B Touchscreen B.1 Introduction FPM-3060G Series’ optional touchscreen uses advanced Fujitsu 4-wire resistive technology. The touchscreen is specially designed for tough industrial environments, and has been approved to FCC Class B stan- dards. B.2 Touchscreen Specifications Electrical • Operating voltage: 5 V (typical) •... -
Page 27: Installing Driver For Windows 2000/Xp
B.3 Installing Driver for Windows 2000/XP The touchscreen has drivers for Windows 2000 and Windows XP. You should read the instructions in this chapter carefully before you attempt installation. Note 1: The following windows illustrations are examples only. You must follow the flow chart instructions and pay attention to the instructions which then appear on your screen. - Page 28 For FPM-3060G-R, please choose 1. Non Plug and Play Device. Then Click "OK". The driver installation will complete. Select the COM port on the PC that the touch screen is connected to. Then click Ok. FPM-3060G Series User Manual...
-
Page 29: Touch Panel Device Driver Settings
B.4 Touch Panel Device Driver Settings For further details on touch driver settings, calibration and setup of rota- tion coordinates, please see the Fujitsu driver manual file on the CD- ROM. File name: Fujitsu-TP-Driver.pdf Appendix B... - Page 30 FPM-3060G Series User Manual...
Need help?
Do you have a question about the FPM-3060G Series and is the answer not in the manual?
Questions and answers