Table of Contents
Advertisement
Quick Links
Advertisement
Table of Contents

Related Manuals for Postek V8i


Summary of Contents for Postek V8i
- Page 2 Copyright © by POSTEK Electronics Co., Ltd. All rights reserved. Under the copyright laws, this manual cannot be reproduced in any form without the prior written permission of POSTEK. No patent liability is assumed with respect to the use of the information contained herein.
- Page 3 Do not place the printer or the battery on or near a heat source. Do not load, unload or recharge the battery near a heat source. Do not heat the battery with any heating devise. Do not discard V8i or its battery into fire.
-
Page 4: Table Of Contents
V8i User’s Manual Table of Contents Table of Contents Preface ....................................... 1 Chapter 1: Introduction ................................2 Technical Specifications ..............................2 Printer Specifications ..............................2 Power Adapter Specifications ............................. 3 Contents of Box .................................. 3 Packing List ................................3 Chapter 2: Setup and Use ................................ 5 Printer Setup .................................. - Page 5 V8i User’s Manual Table of Contents Error Indicator .................................. 29 Miscellaneous ................................... 30 Vertical Blank Lines Appear ............................. 30 Printer Timeout Error Message ..........................30 Data Sent but Not Printing ............................30 Poor Printing Quality ..............................31 Appendix 1: ASCII Table ............................... 32...
-
Page 6: Preface
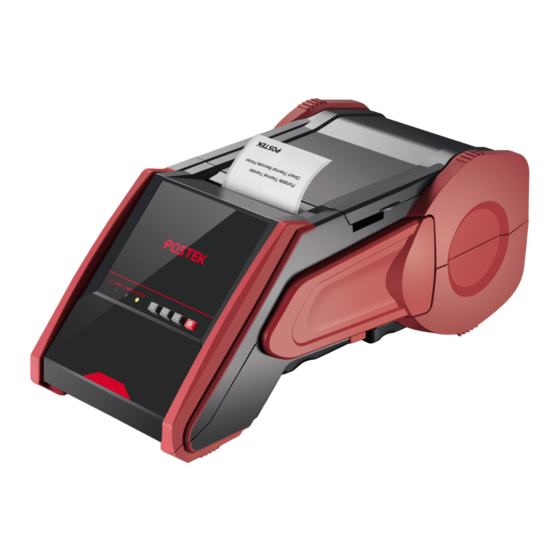
The V8i also has Bluetooth built in, providing an optimal solution for managing off-site label printing applications. The printer supports both direct thermal and thermal transfer printing methods, has many ease-of-use features, is lightweight, weighing only 1.2 kgs, and is powered by a long lasting Lithium ion... -
Page 7: Chapter 1: Introduction
V8i User’s Manual Chapter 1: Introduction Chapter 1: Introduction Technical Specifications Printer Specifications Mode Printing method Thermal Transfer Printing resolution 203 dpi (8 dots/mm) Max printing width 1.89″ (48 mm) Max printing length 39.37″ (1,000 mm) Memory 8MB FLASH ROM, 16MB SDRAM Width: 2.2″... -
Page 8: Power Adapter Specifications
Media Roll Guide 1 pc Sample Media Roll 1 pc Sample Ribbon 1 pc V8i Quick Start Guide 1 pc Shoulder Strap 1 pc CD-ROM pack* 1 pc *Note: CD-ROM pack includes V8i printer driver, label software, User’s Manual and Programming Manual. - Page 9 V8i User’s Manual Chapter 1: Introduction Shoulder Strap V8i Printer USB Cable Power Adaptor Battery Ribbon Sample Media Media Roll Guide CD-ROM Media Spindle Quick Start Guide Figure 1-1: Printer and Components...
-
Page 10: Chapter 2: Setup And Use
V8i User’s Manual Chap ter 2: Setup and Use Chapter 2: Setup and Use Printer Setup Main Parts and Structures 10 11 Figure 2-1 Status Indicator Charge Indicator DC Power Indicator Cover Locking Lever Cutter Handle (the Manual Cutter is an optional item) - Page 11 V8i User’s Manual Chapter 2: Setup and Use Figure 2-2 1. Media Spindle 2. Media Roll Guide 3. Ribbon Take-Up 4. Ribbon Supply...
- Page 12 V8i User’s Manual Chapter 2: Setup and Use Figure 2-3 USB Interface DC IN Port Battery Pack...
-
Page 13: Connecting The Printer
There are two interfaces that can be used to establish the communications between the V8i printer with a device (e.g a computer), which can send out data of the print tasks. The USB DEVICE interface: the V8i has a USB 2.0 port that enable a USB cable to connect printer with the appropriate port on computer. -
Page 14: Windows Driver And Label Software
(1) Be sure to read the Important Safety Instructions section in this manual before using the battery. (2) Using a battery other than the one supplied with the V8i may cause fire, explosion, leakage or other dangers. Using an improper or damaged battery may cause fire, explosion or other dangers. -
Page 15: Installing The Battery
Note: The battery is shipped uncharged. Please fully charge the battery for about eight hours before use. Insert the battery into the V8i and charge it by connecting the printer to a power supply using its Power Adaptor. The V8i can be switched on under its working status while battery charging apart from the first charge. -
Page 16: Installing The Ribbon
Installing the Ribbon Warnings: (1) The V8i supports ribbons with ink on the outside only. (2) Always install a ribbon with the ink side facing outwards. The ink side of the ribbon must face the media and NOT the Printhead. - Page 17 V8i User’s Manual Chapter 2: Setup and Use Guide Wheel Ribbon Core Grooves Guide Wheel Ridge Pressure Plate Figure 2-7 urn the Guide Wheel to tighten the ribbon Figure 2-8...
-
Page 18: Installing A Media Roll
V8i User’s Manual Chapter 2: Setup and Use Installing a Media Roll Warnings: (1) Regardless of how labels are wound, which is inward or outward, always load the media roll with labels facing down. (2) Don’t forget to perform a Media Calibration after every media loading. - Page 19 V8i User’s Manual Chapter 2: Setup and Use Media Roll Media Spindle Media Roll Guide Figure 2-10 Figure 2-11 Load media according to path indicated by small arrows on side wall Figure 2-12...
-
Page 20: Reflective Media Sensor
Figure 2-13 Reflective Media Sensor The V8i employs a non-adjustable Reflective media sensor positioned on the left side of the unit. The media sensor will automatically detect the media’s gaps, black marks or notches after a successful media calibration (see Media Sensor Calibration). -
Page 21: Chapter 3: Operations And Settings
V8i User’s Manual Chapter 3: Create, Download and Print Labels Chapter 3: Operations and Settings The front panel of the V8i printer comprises the following parts: 4 function buttons:FEED, PAUSE, CANCEL and POWER button. 3 LED indicators: DC_POWER indicator... -
Page 22: Buttons
V8i User’s Manual Chapter 3: Create, Download and Print Labels Buttons Button Functions Become familiar with the V8i button functions: Button Basic Functions (short-press) Advanced Functions (long-press) Power switch Feed one label Media Sensor Calibration - Press once to pause current print job... - Page 23 V8i User’s Manual Chapter 3: Create, Download and Print Labels Lamp Status: Display Status Green light Red light Green light blinking (slow) Green light blinking (fast) – apply to STATUS indicator only. Indicators Description Power When indicators display: State of printer is:...
-
Page 24: Power On
V8i User’s Manual Chapter 3: Create, Download and Print Labels The Bluetooth is paired with other Bluetooth devices. Power off Start/Shutdown Report error Normal working status Connected via the DC 9V Power Adaptor while the battery Transferring data is charging. -
Page 25: Self Test
Note: The printed label count and printed length may not be reset. Other Settings Postek Utility V3.0 is a tool developed by Postek for setting Postek barcode label printers (with firmware version later than V1.52), which provides the functions for printer settings, storage management and other advanced settings. It is included in the CD-ROM that comes with your printer’s purchase, or it can be downloaded from... -
Page 26: Windows Driver And Label Software
V8i User’s Manual Chapter 3: Create, Download and Print Labels Windows Driver and Label Software The V8i printer driver is packaged with the printer in the CD-ROM pack, and is compatible with the following operating systems: Windows 10 Windows 8 ... -
Page 27: Working With Bluetooth
Chapter 3: Create, Download and Print Labels Working with Bluetooth Bluetooth is built into the V8i to accommodate a wireless standard of connectivity which emulates a Serial Port Profile (SPP). With Bluetooth, operators can connect wirelessly within the standard range of approximately 30 feet. Make sure the V8i is within wireless range of your controlling device (e.g. - Page 28 Select “Enter the device’s pairing code” as shown in Figure 3-4, and input “1234” as shown in Figure 3-5, and click Next. Figure 3-4 Figure 3-5 3. The POSTEK V8i Bluetooth device has now been added successfully, as shown in Figure 3-6. Figure 3-6...
- Page 29 Chapter 3: Create, Download and Print Labels 4. Then set the V8i driver port to the assigned Bluetooth port. To determine it, right click on the POSTEK Bluetooth icon and open the properties’ window, then select the “Hardware” tab. The port name will be displayed, such as COM1, COM2 or COM3, as shown in Figure 3-7.
- Page 30 Chapter 3: Create, Download and Print Labels 6. Make sure the V8i driver remains online. If the printer driver is offline, right click on the driver, choose Printing preferences, and click on See what’s printing. Click Printer from the top menu, and set the Use Printer Offline unchecked.
-
Page 31: Using Label Forms
USB interface from the PC to V8i. Approximately 200 forms can be stored depending on file size in the V8i’s FLASH memory. Note: When connecting the V8i to a computer via the USB cable, make sure to use the same USB port that assigned during the driver installation process, which enables the printer to receive data from the PC. -
Page 32: Chapter 4: Maintenance
5. Use a cotton swab dipped in anhydrous isopropyl alcohol. Rub the swab along the Printhead until the swab no longer accumulates ink 6. Let the Printhead dry before using the V8i again Cleaning the Cutter Cleaning the cutter, if installed, is recommended after 1,000 cuts to protect the cutter from damage by paper dust, glue, etc. -
Page 33: Cleaning The Platen Roller
V8i User’s Manual Chapter 4: Maintenance Cleaning the Platen Roller The Platen Roller, located at the exit point and underneath labels, supports the labels as they feed out of the printer. The roller can accumulate debris from consumables, such as dirt, sand, dust or glue. To ensure longevity of the Platen Roller, follow the recommended maintenance guidelines below: Clean the Platen Roller after every (3) rolls of label media used. -
Page 34: Chapter 5: Troubleshooting
The Media Guide is not firmly positioned Adjust Media Guide position to firmly press against the media against media Media sensor is broken Contact an authorized POSTEK service provider for technical support. Possible errors of Ribbon: Possible Cause Corrective Action Ribbon runs out... -
Page 35: Miscellaneous
1. Check the interface cable for proper connection. 2. Ensure the V8i printer is powered on. If the trouble still exists, please contact an authorized POSTEK service provider for technical support. Data Sent but Not Printing 1. Ensure the correct driver is chosen in the label software. -
Page 36: Poor Printing Quality
5. Poor quality printing may be caused from using low quality media. Change to higher quality media. Note: The darkness may also be adjusted in printer’s menu. This function is a sub-settings under common settings from the Setup menu. Note: For errors not listed here, please contact an authorized POSTEK Service Provider for further assistance. -
Page 37: Appendix 1: Ascii Table
V8i User’s Manual Appendix 1: ASCII Table Appendix 1: ASCII Table “ XOFF & ‘ < > Remarks: € sign is included in the embedded table at DEC128 or HEX 80.
Need help?
Do you have a question about the V8i and is the answer not in the manual?
Questions and answers