Table of Contents
Advertisement
Advertisement
Table of Contents

Related Manuals for Postek G-2108


Summary of Contents for Postek G-2108
- Page 2 POSTEK and/or its resellers are responsible for troubleshooting (according to POSTEK Warranty Clauses). In no event shall POSTEK be liable for any direct or indirect loss, including but not limited to loss of business profits, business interruption, loss of business information, or other pecuniary loss.
- Page 3 (see FCC Notice). Static electricity that accumulates on the surface of the human body or other objects can damage the print head or electronic components in the G-2108/G-3106 printer. Observe proper electrostatic safety precautions when handling .
-
Page 4: Table Of Contents
G-2108/G-3106 User’s Manual Contents Contents Preface ................................1 Important Notice, Read Me First ........................2 Chapter 1: Introduction ........................... 3 Printer Specifications ................................3 Specifications for Power Adapter ..........................4 Contents of Box .................................. 4 Chapter 2: Setup and Use ..........................6 Setting up the Printer ................................ -
Page 5: Preface
The 32-bit embedded ARM CPU and high-tech system platform delivers the highest quality possible. This manual explains how to set up and begin using your G-2108/G-3106 printer. It also provides detailed information on configuring your printer, basic operations, care and troubleshooting. -
Page 6: Important Notice, Read Me First
G-2108/G-3106 User’s Manual Important Notice Important Notice, Read Me First The thermal printhead can be easily damaged due to its precision construction. A printhead damaged by misuse is not covered under the terms of the warranty. To ensure longevity of the printhead, please note the following: 1. -
Page 7: Chapter 1: Introduction
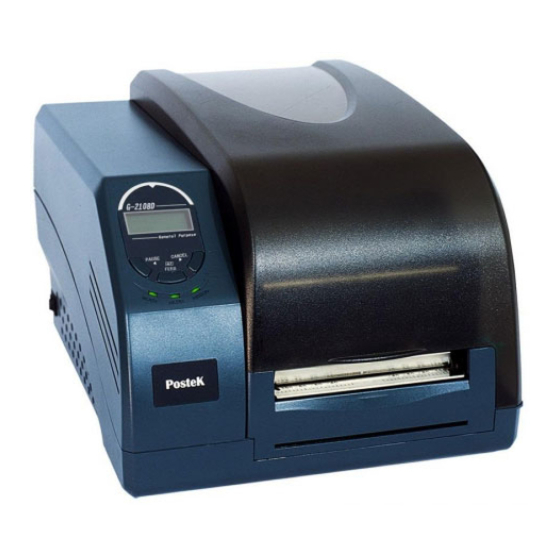
G-2108/G-3106 User’s Manual Chapter 1: Introduction Chapter 1: Introduction Printer Specifications Model G-2108 G-3106 Printing Method Direct Thermal & Thermal Transfer Printing Resolution 203 dpi (8 dots/mm) 300 dpi (11.8 dots/mm) Max Printing Speed 6ips (152.4 mm/s) 4ips (101.6 mm/s) 4.25″... -
Page 8: Specifications For Power Adapter
G-2108/G-3106 User’s Manual Chapter 1: Introduction Specifications for Power Adapter Input AC 100~240 V, 47~63 Hz Output DC 24 V, 2.5 A Environment 0 C ~ 40 C Contents of Box Inspect the shipping carton(s) for possible shipping damage, if damage is discovered, notify the shipping company to report the nature and extent of the damage. - Page 9 G-2108/G-3106 User’s Manual Chapter 1: Introduction G-2108/G-3106 Printer Power Adapter Ribbon Spindles USB Cable Media Spindle Media Core Adapters Media Roll Guides CD-ROM Quick Start Guide Figure 1: Printer and Accessories...
-
Page 10: Chapter 2: Setup And Use
G-2108/G-3106 User’s Manual Chapter 2: Setup and Use Chapter 2: Setup and Use Setting up the Printer Before setting up the printer consider the following: 1. Make sure there is adequate space around the printer for loading consumables and proper ventilation. - Page 11 G-2108/G-3106 User’s Manual Chapter 2: Setup and Use Figure 3 1. Printhead Module 5. Reflective Sensor Ribbon Supply Spindle 2. Printhead Bracket 6. TPH Release Lever 10. Media loading area 3. Printhead 7. Media Guide 11. Ribbon Adjusting Wheel 4. Transmissive Sensor 8.
- Page 12 G-2108/G-3106 User’s Manual Chapter 2: Setup and Use Figure 4 1. RS232 Serial Port 4. DC IN Port 2. USB Device Port 5. Centronics Parallel Port (Optional) 3. Ethernet Port...
-
Page 13: Connecting The Printer
(1) Do not use the printer near liquids or corrosive chemicals. (2) Using the wrong power adapter may cause damage to your printer. Postek assumes no liability for any damage in such cases. The power rating for the printer is 24VDC. -
Page 14: Loading The Ribbon
G-2108/G-3106 User’s Manual Chapter 2: Setup and Use Loading the Ribbon Warnings: (1) Load ribbon only when using the thermal transfer printing method. Remove any ribbon that may be loaded when using the direct thermal printing method. (2) When using a ribbon roll with a width less than 110 m, please place the ribbon roll in the middle of the Ribbon Spindle corresponding to the symmetry symbol (→|←). - Page 15 G-2108/G-3106 User’s Manual Chapter 2: Setup and Use Figure 5-1...
- Page 16 G-2108/G-3106 User’s Manual Chapter 2: Setup and Use Figure 5-2...
- Page 17 G-2108/G-3106 User’s Manual Chapter 2: Setup and Use Figure 5-3...
- Page 18 G-2108/G-3106 User’s Manual Chapter 2: Setup and Use Figure 5-4...
- Page 19 G-2108/G-3106 User’s Manual Chapter 2: Setup and Use Figure 5-5...
- Page 20 G-2108/G-3106 User’s Manual Chapter 2: Setup and Use Figure 5-6...
-
Page 21: Loading The Media
G-2108/G-3106 User’s Manual Chapter 2: Setup and Use Loading the Media G-2108/G-3106 printers can be operated in three different modes: Standard mode, Peel-off mode, or Cutting mode. – In Standard mode, each printed label remains on the backing liner. –... - Page 22 G-2108/G-3106 User’s Manual Chapter 2: Setup and Use Figure 6-1...
- Page 23 G-2108/G-3106 User’s Manual Chapter 2: Setup and Use Figure 6-2...
- Page 24 G-2108/G-3106 User’s Manual Chapter 2: Setup and Use Media Guide Media Guide Rod Transmissive Sensor Platen Roller Label Figure 6-3...
- Page 25 G-2108/G-3106 User’s Manual Chapter 2: Setup and Use Figure 6-4...
-
Page 26: Peel-Off Mode
To load media into the G-2108/G-3106 while using Peel-off Mode, use the Standard Mode procedures. Cutting Mode Note: Operating the printer in Cutting mode requires the optional Cutter. See an authorized Postek Reseller for additional information for cutter module. 1. Enable the cutter function in the printer’s driver (see Figure 6-5). - Page 27 G-2108/G-3106 User’s Manual Chapter 2: Setup and Use Figure 6-6...
-
Page 28: Adjusting The Position Of Media Sensor
G-2108/G-3106 User’s Manual Chapter 2: Setup and Use Adjusting the Position of Media Sensor 1. Lift the top cover. 2. Push the Printhead Release Lever to release the Printhead Module. 3. Lift the Printhead Module to expose the Media Sensor cover (see Figure 7-1). - Page 29 G-2108/G-3106 User’s Manual Chapter 2: Setup and Use 2 – 5mm Media gap Figure 7-3 Media gap Figure 7-4 Media gap Figure 7-5...
-
Page 30: Chapter 3: Operations And Settings
The power switch is on the left panel of the printer. The symbols on the switch are defined as follows: ━ — ON 〇 — OFF The Front Panel The Front Panel of G-2108/G-3106 printer consists of: - Three Indicator Lamps: MEDIA, READY and RIBBON - Three multi function buttons: PAUSE/Self Test, FEED/Calibration and CANCEL/ Reset. LED Indicator The three LED indicate the status of the printer (please refer to Chapter 4: Troubleshooting, for error indicators). -
Page 31: Advanced Functions
Change the Mode of Media Sensor G-2108/G-3106 printers have two modes of media sensor: Reflective sensor and Transmissive sensor. User can select the appropriate mode of media sensor to adapt different media type and reduce error of label skipping or offsetting. The default mode of media sensor is Reflective, but user can change the mode by following these steps: 1. - Page 32 G-2108/G-3106 User’s Manual Chapter 3: Operations and Settings Figure 8-1 4. If the connection is correct (see the area of blue rectangle), please find the “Sensor Type” under then printer settings area, and then select “Transmissive” from the drop-list (Figure 8-1).
-
Page 33: Self Test
G-2108/G-3106 User’s Manual Chapter 3: Operations and Settings Figure 8-2 Self Test 1. Press and hold the Pause/Self Test button for about 4 seconds. 2. The printer will print out a configuration report and the 3 indicators will stop blinking and remain lit. The printer is back to a normal state. -
Page 34: Windows Driver And Label Software
- Others Note: The printed label count and printed length may not be reset. Windows Driver and Label Software The G-2108/G-3106 printer driver is packaged with the printer in the CD-ROM pack, and is compatible with the following operating systems: ... -
Page 35: Chapter 4: Maintenance
2. Clean the Printhead after every (1) roll of ribbon use or every (3) rolls of label media use. To clean the Printhead: 3. Turn printer power off 4. Open the top cover of G-2108/G-3106 printer 5. Turn the handle to open. -
Page 36: Cleaning The Platen Roller
G-2108/G-3106 User’s Manual Chapter 4: Maintenance Cleaning the Platen Roller The Platen Roller, located at the exit point and underneath labels, supports the labels as they feed out of the printer. The roller can accumulate debris from consumables, such as dirt, sand, dust or glue. To ensure longevity of the Platen Roller, follow the recommended maintenance guidelines below: Clean the Platen Roller after every (3) rolls of label media used. -
Page 37: Chapter 5: Troubleshooting
Install the Media Roll Guides correctly and press them firmly press the positioned against the Media or have media. not been installed. Media sensor is broken Contact an authorized POSTEK service provider for technical support. READY and RIBBON LED blink simultaneously: Possible Cause Recommend Solutions Ribbon ran out... -
Page 38: Miscellaneous
1. Check the interface cable for proper connection. 2. Ensure the printer is powered on. If the trouble still exists, please contact an authorized POSTEK service provider for technical support. Data Sent but Not Printing 1. Ensure the correct driver is chosen in the label software. -
Page 39: Poor Printing Quality
Recovery After the miscellaneous has been cleared, press the CANCEL button to clear the alarm or restart the printer to resume the printing automatically. Note: For errors not listed here, please contact an authorized POSTEK Service Provider for further assistance. -
Page 40: Appendix A: Interface Specifications
G-2108/G-3106 User’s Manual Appendix A: Interface Specifications Appendix A: Interface Specifications The RS232 connector on the printer is a DB9F: Direction Definition Ground Connection with host: Host 25S Printer 9P Host 9S Printer 9P ……… 3 RX ……… TX 2... - Page 41 G-2108/G-3106 User’s Manual Appendix A: Interface Specifications – Baud rate: 9600, 19200, 38400, 57600 – Data format: always 8 data bits, 1 start bit and 1 stop bit. – Parity: always non parity. – Flow control: RTS/CTS (Hardware flow control).
-
Page 42: Appendix B: Ascii Table
G-2108/G-3106 User’s Manual Appendix B: ASCII Table Appendix B: ASCII Table “ XOFF & ‘ < > Note: The € sign is included in the embedded table at DEC128 or HEX 80...
Need help?
Do you have a question about the G-2108 and is the answer not in the manual?
Questions and answers