Advertisement
Advertisement
Table of Contents

Related Manuals for Goodwe NS Series


Summary of Contents for Goodwe NS Series
- Page 1 NS & DNS Series INTRODUCTION © copy right reserved by GoodWe V2.0...
-
Page 2: Table Of Contents
Contents Product Introduction Development Background New Product Feature Installation Guide Booting-Up Process Internal Structure Trouble Shooting Technical Data Certifications Warranty & Service © copy right reserved by GoodWe... -
Page 3: Product Introduction
1.1 Product Introduction © copy right reserved by GoodWe... -
Page 4: Development Background
With the solar industry grows, more and more functions are required for photovoltaic inverter, online monitoring、better performance、anti-reverse current function and etc. GoodWe brings up second generation of single phase inverter. Below is the comparison between SS/DS and NS/DNS series. Comparison Between SS/DS and NS/DNS... -
Page 5: New Product Feature
1.3 New Product Feature Up to 10 Safety Measurements Smarter & Lower Start-up Lighter Voltage at 80V Zero Export RS485 & WiFi Function Integrated © copy right reserved by GoodWe... -
Page 6: Installation Guide
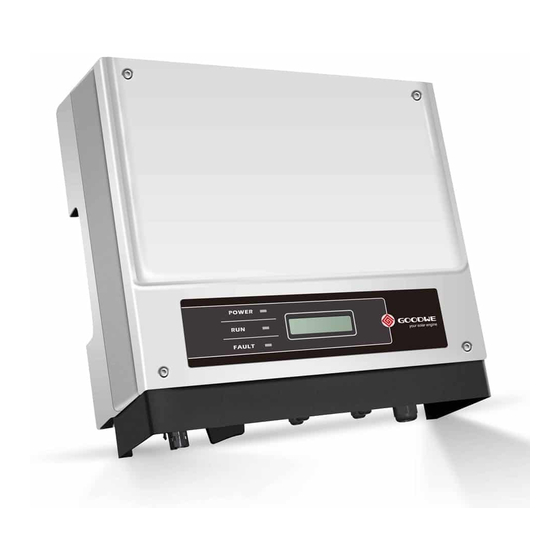
2.1 Installation Guide • Mounting Instruction Note: Every GoodWe inverter has IP65 protection, the mounting instruction is for better performance and longer lifetime. © copy right reserved by GoodWe... - Page 7 2.1 Installation Guide • NS Series 1~3kW Inverter Overview 1. PV Input Terminals 5. CT and DRED function(Optional) 2. DC Switch (Optional) 6. AC Output Terminals 3. USB Port & RS485 Port 7. LCD Display 4. WiFi BOX (Optional) 8. Indicator Lights 9.
- Page 8 2.1 Installation Guide • NS Series 3.6~5kW and DNS Series 3~5kW Inverter Overview 1. PV Input Terminals 5. CT and DRED function(Optional) 2. DC Switch (Optional) 6. AC Output Terminals 3. USB Port & RS485 Port 7. LCD Display 4. WiFi BOX (Optional) 8.
- Page 9 2.1 Installation Guide • Package © copy right reserved by GoodWe...
- Page 10 2.1 Installation Guide • Selecting the installation location © copy right reserved by GoodWe...
- Page 11 2.1 Installation Guide • AC Terminals Connection Make sure the cable is connected well and can’t be plugged out after connecting with AC terminals. © copy right reserved by GoodWe...
- Page 12 2.1 Installation Guide • AC Terminals Connection Cable specification of NS 1~3kW AC side: Cable specification of NS 3.6~5kW and DNS 3~5kW AC side: © copy right reserved by GoodWe...
- Page 13 2.1 Installation Guide • AC Terminals Connection There are two AC connector brands for NS 3.6kW~5kW and DNS 3~5kW inverter which showed as below: Installation instruction of VACONN series : © copy right reserved by GoodWe...
- Page 14 2.1 Installation Guide • AC Terminals Connection Installation instruction of WIELAND series : © copy right reserved by GoodWe...
- Page 15 2.1 Installation Guide • DC Terminals Connection DC cable specification: There are three types of DC connectors , SUNCLIX/MC4 and AMPHENOL H4 series: © copy right reserved by GoodWe...
- Page 16 2.1 Installation Guide • DC Terminals Connection Installation instruction of SUNCLIX: © copy right reserved by GoodWe...
- Page 17 2.1 Installation Guide • DC Terminals Connection Installation instruction of MC4 and H4 series: © copy right reserved by GoodWe...
- Page 18 2.1 Installation Guide • RS485 Connection © copy right reserved by GoodWe...
- Page 19 2.1 Installation Guide • WiFi BOX Connection: © copy right reserved by GoodWe...
- Page 20 2.1 Installation Guide •Connection method of power limiting device CT please refer to below: •For CT quick install please refer to attached file: © copy right reserved by GoodWe...
- Page 21 • GW3000-NS Sample System Schematic Explaination: 1. PV modules using polysilicon component, Pm=250Wp, 12pcs; 2. The grid-connected inverter using GW3000-NS inverter*1; 3. GoodWe Meter using CT to sample the current, in order to realize anti-reverse current function. © copy right reserved by GoodWe...
- Page 22 • GW5000D-NS Sample System Schematic Explaination: 1. PV modules using polysilicon component, Pm=250Wp, 20pcs; 2. The grid-connected inverter using GW5000D-NS inverter*1; 3. GoodWe Meter using CT to sample the current, in order to realize anti-reverse current function. © copy right reserved by GoodWe...
-
Page 23: Booting-Up Process
Holland AU Energex Set Power Limit 100% Rated Wait for 5s Wait for 5s Long Press Utility Loss Utility Loss Power Limit Switch on AC Short Press Power Limit Normal © copy right reserved by GoodWe... - Page 24 Please refer to steps below to set/modify the time setting after WiFi configuration. Inverter Short Press Set Time Long Press 2015- 11- 09 2015- 11- 11 Normal 15:37 16.22 Short press to modify the Wait for 5s figure, long press to next. © copy right reserved by GoodWe...
- Page 25 Otherwise please set WiFi reload through inverter. 1.3 Power WiFi router on. 1.4 Switch on the WiFi of laptop. 2. Connect laptop to “Solar-WiFi” 2.1 Search WiFi network and connect to “Solar-WiFi” (Password: 12345678). © copy right reserved by GoodWe...
- Page 26 2.2 Booting-Up Process ◆ Monitoring Configuration – WiFi Inverter 2.2 Browse website: http://10.10.100.253 2.3 Enter User Name: “admin”, Password: “admin”. © copy right reserved by GoodWe...
- Page 27 2.2 Booting-Up Process ◆ Monitoring Configuration – WiFi Inverter 3. Click ‘Start Setup’ © copy right reserved by GoodWe...
- Page 28 2.2 Booting-Up Process ◆ Monitoring Configuration – WiFi Inverter 4. Select WiFi router’s SSID and click ‘Next’ © copy right reserved by GoodWe...
- Page 29 2.2 Booting-Up Process ◆ Monitoring Configuration – WiFi Inverter 5. Type in password and click ‘Next’ 10.10.100.253: Note: If it fails, there will be a notice. © copy right reserved by GoodWe...
- Page 30 2.2 Booting-Up Process ◆ Monitoring Configuration – WiFi Inverter 6. Click ‘OK’ and configuration process completes. © copy right reserved by GoodWe...
- Page 31 2.2 Booting-Up Process ◆ Monitoring Configuration – WiFi Inverter Note: If you want to modify the SSID and password of the inverter’s WiFi, please refer to picture below. © copy right reserved by GoodWe...
- Page 32 2.2 Booting-Up Process ◆ Monitoring Configuration – WiFi Inverter 8、Disconnect the inverter WiFi, connect to the local WiFI, create a station in GoodWe portal with the SN and check code. System will be online in the portal. www.goodwe-power.com Portal Website: (Refer to picture as below) ©...
- Page 33 1.1 If using the Ezlogger Pro-WIFi, please follow the page 20-26 to do the configuration. As the steps are completely the same as configuring a WIFi inverter. 1.2 If using Ezlogger Pro-LAN, follow the steps below to configure the monitoring. © copy right reserved by GoodWe...
- Page 34 • Install the Ezlogger Pro to the target position; • Connect the adapter; • Device Connection; • A: Connect the inverter to the Ezlogger Pro ; • B: Connect the COM port to PC. • Start to configure the Ezlogger Pro. © copy right reserved by GoodWe...
- Page 35 , EzLogger Pro and router together with router DHCP function . Also can refer to below steps to operate with ProMate. The user only needs to connect EzLogger and computer to router and open DHCP function , click ‘Scan’ to connect in ProMate as picture showed. © copy right reserved by GoodWe...
- Page 36 192.168.1.200) , then configure IP address for computer as the same with EzLogger Pro , the steps are as below: Fig 2. Click ‘View Fig 1. Click ‘Start’, and network status and tasks.’ Click ‘Control Panel’. © copy right reserved by GoodWe...
- Page 37 2.2 Booting-Up Process • Local Area Connection • Wireless Connection Fig 3. Click ‘Local Area Note: The “Local Area Connection’. Connection” option will only appear when the net port is connected. © copy right reserved by GoodWe...
- Page 38 2.2 Booting-Up Process Fig 4. Click ‘Details’ © copy right reserved by GoodWe...
- Page 39 2.2 Booting-Up Process Fig 5. Record the 3 items in Fig 5, which will be useful later. © copy right reserved by GoodWe...
- Page 40 2.2 Booting-Up Process 2、Connect the Ezlogger with laptop via STP; Set the local area IP Address to 192.168.1.100 on the laptop.; 3、 © copy right reserved by GoodWe...
- Page 41 1、Run program ProMate on the laptop; 1. The program is in the USB disk in Ezlogger box. 2. If the USB disk is missing, please download ProMate from GoodWe website and install the program on the laptop. 2、The connection status display as ‘Connection Succeeds’, and EzLogger Pro SN and software version will come out soon;...
- Page 42 2.2 Booting-Up Process 3、 Click the refresh button, then all inverter’s SN will be listed; If any inverter is missing, please check the cable connection off the inverter. © copy right reserved by GoodWe...
- Page 43 2.2 Booting-Up Process 4、 Modify the IP Address, Subnet Mask, Gateway to the one recorded (Refer to Page 12); 5、 Press ‘Set’, find ‘Set IP Successfully!’ in ‘Log Info’; © copy right reserved by GoodWe...
- Page 44 2.2 Booting-Up Process 6、Then Disconnect the laptop, and connect the net port to the router, create a station in GoodWe portal with the SN and check code. System will be online in the portal. www.goodwe-power.com Portal Website: (Refer to picture as below)
- Page 45 1、Run program ProMate on the laptop; 1. The program is in the USB disk in Ezlogger Pro box. 2. If the USB disk is missing, please download EzConfig from GoodWe website and install the program on the laptop. 2、The connection status display as ‘Connection Succeeds’, and EzLogger Pro SN and software version will come out soon;...
- Page 46 2.2 Booting-Up Process 3、 Click the refresh button, then all inverter’s SN will be listed; If any inverter is missing, please check the cable connection off the inverter. © copy right reserved by GoodWe...
- Page 47 2.2 Booting-Up Process 4、Find ‘LAN Configuration’ part in the window; 5、 Click ‘DHCP Enable’, and there will be a warning displayed, click ‘OK’, find DHCP Enable successfully in Log Info. © copy right reserved by GoodWe...
- Page 48 2.2 Booting-Up Process 6、Then Disconnect the laptop, and connect the net port to the router, create a station in GoodWe portal with the SN and check code. System will be online in the portal. www.goodwe-power.com Portal Website: (Refer to picture as below)
-
Page 49: Internal Structure
2.3 Internal Structure Block Diagram of NS series inverter. © copy right reserved by GoodWe... - Page 50 2.3 Internal Structure Block Diagram of DNS series inverter. © copy right reserved by GoodWe...
-
Page 51: Trouble Shooting
If not, please contact with your electrical company. If yes, please contact with GoodWe local service center; D. Switch of the AC & DC power of the inverter and wait for 5minutes. Measure the impedance of L &... - Page 52 D. Check if the firmware version of the inverter is the latest. As with the time goes, threshold in the firmware are also changing. If not the latest, please update the firmware; E. If all above don’t work, please contact with GoodWe local service center. © copy right reserved by GoodWe...
- Page 53 Cause: Output relay fault Measurement: A. Switch on AC & DC power of the inverter, listen to the inverter when inverter is checking. If there is no relay clicking sound, please contact with GoodWe local service center. © copy right reserved by GoodWe...
- Page 54 Then check if there is any damage of the PV wiring; B. If the fault only displays when rainy or wet weather, please ignore the fault, when humidity turn lower, the inverter will be normal. © copy right reserved by GoodWe...
- Page 55 AC wiring (For inverter display ‘Vac Failure’ when counting down at 0s); C. Check if the ‘Vac’ displayed in the screen is the same as the value measure from the switch board. If not, please contact with GoodWe local service center. © copy right reserved by GoodWe...
- Page 56 5s and the setting will be saved); C. Check the ‘Fac’ displayed in the screen, if the value is out of the limitation, please wider the frequency range via ‘Calibrate Tool’. © copy right reserved by GoodWe...
- Page 57 PV string; B. If the PV string is OK, please check the ‘Vpv’ displayed in the screen. If the values are not the same, please contact with GoodWe local service center. © copy right reserved by GoodWe...
- Page 58 A. Check the installation position is under the requirement of usermanual; B. Try to decrease the temperature around the inverter, and shut down the inverter for 15 minutes, then restart it. If fault remains, please contact with GoodWe local service center. © copy right reserved by GoodWe...
- Page 59 ◆ AC HCT Failure Error Code: 31 Cause: Output current sensor fault Measurement: A. Switch off DC switch for 15 minutes, then switch it on.; B. If problem remains, please contact with GoodWe local service center. © copy right reserved by GoodWe...
- Page 60 2.4 Trouble Shooting ◆ GFCI Failure Error Code: 28/32 Cause: Current leakage test equipment failure Measurement: A. Update the firmware to latest; B. If problem remains, please contact with GoodWe local service center. © copy right reserved by GoodWe...
- Page 61 A. When inverter first used, please switch on DC and keep AC off, or the inverter will always stay at ‘Waiting’; B. Measure the DC voltage of the inverter, make sure it is higher than the start-up voltage. © copy right reserved by GoodWe...
- Page 62 B.1 Check if there is any damage on the DC and AC connector; B.2 Disconnect AC & DC of the inverter, and reconnect after 15 minutes. C. If all solutions above failed, please contact with GoodWe local service center. © copy right reserved by GoodWe...
- Page 63 C. Check if the regulation is correct; D. Check if any fault display when inverter keep checking; E. Check the counting down time remains when the inverter reconnect, and feed back to GoodWe local service center. © copy right reserved by GoodWe...
- Page 64 A. If E-day in the screen is very low, please check if the time setting in the inverter is correct; B. If E-day in the portal is very low, please check the time zone set in the portal is correct; © copy right reserved by GoodWe...
- Page 65 Cause: Information missing, mess display, no backlight, backlight is always on Measurement: A. Remove the cover, and reconnect the ribbon between the screen and PCB. B. If problem remains, please contact with GoodWe local service center. © copy right reserved by GoodWe...
- Page 66 B. Solar-WiFi is unstable B.1 Reload WiFi module to see if Solar-WiFi will be stable; B.2 Remove the cover, reconnect the ribbon of WiFi module; C. If problem remains, please contact with GoodWe local service center. © copy right reserved by GoodWe...
- Page 67 Measurement: A. Remove the cover, and reconnect the ribbon between the screen and PCB. B. If problem remains, please contact with GoodWe local service center. Conclusion: As above, we can see that when solar system goes fault, the problem could be of PV panels, DC wiring, AC wiring, inverter itself etc.
- Page 68 50/60Hz; 220/230Vac AC output range 0.8Lagging~0.8Leading Power factor <3% THDi Single phase Grid connection 96.20% 96.20% 96.20% 97.20% 97.20% Max. efficiency >96% >96% >97% >97% Euro efficiency >99.90% >99.90% >99.90% >99.90% >99.90% MPPT adaptation efficiency © copy right reserved by GoodWe...
- Page 69 Ambient temperature range Relative humidity 0~95% 4000m (Over 2000m Derating) Max. operating altitude IP65 Protection degree Transformerless Topology <1 Night power consumption(W) Natural Convection Cooling <25 Noise emision(dB) Display RS485/WiFi Communication 5/10/15/20/25 (Optional) Standard warranty(years) © copy right reserved by GoodWe...
- Page 70 45~55Hz/55~65Hz; 180~270Vac AC output range 0.8 leading ~ 0.8 lagging Power factor <3% THDi Single Phase Grid connection 97.8% 97.8% 97.8% Max. efficiency 97.5% 97.5% 97.5% Euro efficiency 99.9% 99.9% 99.9% MPPT adaptation efficiency © copy right reserved by GoodWe...
-
Page 71: Technical Data
-25~60℃ (Over 45℃ Derating) Relative humidity 0~95% Max. operating altitude 4000m (Over 3000m Derating) Protection degree IP65 Topology Transformerless Night power consumption(W) <1 Cooling Natural Convection Noise emision(dB) <25 Display Communication RS485/WiFi Standard warranty(years) 5/10/15/20/25 (Optional) © copy right reserved by GoodWe... - Page 72 22.8 50/60Hz; 230Vac AC output range 0.8Lagging~0.8Leading Power factor <3% THDi Single phase Grid connection 97.80% 97.80% 97.80% 97.80% Max. efficiency 97.50% 97.50% 97.50% 97.50% Euro efficiency 99.90% 99.90% 99.90% 99.90% MPPT adaptation efficiency © copy right reserved by GoodWe...
- Page 73 -25~60℃ (Over 45℃ Derating) Relative humidity 0~95% Max. operating altitude 4000m (Over 3000m Derating) Protection degree IP65 Topology Transformerless Night power consumption(W) <1 Cooling Natural Convection Noise emision(dB) <25 Display Communication RS485/WiFi Standard warranty(years) 5/10/15/20/25 (Optional) © copy right reserved by GoodWe...
-
Page 74: Certifications
◆ ◆ ◆ ◆ ◆ GW3600D-NS D-NS ◆ ◆ ◆ ◆ ◆ ◆ ◆ GW4200D-NS ◆ ◆ ◆ ◆ ◆ ◆ ◆ ◆ GW5000D-NS ◆ Approved ◆ Processing ◆ Planning ◇ Updated to 21/09/2015 © copy right reserved by GoodWe... -
Page 75: Warranty & Service
30 months (2.5 years) from the date of manufacture from GOODWE. For inverters (GOODWE NS SS DS DT ES series), and the accessory products, the warranty can be extended within 24months (2 years) term of the GOODWE warranty from the date of manufacturing. - Page 76 If you are a private end‐user, please contact your installer, or any GOODWE authorized Dealer or Distributor .
- Page 77 If you are a private end‐user, please contact your installer, or any GOODWE authorized Dealer or Distributor .
- Page 78 In this event, you will not receive a new certificate, as this replacement will be registered by GOODWE. In any event, we provide a full one‐year warranty on all replacement devices regardless of whether the original warranty is still valid.
- Page 79 Warranty card and purchase invoices should be properly kept for further warranty claim. For return transportation of inverters or components, it must be packed in their original or equivalent packaging. GOODWE keeps the right to arrange the warranty service by using third parties for performing warranty works.
- Page 80 GOODWE’s standard warranty: Product warranty period is expired (excluding additional agreements of warranty extension). Faults or damages due to operations against GOODWE instructions, installation and maintenance requirement. Such as mounting distance, air, waterproof plug. Disassembly, repair or modification by non GoodWe authorized person.
- Page 81 Failure to comply with the safety regulations (VDE standards, etc.). Faults or damages caused by other reasons not related to product quality problem. The defect is caused during transportation. The rust appeared on inverter’s enclosure caused by hash environment. © copy right reserved by GoodWe...
- Page 82 3.3 Warranty & Service SERVICE AFTER WARRANTY EXPIRATION For products which are out of warranty, GOODWE charges an on‐site service fee, parts, labor cost and logistic fee to end‐user which can be any/all of: >On‐site attendance fee: Cost of travel and time for the technician in attending on‐site.
- Page 83 THANKS © copy right reserved by GoodWe...
Need help?
Do you have a question about the NS Series and is the answer not in the manual?
Questions and answers