Goodwe DNS Series Quick Installation Manual
Solar inverter
Hide thumbs
Also See for DNS Series:
- User manual (47 pages) ,
- Quick installation manual (2 pages) ,
- Manual (83 pages)

Related Manuals for Goodwe DNS Series


Summary of Contents for Goodwe DNS Series
- Page 1 Quick Installation Guide Solar Inverter DNS Series (GW2900D-NS/GW3000D-NS/GW3600D-NS/GW4200D-NS/ GW5000D-NS/GW6000D-NS/GW3000T-DS/GW3600T-DS/ GW4200T-DS/GW5000T-DS/GW6000T-DS) V1.1-2021-11-15...
-
Page 2: Safety Precautions
• Check the deliverables for correct model, complete contents, and intact appearance. Contact GoodWe if any damage is found or any component is missing. • Use insulating tools and wear personal protective equipment when operating the equipment to ensure personal safety. Wear anti-static gloves, clothes, and wrist strip when touching electron devices to protect the inverter from damage. • Strictly follow the installation, operation, and configuration instructions in this guide and user manual. GoodWe shall not be liable for equipment damage or personal injury if you do not follow the instructions. For more warranty details, please visit https://en.goodwe.com/ warranty.asp. Safety Disclaimer Warning DC Side: 1. Ensure the component frames and the bracket system are securely grounded. 2. Connect the DC cables using the delivered DC connectors and terminals. GoodWe shall not be liable for the equipment damage if other connectors or terminals are used. 3. Ensure the DC cables are connected tightly and securely. 4. Measure the DC cable using the multimeter to avoid reverse polarity connection. Also, the voltage should be under the permissible range (≤600V). 5. The PV modules used with the inverter must have an IEC61730 class A rating. AC Side: 1. The voltage and frequency at the connecting point should meet the on-grid requirements. 2. An additional protective device like the circuit breaker or fuse is recommended on the AC side. Specification of the protective device should be at least 1.25 times the AC output rated current. 3. PE cable of the inverter must be connected firmly. The resistance between the neutral wire and the earth cable is less than 10Ω. -
Page 3: Check Before Power-On
CE marking Grounding point. Indicates the position for connecting the PE cable. Check before Power-on: Check Item The inverter is firmly installed in a clean place where is well-ventilated and easy to operate. The PE cable, DC input cable, AC output cable, and communication cable are connected correctly and securely. Cable ties are routed properly and evenly, and no burrs. Unused ports and terminals are sealed. The voltage and frequency at the connection point meet the grid-tied requirements. EU Declaration of Conformity The inverters sold in the European market meets the following directives and requirements: • Electromagnetic compatibility Directive 2014/30/EU (EMC) • Electrical Apparatus Low Voltage Directive 2014/35/EU (LVD) • Radio Equipment Directive 2014/53/EU (RED) • Restrictions of Hazardous Substances Directive 2011/65/EU and (EU) 2015/863 (RoHS) • Waste Electrical and Electronic Equipment 2012/19/EU • Registation, Evaluation, Authorisation and Restriction of Chemicals (EC)No 1907/2006 (REACH) For more detailed declarations of conformity, visit https://en.goodwe.com. -
Page 4: Product Introduction
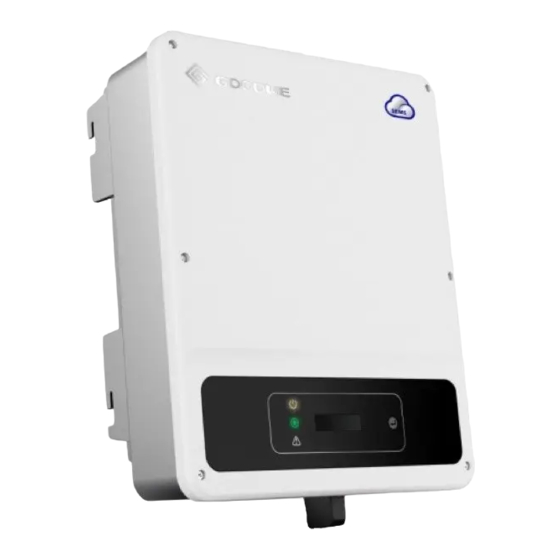
Product Introduction Parts WiFi/4G/LAN/GPRS Communication PV Input Terminal DC Switch Module Port or RS485 Communication Cable Port DRED/CT/Remote Shut AC Output down Communication Indicator Terminal Cable Port Button PE Terminal Mounting Plate Heat Sink Dimensions 354mm 147mm 195mm 32.5mm 32.5mm 130mm... -
Page 5: Inverter Installation
Inverter Installation Package N means the number of actual accessories may differ depending on different model. Space Requirements ≥300mm ≥200mm ≥200mm -25℃~60℃ IP65 ≥300mm ≥500mm 0%~100%RH... - Page 6 Angle Requirements ≤15° Installing the Inverter 1.2~2N·m...
-
Page 7: Electrical Connection
Electrical Connection PE Cable L=L1+(1~2)mm S≥4mm2 1.2~2N·m AC Cable Type One AC Connector Type Two AC Connector Click Type One AC Connector 8-10mm Φ: 8-10mm 10-15mm 2.5mm2≤S≤4mm2... - Page 8 AC OUTPUT Click 0.8N·m Type Two AC Connector 10-12mm Φ: 10-12mm 10-15mm 2.5mm2≤S≤4mm2 AC OUTPUT Click 0.8N·m...
- Page 9 DC Cable Click 7~8mm Φ: 4~5mm 7~8mm 2.5mm2≤S≤4mm2 PV1+ PV2+ PV1- PV2- Click Click ≤600V...
- Page 10 DRED/Remote Shutdown Communication Cable (Optional) • DRED: Australia • Remote Shutdown: Europe 6.5mm 25mm DRED DRED 6: DRM1/5 5: DRM2/6 4: DRM3/7 3: DRM4/8 2: REFGEN 1: COM/DRM0 Remote Shutdown 3: DRM4/8 2: REFGEN DRED 0.8N·m CT Communication Cable (Optional) 6.5mm 25mm DRED 1: CT- 2: CT+ DRED...
- Page 11 RS485 Communication Cable(Optional) 6.5mm RS485 25mm RS485 6: RS485+ 5: RS485- 4: Reserved RS485 3: Reserved 2: RS485+ 1: RS485- DRED 0.8N·m Communication Module(Optional) WiFi kit, 4G kit, LAN kit, GPRS, Wi-Fi/LAN Kit module: optional.
- Page 12 Power On Inverter AC Switch Grid DC Switch DC Switch Power ON Check the LED indicators Turn on (Optional) Power OFF Turn off (Optional) Commissioning Commissioning via LCD Set safety country Long Press 2s Select China Country/Region Short Press Normal Wait China Pac=2595.5W...
- Page 13 Commissioning via SolarGo APP play SolarGo App Store <10m <5m SolarGo App Bluetooth: SOL-BLE******** WiFi: SOL-WiFi******** WiFi initial password: 12345678 Scan the QR Code on the equipment if you need to use 4G or GPRS. * are the last 8 digits of the inverter Password: Bluetooth: 1234 Wifi: 1234 4G: Automatically filled in Initial Password for GPRS: the last 4 digits of the inverter bar code.
- Page 14 Monitoring via SEMS Portal App play SEMS Portal App Store SEMS Portal APP Test@ge.com Test...
- Page 15 For more detailed instructions, scan the QR code below to see the user manual. DNS Series User Manual WiFi Configuration Instruction SolarGo User Manual...
- Page 16 Offical Website GoodWe Technologies Co., Ltd. No. 90 Zijin Rd., New District, Suzhou, 215011, China www.goodwe.com 340-00595-01 service@goodwe.com...
Need help?
Do you have a question about the DNS Series and is the answer not in the manual?
Questions and answers