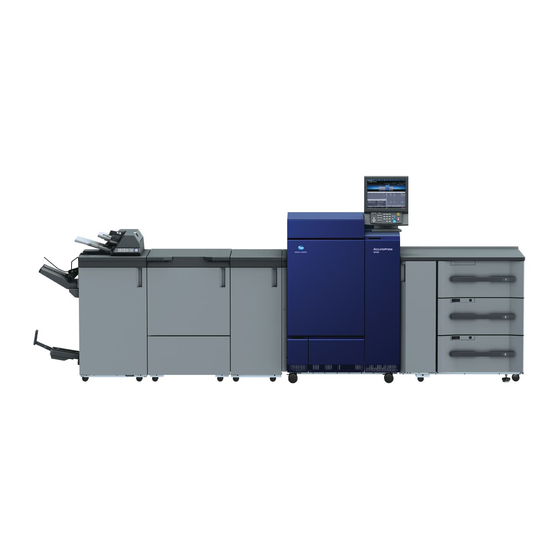
Konica Minolta AccurioPress C6100 Operation Manual

Konica Minolta AccurioPress C6100 Operation Manual

Hide thumbs Also See for AccurioPress C6100:
Table of Contents

Advertisement

Advertisement

Table of Contents
loading

Summary of Contents for Konica Minolta AccurioPress C6100

  • Page 2 Aim of this manual This manual describes the basic use of the automatic inspection function, which automatically checks the printing quality. Notations and symbols used in this manual 7 CAUTION This symbol indicates that negligence of the instructions may lead to mishandling that may cause injury or property damage.
  • Page 3: Table Of Contents

    Table of contents Overview of Function What is Automatic Inspection?...................... 1-2 Automatic Inspection Setting Presetting the Details of Automatic Inspection ................2-2 2.1.1 About the Detailed Setting of Automatic Inspection................2-2 2.1.2 [Automatic Inspection Level Setting] ....................2-4 2.1.3 [Automatic Inspection NIC Setting].....................2-5 2.1.4 [Memory Status]..........................2-6 2.1.5...
  • Page 4 Automatic Inspection Area What Is the Automatic Inspection Area? ..................7-2 Overview .............................7-2 Inspection Excluding Area ........................7-2 Barcode Area ............................7-2 Serial No. (0-9) Area ..........................7-3 Specified Inspection Level Area......................7-3 Setting an Inspection Area......................7-3 Output Setting Outputting a Printout with an Error Detected to Another Tray........... 8-2 Overview .............................8-2 Procedure ............................8-3 Outputting a Printout with an Error Detected to the Same Tray ..........
  • Page 5: Overview Of Function

    Overview of Function...
  • Page 6: What Is Automatic Inspection

    What is Automatic Inspection? Overview of Function What is Automatic Inspection? This function uses the sensor to automatically detect image dirt that occurs during printing, and removes problematic output paper. It reduces inspection work costs and provides an efficient printing process. Reference image (1) Create a reference (3) Compare images.
  • Page 7 What is Automatic Inspection? When you forcibly turn OFF the main power switch of this machine, also turn OFF the power switch of the Auto Inspection Unit UK-301. For details on the default administrator password, refer to [Safety Information] in the separate volume. Automatic Inspection Operation Manual...
  • Page 8: Automatic Inspection Setting

    Automatic Inspection Setting...
  • Page 9: Presetting The Details Of Automatic Inspection

    Presetting the Details of Automatic Inspection Automatic Inspection Setting Presetting the Details of Automatic Inspection 2.1.1 About the Detailed Setting of Automatic Inspection Determine the basic settings and operation settings for automatic inspection. To configure the settings, follow one of the procedures below. [Utility] - [User Setting] or [Administrator Setting] - [Common Setting] [IQ Function Setting] on the [MACHINE] screen Setting item...
  • Page 10 Presetting the Details of Automatic Inspection Setting item Description [Partition Paper when Deviation/Out of Range was Configure a setting to insert partition paper when Detected] inappropriate output paper is detected. When inserting, select the paper tray to load parti- tion paper into. [Automatic Reprint when Deviation/Out of Range Configure a setting to perform reprinting when in- was Detected]...
  • Page 11: Automatic Inspection Level Setting]

    Presetting the Details of Automatic Inspection 2.1.2 [Automatic Inspection Level Setting] Specify the reference values of the stain size and density that are to be detected by automatic inspection. Setting item Description [Detection Level] Range: 1(Large) - 7(Small) Adjusts the size and density standard of a stain to be detected.
  • Page 12: Automatic Inspection Nic Setting]

    Presetting the Details of Automatic Inspection 2.1.3 [Automatic Inspection NIC Setting] Selecting [Automatic Inspection NIC Setting] allows you to check the automatic inspection report from Web Utilities of the Auto Inspection Unit UK-301. This value is set by default at the time of installation. To check or change the setting, follow the procedure below.
  • Page 13: Memory Status]

    Presetting the Details of Automatic Inspection 2.1.4 [Memory Status] You can confirm the amount of available memory space. To confirm, follow the procedure below. [MACHINE] - [Memory Status] - Main Body Item name Description [Memory] Displays the amount of available space in the main unit memory.
  • Page 14: Security Setting (Uk-301)]

    Presetting the Details of Automatic Inspection 2.1.5 [Security Setting (UK-301)] Set the security of the Auto Inspection Unit UK-301. Take the required measures to suit your environment. To configure the setting, follow the procedure below. [Utility] - [Administrator Setting] - [Security Setting (UK-301)] Setting item Description [Web Access Password Setting]...
  • Page 15: Automatic Inspection Notification

    Presetting the Details of Automatic Inspection 2.1.6 Automatic Inspection Notification Set an automatic inspection notification. When your E-mail is registered, a notification E-mail is automatically sent to you if a stain is detected on an image. To register the destination E-mail address, follow the procedure shown below. [Utility] - [Administrator Setting] - [Network Setting] - [NIC Settings] - [Detail Settings] - [Status Notif.
  • Page 16: Error Image Store Setting (Uk-301)]

    Presetting the Details of Automatic Inspection 2.1.7 [Error Image Store Setting (UK-301)] Specify whether to allow log storage when a service call occurs.To allow logs, specify whether to mask the image. [Utility] - [Administrator Setting] - [Security Setting] - [Error Image Store Setting (UK-301)] Setting item Description [Storing Error Image Log]...
  • Page 17: Checking The Automatic Inspection Level

    Checking the Automatic Inspection Level Checking the Automatic Inspection Level You can check the inspection level on printing paper using automatic inspection test charts. In the actual automatic inspection, the visibility (size and density) of stains on an image varies depending on the paper or image.
  • Page 18 Checking the Automatic Inspection Level Set the details of automatic inspection. Determine the basic settings and operation settings for automatic inspection. For details on the set- tings, refer to "2.1 Presetting the Details of Automatic Inspection" in this manual. In this step, configure the following settings.
  • Page 19 Checking the Automatic Inspection Level Check the automatic inspection report. Check the report following the procedure described in "4.1 Confirming the Automatic Inspection Re- port" in this manual. Check whether the levels specified in step 2 match the values framed in red. NOTICE The result of automatic inspection may vary depending on whether any subtle changes are made for each print job.
  • Page 20: Performing Automatic Inspection

    Performing Automatic Inspection...
  • Page 21: Creating A New Reference Image For Automatic Inspection

    Creating a New Reference Image for Automatic Inspection Performing Automatic Inspection Creating a New Reference Image for Automatic Inspection When newly performing automatic inspection, create a reference image before executing a job. Hold a print job on this machine. When printing via the printer driver, change the storage destination in the [Workflow] tab of the PS-Pl- ugin driver.
  • Page 22 Creating a New Reference Image for Automatic Inspection Select the [Create New] check box in [Reference Image Setting]. Specify each item, and press [OK] to apply the setting. When deleting [Reference Image] when printing is finished, select [Delete at the End]. In [Inspection Level Setting], specify the desired level depending on the output purpose.
  • Page 23 Creating a New Reference Image for Automatic Inspection Press [Output], and press [OK]. One copy is output as [Proof], and the reference image for automatic inspection is created. Check whether or not output paper is erroneous. % A job ticket can be changed in [Setting]. Check the contents, and press [Output].
  • Page 24 Creating a New Reference Image for Automatic Inspection Tips [Auto Inspection] can also be configured using JobCentro or AccurioPro Print Manager. Automatic Inspection Operation Manual...
  • Page 25: Selecting The Created Reference Image For Automatic Inspection

    Selecting the Created Reference Image for Automatic Inspection Selecting the Created Reference Image for Automatic Inspection When performing [Auto Inspection] using the created reference image, you need to select an image from the list. Hold a print job on this machine. When printing via the printer driver, change the storage destination in the [Workflow] tab of the PS-Pl- ugin driver.
  • Page 26 Selecting the Created Reference Image for Automatic Inspection Select [Use Registered Image] in [Reference Image Setting], and press the white button on the lower- right side. The [Reference Image Selection] screen is displayed. Select the desired [Reference Image], and press [OK]. This returns to the [Automatic Inspection Setting] screen.
  • Page 27 Selecting the Created Reference Image for Automatic Inspection Press [New Store] or [Overwrite]. The setting is stored, and the display returns to the [Hold Job] screen. Press [Output], select [Normal] in [Output Method], and press [OK]. The print job starts, and [Auto Inspection] is performed. If an error is detected by the automatic inspec- tion, it is displayed in [IQ Detected Result].
  • Page 28 Selecting the Created Reference Image for Automatic Inspection Tips The reference image can also be selected using JobCentro or AccurioPro Print Manager. Automatic Inspection Operation Manual...
  • Page 29: Creating A New Reference Image For Automatic Inspection Using A Wait Setting Job

    Creating a New Reference Image for Automatic Inspection Using a Wait Setting Job Creating a New Reference Image for Automatic Inspection Using a Wait Setting Job Executing a job in Wait setting allows you to use the automatic inspection when outputting a print job such as Direct Print without holding it.
  • Page 30 Creating a New Reference Image for Automatic Inspection Using a Wait Setting Job Press Start on the control panel. The print job starts, and [Auto Inspection] is performed. If an error is detected by the automatic inspec- tion, it is displayed in [IQ Detected Result]. The [Automatic Inspection Report] can be viewed on this machine or in Web Utilities of the Auto Inspection Unit UK-301.
  • Page 31: Selecting A Created Reference Image For Automatic Inspection Using A Wait Setting Job

    Selecting a Created Reference Image for Automatic Inspection Using a Wait Setting Job Selecting a Created Reference Image for Automatic Inspection Using a Wait Setting Job When performing [Auto Inspection] using the created reference image for a job in the Wait setting, you need to select an image from the list.
  • Page 32: Automatic Inspection Report

    Automatic Inspection Report...
  • Page 33: Confirming The Automatic Inspection Report

    Confirming the Automatic Inspection Report Automatic Inspection Report Confirming the Automatic Inspection Report When you want to check the result of [Auto Inspection], confirm [AutoInspect.Report], and take the appropri- ate action such as reprinting. The [Automatic Inspection Report] can be viewed on this machine or in Web Utilities of the Auto Inspection Unit UK-301.
  • Page 34: Viewing The Report From The Machine

    Viewing the report from the machine Viewing the report from the machine Procedure Press [AutoInspect.Report] on the [MACHINE] screen. The login window opens. Enter the user name and password for [User Name] and [Password] to log in. [User Name]: webuser Enter any password.
  • Page 35 Viewing the report from the machine % When the machine is equipped with Image Controller IC-313, Image Controller IC-314, Image Controller IC-315 or Image Controller IC-417 [Save this information] is not available. % Beyond that, you need to enter [User Name] and [Password] every time depending on the option configuration.
  • Page 36 Viewing the report from the machine Press the file name under [Out of range], and also press [Display]. The Automatic Inspection Report screen is displayed. To check [Completed Job], select Web Utilities of the Auto Inspection Unit UK-301. The [Decoding result] is a report of the decode results of the numbers/barcodes. Access and check it from a browser.
  • Page 37 Viewing the report from the machine Select the part you want to check, and press [OK]. The detected page is displayed. % For details on the detection location, refer to Web Utilities of the Auto Inspection Unit UK-301. Type Description [Set] Indicates the number of the set in which an out-of-range image is detected.
  • Page 38 Viewing the report from the machine Type Description [Alignment error] Displayed when the system failed in alignment with the reference im- age. [CSV Read Error] Displayed when the system failed to create a report. [Too Many Stains] Displayed when many stains were detected. Automatic Inspection Operation Manual...
  • Page 39: Viewing The Report Via Web Utilities Of The Auto Inspection Unit Uk-301

    Viewing the report via Web Utilities of the Auto Inspection Unit UK-301 Viewing the report via Web Utilities of the Auto Inspection Unit UK-301 Procedure Open the Web browser. For details on the browser operating environment of Web Utilities, refer to [Web Utilities] in the HTML User's Guide.
  • Page 40: How To Check The Automatic Inspection Report

    Viewing the report via Web Utilities of the Auto Inspection Unit UK-301 Confirm the target Automatic Inspection Report. The following items are displayed in [List of Report]. [Job ID] [Date/Time] [Filename] [Result (Successful/Stain)] [Report Creation Status (Created/Uncreated)] [Link (Report)] [Error Report] How to check the automatic inspection report Click [Report] to display [Completed Job] and [Out of range].
  • Page 41: [Summary]

    Viewing the report via Web Utilities of the Auto Inspection Unit UK-301 Display item Description [Out of range] Shows a report of the printout that does not satisfy the inspection standard. If you view a report via Web Utilities of the Auto Inspection Unit UK-301, the problem part is framed in red, and the reason is displayed.
  • Page 42: [Machine Information]

    Viewing the report via Web Utilities of the Auto Inspection Unit UK-301 [Machine Information] Name Description [Model] Displays the model code that is used for printing when an automatic inspection is performed. [Serial No.] Displays the serial number of the model that is used for printing when an automatic inspection is per- formed.
  • Page 43: [Failure Details]

    Viewing the report via Web Utilities of the Auto Inspection Unit UK-301 [Failure Details] Name Description [Number of Failed Pages] Displays the number of pages that are judged to be out of range. [Number of Stain Detection Pages] Displays the number of pages in which a stain is judged to be a non-standard image.
  • Page 44: Out Of Range

    Viewing the report via Web Utilities of the Auto Inspection Unit UK-301 Out of range The part related to the problem is framed in red, and details are displayed as shown below. Name Description [Stain(XXX)] Displays the number of detected stains. ("XXX" in- dicates a serial number.) [Level(X)] Displays the stain detection level.
  • Page 45: Checking The Automatic Inspection Report In Pdf

    Checking the Automatic Inspection Report in PDF Checking the Automatic Inspection Report in PDF Overview Display items can be changed by opening the PDF file of the downloaded automatic inspection report using Adobe Acrobat. This function displays stains or omissions judged to be in the allowable range as well as the specified [In- spection Excluding Area], and also allows you to change the color to display the inspection result.
  • Page 46: Real-Time Inspection Display

    Real-time Inspection Display...
  • Page 47: Confirming The Inspection Result In Real Time

    Confirming the Inspection Result in Real Time Real-time Inspection Display Confirming the Inspection Result in Real Time You can confirm the automatic inspection result in real time. This function displays the images that are loaded with Intelligent Quality Optimizer IQ-501 during job execution. Procedure Open the Web browser.
  • Page 48: Reference Image

    Reference Image...
  • Page 49: Managing Reference Images

    Managing Reference Images Reference Image Managing Reference Images You can confirm the previously created reference images. Tips Up to 1,000 reference images can be stored in [Reference Image List 1], and also up to 1,000 ones in [Reference Image List 2]. In some cases, up to the maximum number of reference images cannot be stored depending on the paper size to be read.
  • Page 50 Managing Reference Images Tips You can also confirm the reference images from [Reference Image List] of Web Utilities of the Auto Inspec- tion Unit UK-301. Automatic Inspection Operation Manual...
  • Page 51: Automatic Inspection Area

    Automatic Inspection Area...
  • Page 52: What Is The Automatic Inspection Area

    What Is the Automatic Inspection Area? Automatic Inspection Area What Is the Automatic Inspection Area? Overview Set an area that is not subject to automatic inspection, or set an area that is subject to special inspection, such as variable printing, for example by changing part of an image intentionally. Efficient inspection is ena- bled by preventing unnecessary errors and automating checks such as serial number printing.
  • Page 53: Serial No. (0-9) Area

    Setting an Inspection Area Serial No. (0-9) Area Sets an area targeted for serial No. (0-9) inspection. This function reads and decodes the number in the target area. You can also check whether the numeric val- ue changes sequentially. The read number must satisfy the following conditions. Font type: Gothic / Arial Font size: 8 points or more Background color: White...
  • Page 54 Setting an Inspection Area Press [InspectionAreaSet.] on the [Reference Image Management] screen. % You can also select [Reference Image Selection] - [InspectionAreaSet.] on the [Job Ticket] screen to specify the desired area. % You can also set an inspection area from [InspectionAreaSet.] on the [Reference Image List] screen of Web Utilities.
  • Page 55 Setting an Inspection Area Display item Description [Select Area Type] Specify the type of area to set. [Select Target Page] Select the page that is targeted for automatic in- spection. There are three types of pages: [Front Page], [Back Page], and [Select Page], in each of which you can specify a different area.
  • Page 56 Setting an Inspection Area Automatic inspection execution example Output side [Front Side] [Back Side] [Front Side] [Back Side] Scanned page 1page 2page 3page 4page order Scanned sheet 1st sheet 2nd sheet order Tips Selecting [VDP area match(1st/2nd) ON] automatically checks whether the same barcode is output to the front and back pages, or whether the serial number was correctly changed.
  • Page 57: Output Setting

    Output Setting...
  • Page 58: Outputting A Printout With An Error Detected To Another Tray

    Outputting a Printout with an Error Detected to Another Tray Output Setting Outputting a Printout with an Error Detected to Another Tray Overview Output a printout, in which an error is detected by automatic inspection, to the Purge Tray, and perform re- printing.
  • Page 59: Procedure

    Outputting a Printout with an Error Detected to Another Tray Procedure Press [IQ Function Setting] on the [MACHINE] screen. The [IQ Function Setting] screen is displayed. Select [Continue Output] in [Operation after Deviation/Out of Range was Detected], and enter [Detec- tion Count] using the keypad on the screen.
  • Page 60 Outputting a Printout with an Error Detected to Another Tray Select [Purge Tray] of [Output Tray for Out of Range]. Press [OK]. Automatic inspection and printing are performed. For details, refer to "3. Performing Automatic Inspection" in this manual. If an error is detected during printing, the printout subject to the detected error and paper left in the machine at the same time are output to the Purge Tray.
  • Page 61: Outputting A Printout With An Error Detected To The Same Tray

    Outputting a Printout with an Error Detected to the Same Tray Outputting a Printout with an Error Detected to the Same Tray Overview Output a printout, in which an error is detected by automatic inspection, to the same tray as normal printouts, not the Purge Tray.
  • Page 62 Outputting a Printout with an Error Detected to the Same Tray Select [Continue Output] in [Operation after Deviation/Out of Range was Detected], and type "00" for [Detection Count] using the keypad on the screen. Printing is continued even if an error is detected multiple times. Select [Same as the Job] of [Output Tray for Out of Range].
  • Page 63 Outputting a Printout with an Error Detected to the Same Tray Select [OFF] in [Automatic Reprint when Deviation/Out of Range was Detected]. Select [ON] in [Create Auto Inspection Report]. Press [OK]. Automatic inspection and printing are performed. For details, refer to "3. Performing Automatic Inspection" in this manual. When an error is detected during printing, a printout is also output to the same tray as a normal printout.
  • Page 64: Decoding The Barcode Area Or Serial No. (0-9) Area To Check The Contents

    Decoding the Barcode Area or Serial No. (0-9) Area to Check the Contents Decoding the Barcode Area or Serial No. (0-9) Area to Check the Contents Overview Decode the barcode or number in the barcode inspection or serial No. (0-9) inspection area, and check the contents.
  • Page 65 Decoding the Barcode Area or Serial No. (0-9) Area to Check the Contents % You can also select Utility/Counter - [User Setting] - [Common Setting] or Utility/Counter - [Ad- ministrator Setting] - [Common Setting] to configure the setting. Select [ON] in [Create Auto Inspection Report], and press [OK]. Hold a print job for creating a reference image on this machine.
  • Page 66 Decoding the Barcode Area or Serial No. (0-9) Area to Check the Contents Select the held print job, and press [Job Ticket]. The [Job Ticket Edit] screen is displayed. Press [Auto Inspection], set [Inspection Setting] to [ON], and enable [Create New] in [Reference Image Setting].
  • Page 67: Procedure (Setting An Inspection Area)

    Decoding the Barcode Area or Serial No. (0-9) Area to Check the Contents Procedure (Setting an Inspection Area) Press [Reference Image Management] on the [MACHINE] screen. The [Reference Image Management] screen is displayed. In [Reference Image List 1], select the row of the reference image created in "Procedure (Creating a Ref- erence Image)", and press [InspectionAreaSet].
  • Page 68: Procedure (Decoding)

    Decoding the Barcode Area or Serial No. (0-9) Area to Check the Contents When you want to set two or more inspection areas, select [No.2] and subsequent numbers in the menu list of No. Then, execute steps 6 and 7 again. % You can set up to 30 inspection areas in each of [Front Page] and [Back Page].
  • Page 69 Decoding the Barcode Area or Serial No. (0-9) Area to Check the Contents Confirm the automatic inspection report in Web Utilities of the Auto Inspection Unit UK-301. % For details on how to view the automatic inspection report, refer to steps 1 to 5 in "4.3 Viewing the Report via Web Utilities of the Auto Inspection Unit UK-301"...
  • Page 70: Performing Sequential Check For The Barcode Area Or Serial No. (0-9) Area

    Performing Sequential Check for the Barcode Area or Serial No. (0-9) Area Performing Sequential Check for the Barcode Area or Serial No. (0-9) Area Overview You can check whether consecutive numbers or barcodes in the barcode inspection or serial No. (0-9) in- spection area have been changed correctly.
  • Page 71 Performing Sequential Check for the Barcode Area or Serial No. (0-9) Area Display item Description [OFF] Does not perform sequential checking. [Check the data inside a page] Check whether the numbers that have been se- quentially arranged on one page have been cor- rectly changed based on the area No.
  • Page 72: Procedure (Decoding)

    Performing Sequential Check for the Barcode Area or Serial No. (0-9) Area Procedure (Decoding) Decode the data of the inspection area, and download the CSV file, referring to steps 1 to 8 in "Proce- dure (Decording)" of "8.3 Decoding the Barcode Area or Serial No. (0-9) Area to Check the Contents" in this manual.
  • Page 73: Variable Data Inspection Function

    Variable Data Inspection Function Variable Data Inspection Function This function automatically inspects whether or not variable printing of numeric values or barcodes is per- formed correctly by collating the CSV file of VDP print data with the actual printout in real-time. Overview VDP print data Compare...
  • Page 74 Variable Data Inspection Function Name Description Ascending or Descending Order Order in which the numeric value varies. 0: Ascending order 1: Descending order * This item is required to set. Page Page number to be collated. Set in the range from 1 to 200000. * If Image Controller IC-313 is mounted, the scan image in Intelligent Quality Optimizer IQ-501 is used as the reference image (for 1 output sheet, the...
  • Page 75: Procedure (Uploading A Csv File)

    Variable Data Inspection Function Name Description Image orientation in decoding area. 0: Upward 1: Leftward 2: Downward 3: Rightward TYPE Barcode type. The following types are available. 1: Code 39 2: Code 128 3: JAN(EAN) 5: ITF 6: NW-7 7: Code 93 8: UPC 65: QR Code 66: PDF417...
  • Page 76: Procedure (Holding A Print Job Before Execution)

    Variable Data Inspection Function Click [Upload]. Click [Choose File], select the desired file, and click [Upload]. The selected CSV file is uploaded to this machine. Procedure (Holding a Print Job before Execution) Execute a job, and collate the expected decoding result entered in the CSV file with the printout. For details on the procedure, refer to "3.1 Creating a New Reference Image for Automatic Inspection"...
  • Page 77 Variable Data Inspection Function Click [List of Realtime Collation Result]. The List of Realtime Collation Result screen is displayed. If the inspection result is [Collation Err], click [Report]. The Mismatch Report screen is displayed. Automatic Inspection Operation Manual 8-21...
  • Page 78: Troubleshooting

    Troubleshooting...
  • Page 79: If An Out-Of-Range Image Is Detected

    If an Out-of-Range Image is Detected Troubleshooting If an Out-of-Range Image is Detected Out-of-range image report status and remedy When message "Out of range was detected." is displayed on the touch panel, check the out-of-range image report. Status Cause Remedy A comment marked by a Out-of-range stains were Stains may be seen in the paper feed-...
  • Page 80 If an Out-of-Range Image is Detected Status Cause Remedy Message "Too Many One hundred or more Stains may be seen in the paper feed- Stains" is displayed on stains, which is in the ing route. Perform maintenance for this the bookmark of the out- standard, were detected.
  • Page 81 A92W-IQ-E-22 2020. 9 © 2018...

Table of Contents