Table of Contents
Advertisement
Quick Links
Advertisement
Table of Contents

Related Manuals for Electrolux RKK660201W


Summary of Contents for Electrolux RKK660201W
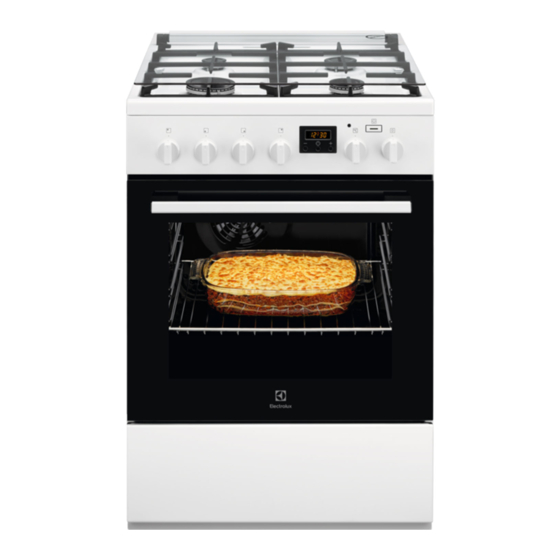
- Page 1 RKK660201W RKK660201X Cooker User Manual...
-
Page 2: Table Of Contents
16. ENVIRONMENTAL CONCERNS..............37 WE’RE THINKING OF YOU Thank you for purchasing an Electrolux appliance. You’ve chosen a product that brings with it decades of professional experience and innovation. Ingenious and stylish, it has been designed with you in mind. So whenever you use it, you can be safe in the knowledge that you’ll get great results every time. -
Page 3: Safety Information
ENGLISH SAFETY INFORMATION Before the installation and use of the appliance, carefully read the supplied instructions. The manufacturer is not responsible for any injuries or damage that are the result of incorrect installation or usage. Always keep the instructions in a safe and accessible location for future reference. - Page 4 WARNING: Unattended cooking on a hob with fat or • oil can be dangerous and may result in fire. NEVER try to extinguish a fire with water, but switch • off the appliance and then cover flame e.g. with a lid or a fire blanket.
-
Page 5: Safety Instructions
ENGLISH side walls. Install the shelf supports in the opposite sequence. WARNING: Use only hob guards designed by the • manufacturer of the cooking appliance or indicated by the manufacturer of the appliance in the instructions for use as suitable or hob guards incorporated in the appliance. - Page 6 WARNING! leakage trips and contactors. Risk of fire and explosion • The electrical installation must have an isolation device which lets you • Fats and oil when heated can release disconnect the appliance from the flammable vapours.
- Page 7 ENGLISH • Do not activate the cooking zones • Clean regularly the appliance to with empty cookware or without prevent the deterioration of the cookware. surface material. • Cookware made of cast iron, • Clean the appliance with a moist soft aluminium or with a damaged bottom cloth.
-
Page 8: Installation
2.8 Service manufacturer's authorized person, or your local solid waste operator. • To repair the appliance contact the • Disconnect the appliance from the Authorised Service Centre. mains supply. • Use original spare parts only. • Cut off the mains electrical cable close to the appliance and dispose of 2.9 Disposal... - Page 9 ENGLISH 3.4 Bypass diameters BURNER Ø BYPASS 1/100 mm Auxiliary 29 / 30 Semi-rapid Rapid 1) Type of bypass depends on model. 3.5 Gas burners for NATURAL GAS G20 13 mbar BURNER NORMAL POW‐ REDUCED POWER kW INJECTOR MARK ER kW 1/100 mm Rapid 0.78...
- Page 10 3.9 Gas connection • it is not longer than 1500 mm, • it has no narrowing anywhere, WARNING! • it is not twisted or tighten, Before you connect the gas, • it does not get in touch with sharp...
- Page 11 ENGLISH 3.13 Adjusting the minimum gas level on the hob burner 1. Disconnect the appliance from the electricity. 2. Remove the knob for the hob. If there is no access to the bypass screw dismount the control panel before adjustment start. 3.
- Page 12 3.14 Levelling of the appliance 1. Install the anti-tilt protection 232 - Use small feet on the bottom of 237 mm down from the top surface of appliance to set the appliance top the appliance and 110 - 115 mm from surface level with other surfaces.
-
Page 13: Product Description
ENGLISH 3.16 Electrical installation WARNING! The manufacturer is not responsible if you do not follow the safety precautions from Safety chapters. This appliance is supplied with a main plug and a main cable. WARNING! The power cable must not touch the part of the appliance shaded in the illustration. -
Page 14: Before First Use
4.2 Cooking surface layout Auxiliary burner Semi-rapid burner Semi-rapid burner Rapid burner 4.3 Accessories • Optional telescopic runners For shelves and trays. You can order • Wire shelf them separately. For cookware, cake tins, roasts. • Storage drawer • Baking tray The storage drawer is below the oven For cakes and biscuits. -
Page 15: Hob - Daily Use
ENGLISH 6. Let the oven operate for 15 minutes. 1. Set the function . Set the 7. Turn off the oven and let it cool maximum temperature. down. 2. Let the oven operate for 1 hour. Accessories can become hotter than 3. -
Page 16: Hob - Hints And Tips
6.2 Burner overview A. Burner cap B. Burner crown C. Ignition candle D. Thermocouple 6.3 Turning the burner off To put the flame out, turn the knob to the off position WARNING! Always turn the flame down or switch it off before you remove the pans from the burner. -
Page 17: Hob - Care And Cleaning
ENGLISH 8. HOB - CARE AND CLEANING electrode. Keep these components well WARNING! clean to prevent difficult lighting and Refer to Safety chapters. check that the burner crown holes are not obstructed. 8.1 General information 8.4 Pan supports • Clean the hob after each use. •... - Page 18 9.3 Oven functions Symbol Oven functions Application Off position The oven is off. Oven lamp To turn on the lamp without a cooking function. PlusSteam To add humidity during the cooking. To get the right colour and crispy crust during baking. To give more juiciness during reheating.
-
Page 19: Oven - Clock Functions
ENGLISH 9.4 Activating the function: The Plus Steam button works only with the function: PlusSteam. PlusSteam The indicator turns on. 5. Turn the knob for the temperature to This function allows to have an select a temperature. improvement of humidity during the 6. -
Page 20: Oven - Using The Accessories
10.3 Clock functions table Clock function Application 00:00 TIME OF DAY To set, change or check the time of day. DURATION To set how long the appliance operates (1 min - 10 h). MINUTE MINDER To set countdown time (1 min - 23 h 59 min). -
Page 21: Oven - Hints And Tips
ENGLISH Push the tray or deep pan between the guide bars of the shelf support. Make sure it does not touch the back wall of the oven. Wire shelf and the deep pan together: Push the deep pan between the guide bars of the shelf support and the wire shelf on the guide bars above. - Page 22 You can extend the baking time by 10 – To prevent too much smoke in the oven 15 minutes if you bake cakes on more during roasting, add some water into the than one shelf position. deep pan. To prevent the smoke...
- Page 23 ENGLISH Food Water in the Tempera‐ Time (min) Shelf po‐ Accessories cavity em‐ ture (°C) sition bossment (ml) Plum cake, 75 - 90 Use cake mould. apple pie, cinnamon rolls 1) Preheat in an empty oven for 5 minutes before cooking. Cook from frozen Food Water in the...
- Page 24 Roasting Food Water in the Tempera‐ Time (min) Shelf po‐ Accessories cavity em‐ ture (°C) sition bossment (ml) Roast pork 65 - 80 Use wire shelf plus baking tray. Roast beef 45 - 50 Use wire shelf rare plus baking tray.
- Page 25 ENGLISH Soft vegetables Food Temperature Time (min) Shelf po‐ Accesso‐ (°C) sition ries Zucchini / Aubergine / On‐ 30 - 35 Use baking ions / Tomatoes tray. Pickled vegetables Food Temperature Time (min) Shelf po‐ Accesso‐ (°C) sition ries Carrots / Pickles / Turn‐ 35 - 45 Use baking ips / Celery...
- Page 26 Food Quantity Searing Temperature Shelf Time (min) (kg) each side (°C) position (min) Filet rosé 1.0 - 1.5 80 - 100 50 - 90 Loin, in one 1.5 - 2.0 80 - 100 100 - 160 piece Roast veal me‐...
- Page 27 ENGLISH 12.10 Fast Grilling Food Temperature (°C) Time (min) Shelf position Chicken, half 50 - 60 Pork roast cutlet 40 - 50 Grill bacon 17 - 25 Sausages 20 - 30 Beef steak: medium 25 - 35 12.11 Turbo Grilling Food Temperature (°C) Time (min) Shelf position...
- Page 28 Food Tem‐ Time Shelf Accessories pera‐ (min) posi‐ ture tion (°C) Buns 25 - 30 baking tray or grill- / roasting Bread rolls 40 - 45 baking tray or grill- / roasting Frozen pizza 350 g 25 - 35...
- Page 29 ENGLISH Food Tem‐ Time Shelf Accessories pera‐ (min) posi‐ ture tion (°C) Shortcrust pastry 25 - 35 baking tray or grill- / roasting biscuits Tartelettes 20 - 30 baking tray or grill- / roasting Vegetarian Mixed vegetables in 20 - 30 baking tray or grill- / roasting pouch 400 g Omelette...
-
Page 30: Oven - Care And Cleaning
Food Function Temper‐ Accessories Shelf Time ature position (min) (°C) Apple pie (2 tins Fan Cooking wire shelf 70 - 80 Ø20 cm, diagonally off set) Fatless sponge Conventional wire shelf 20 - 30 cake Cooking Fatless sponge Fan Cooking... - Page 31 ENGLISH 13.3 Cleaning the cavity embossment The cleaning procedure removes limestone residue from the cavity embossment after cooking with steam. We recommend that you follow the cleaning procedure at least every 5th - 10th cycle of the function: PlusSteam. Install the removed accessories in the opposite sequence.
- Page 32 90° 7. First lift carefully and then remove the glass panel. 3. Close the oven door halfway to the first opening position. Then lift and pull forward and remove the door from its seat. 8. Clean the glass panels with water and soap.
-
Page 33: Troubleshooting
ENGLISH 13.7 Replacing the lamp The drawer below the oven can be removed for cleaning. WARNING! 1. Pull the drawer out until it stops. Risk of electric shock. The lamp can be hot. 1. Turn off the oven. Wait until the oven is cold. - Page 34 Problem Possible cause Remedy The flame colour is orange The flame can look orange or yellow. or yellow in some areas of the burner. This is normal. The oven does not heat The oven is deactivated. Activate the oven.
-
Page 35: Energy Efficiency
......... Product number (PNC) ......... Serial number (S.N.) ......... 15. ENERGY EFFICIENCY 15.1 Product information for hob according to EU 66/2014 Model identifi‐ RKK660201W cation RKK660201X Type of hob Hob inside Freestanding Cooker Number of gas burners Energy effi‐ Left rear - Auxiliary... - Page 36 RKK660201W 943005428 Model identification RKK660201X 943005429 Energy Efficiency Index 94.9 Energy efficiency class Energy consumption with a standard load, con‐ 0.84 kWh/cycle ventional mode Energy consumption with a standard load, fan- 0.75 kWh/cycle forced mode Number of cavities Heat source...
-
Page 37: Environmental Concerns
ENGLISH 16. ENVIRONMENTAL CONCERNS appliances marked with the symbol Recycle materials with the symbol with the household waste. Return the Put the packaging in relevant containers product to your local recycling facility or to recycle it. Help protect the contact your municipal office. environment and human health by recycling waste of electrical and electronic appliances. - Page 40 www.electrolux.com/shop...
Need help?
Do you have a question about the RKK660201W and is the answer not in the manual?
Questions and answers