
Related Manuals for Electrolux ECFI3068AS


Summary of Contents for Electrolux ECFI3068AS
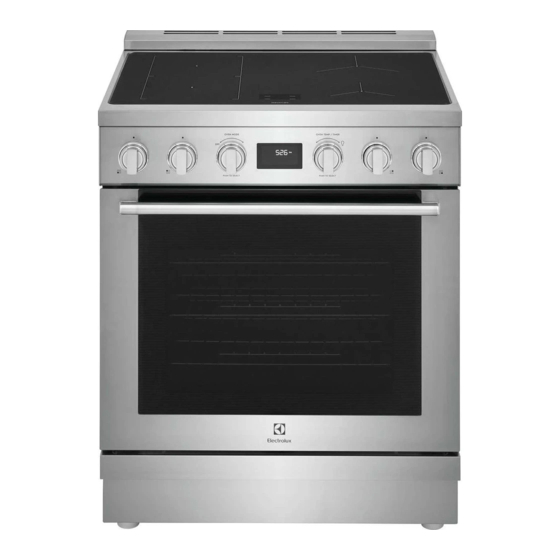
- Page 1 Use & Care Manual Induction Range Manual utilisateur FR 52 Cuisinière à induction Manual de uso y cuidado SP 102 Estufa de inducción...
-
Page 2: Table Of Contents
THANK YOU FOR CHOOSING OUR APPLIANCE! For Customer Care support and webshop visit or download an extended version of this manual, visit: www.ElectroluxAppliances.com WELCOME TO ELECTROLUX!..........2 USING THE COOKTOP............16 IMPORTANT SAFETY INSTRUCTIONS ......3 USING THE OVEN..............20 FEATURES .................. -
Page 3: Important Safety Instructions
IMPORTANT SAFETY INSTRUCTIONS Read all instructions before using this appli- NOTE ance. Indicates a short, informal reference – This manual contains important safety symbols something written down to assist the mem- and instructions. Please pay attention to these ory or for future reference. symbols and follow all instructions given. - Page 4 IMPORTANT SAFETY INSTRUCTIONS GROUNDING INSTRUCTIONS See the installation instructions provided with this appliance for complete installation and WARNING grounding instructions. • Avoid fire hazard or electrical shock. IMPORTANT INSTRUCTIONS FOR USING Failure to follow this warning may THE APPLIANCE cause fire, serious injury, or death. CAUTION •...
- Page 5 IMPORTANT SAFETY INSTRUCTIONS WARNING CAUTION • Do not leave children alone - Children • Only use dry potholders. Moist or should not be left alone or unattended damp potholders on hot surfaces may in the area where appliance is in use. result in burns from steam.
- Page 6 IMPORTANT SAFETY INSTRUCTIONS Use proper pan size — This appliance is IMPORTANT INSTRUCTIONS FOR GLASS equipped with one or more surface units of AND CERAMIC COOKTOPS different sizes. Select cookware with flat bot- WARNING toms that match the surface unit size. Using the proper cookware on the cooking area will Do Not Clean or Operate a Broken Cook- improve efficiency.
- Page 7 IMPORTANT SAFETY INSTRUCTIONS Placement of oven racks - Always place oven IMPORTANT INSTRUCTIONS FOR SERVICE racks in required position while the oven is AND MAINTENANCE cool. If a rack has to be moved while the oven Do not repair or replace any part of the appli- is hot, do not let the potholder come into con- ance unless specifically recommended in the tact with a hot burner or element in oven.
- Page 8 IMPORTANT SAFETY INSTRUCTIONS Important: This appliance has been tested and found to comply with the limits for a class B digital device, pursuant to Part 18 of the FCC rules (United States) and ICES-001 (Canada). These limits are designed to provide reason- able protection against harmful interference in a residential installation.
-
Page 9: Features
FEATURES General description Cooktop Cooking zones characteristics table Zone Dimensions Max. Max. absorbed absorbed power (W) power in 1. Cooktop Boost 2. Control panel mode (W) 3. Inside lights 180 mm - 7 1850 3000 4. Seal 1/16” Single zone 5. - Page 10 FEATURES Control panel Cooling fan 1. Oven display Cooktop knobs: The fan cools the oven and comes into operation during cooking. 2. Cooktop cooking zone knob (front left) The fan causes a steady outflow of air that exits from the rear of the appliance, which may continue for a brief period of time even after the appliance has been 3.
- Page 11 FEATURES Inside lights Oven shelf positions The inside lights can be toggled ON and OFF by turn- The appliance is fitted with shelf supports to position trays and racks at different heights. The insertion ing the oven temperature knob to he bulb icon: heights are indicated from the bottom upwards.
- Page 12 FEATURES Available accessories Protective cover Regular rack Used to cover and protect the temperature probe socket when the temperature probe is not in use. Useful for supporting containers with food during cooking. NOTE Telescopic guide set • Some models are not provided with all acces- sories.
-
Page 13: Before Using The Appliance
BEFORE USING THE APPLIANCE First power on First power on When the range is first plugged in, or when the power Preliminary setup supply has been interrupted “12:00 PM” will flash on When setting the clock or a timer, depending on how the timer display. - Page 14 BEFORE USING THE APPLIANCE Cooking with the induction cooktop Energy Efficiency: Induction cooking wastes less energy than a conventional cooktop, so it uses less Preliminary information electricity. • Each zone of the induction cooktop has its own CAUTION dedicated display, where the power level and the function symbols are indicated.
- Page 15 BEFORE USING THE APPLIANCE Use the correct cookware type Cookware material types Cookware material is especially important when using IMPORTANT an induction cooktop. The cookware must contain magnetic iron or steel to work on an induction cook- • Each cooking zone is fitted with a magnetic top.
-
Page 16: Using The Cooktop
USING THE COOKTOP Minimum pan size requirements First power on USE THE CORRECT SIZE COOKWARE - The When the range is first plugged in, or when the power supply has been interrupted, all the symbols on the cooking zones available on the Induction cooktop cooktop display light up for one second. - Page 17 USING THE COOKTOP Cooktop operation time limitation Switching on the cooking zones The cooktop is equipped with an automatic device To switch on a cooking zone, press and then turn the that limits its duration of use. corresponding knob clockwise. A short beep will be emitted.
- Page 18 USING THE COOKTOP Power levels Boost mode The power of the cooking zone can be adjusted to IMPORTANT various levels. Information on the different types of cooking can be found in the table. All power levels are After 10 minutes of operation in Boost mode, the available for all cooking zones.
- Page 19 USING THE COOKTOP Heating accelerator function Bridge function This function allows you to bring the cooking zone to IMPORTANT the selected power level more quickly than when selecting the power level. • This function is only available for front and rear To activate the Heating accelerator function (the left zones (1 - 2).
- Page 20 USING THE COOKTOP 3. Press and turn the rear left cooking zone knob Control Lock until you reach power level 9 (a long beep will The control lock is a device that protects the appli- be emitted). ance from accidental or inappropriate use. Only the cooktop knobs will be locked.
-
Page 21: Using The Oven
USING THE OVEN Oven preparation Regular rack CAUTION CAUTION Remove all accessories, materials and literature from • Be careful to insert the rack in the correct the inside of the oven before performing this opera- spaces indicated by the dashed lines: tion. - Page 22 USING THE OVEN To remove the rack: To install the telescopic guides: 1. Slide out the rack until it stops due to the 1. Slightly tilt the guides towards the inside wall of mechanical safety locks. the oven (1) and rest its hooks on the raised parts of the oven shelf supports (2).
- Page 23 USING THE OVEN The telescopic guides allow a two stage extraction: Temperature probe • Partial extraction: WARNING • Do not leave the temperature probe unat- tended. • Do not allow children to play with the probe. • Take care not to hurt yourself on the sharp parts of the probe.
- Page 24 USING THE OVEN For cooking with the temperature probe see “Meat Convection roast probe cooking”. The combination of the fan and the ring heating element (incorporated in the rear Cooking with the oven of the oven) allows you to cook different With this range, you can bake many kinds of food in foods on several levels, as long as they several ways.
- Page 25 USING THE OVEN • When setting the temperature and the timing Manual cooking in progress functions, the relative symbol/word starts flash- 1. Manual cooking can be stopped at any time by ing: turning the oven mode knob to the left. 2.
- Page 26 USING THE OVEN A buzzer sounds to signal the end of preheating. Open Minute minder the oven door to stop the buzzer. NOTE IMPORTANT • The minute minder can be set both during There is no preheating for the convection roast func- cooking and as a stand alone timer.
- Page 27 USING THE OVEN Cooking timer End of cooking timer This timer mode acts as a stand alone timer during a When the timer expires, a buzzer sounds and the fol- function in progress. lowing screen appears on the display with the 1.
- Page 28 USING THE OVEN 3. Turn the temperature knob left or right to set the Delayed cooking time. IMPORTANT 4. Press the temperature knob until the display shows the cooking settings screen with the • Delayed cooking can only be selected if a cooking time just set and the word “START”...
- Page 29 USING THE OVEN Auxiliary functions Preliminary operations: Three auxiliary functions are available, selectable in 1. Open the oven door. the same way as the cooking functions. 2. Place the container containing the dough in the oven. Steam clean 3. Close the oven door. This function is an assisted cleaning pro- cedure that facilitates dirt removal.
- Page 30 USING THE OVEN End of Proof function Warm function in progress At the end of the Proof function, a buzzer sounds and You can modify the temperature and duration of the “END” will appear on the display together with the cur- function by pressing and turning the oven temp.
- Page 31 USING THE OVEN Sabbath function End of Sabbath function The Sabbath function operates the appliance in a par- When the Sabbath cooking function has ended, the ticular way: display switches directly to standby mode. • The maximum operating time is 72 hours. Meat probe cooking •...
- Page 32 USING THE OVEN 4. Insert the plug of the probe into the socket on 3. Press the oven temp. knob to change the oven cavity temperature. The display will show the the left the side of the oven cavity. The default cavity temperature at the bottom with the flashing degree symbol.
- Page 33 USING THE OVEN Meat probe cooking in progress Oven cooking tips When meat probe cooking is in progress the display WARNING will show the oven cavity temperature at the top, the meat probe target temperature at the bottom and the FOOD POISONING HAZARD.
- Page 34 USING THE OVEN When baking with two or more racks we recommend • Use tested recipes with times adjusted for Con- arranging the pans on the upper rack closer to the vection Baking when using this mode. Check door and the pans on the lower rack closer to the fans food at the minimum cooking time.
- Page 35 USING THE OVEN • Broil one side until the food is browned; turn and • For very thick pieces of meat, take care to insert cook the second side. Season and serve. the entire length of the probe to ensure correct temperature detection.
- Page 36 USING THE OVEN Child lock mode Demo mode IMPORTANT IMPORTANT This setting will only lock the oven knobs. This mode can be activated and deactivated only for the first 5 minutes after the power to the appli- After accessing the settings menu, the oven display will ance has been turned on.
- Page 37 USING THE OVEN Temperature units After accessing the settings menu keep pressing the temperature knob until the display shows Turning the temperature knob to right causes the dis- play to switch between °C and °F. Press the knob to confirm the selection and exit from the user menu if you wish to do so.
- Page 38 USING THE OVEN Oven cooking tables Bake function cooking table Food Rack Recommended pan position Cookies Shiny pan with no sides/ very low sides placed on the rack Biscuits Shiny pan with no sides/ very low sides placed on the rack Convection Bake function cooking table Food Rack...
- Page 39 USING THE OVEN Convection Roast function cooking table Meat type Weight (lb) Oven T° Probe T° Time/lb (min/lb) Rack position Standing Rib Roast 5 - 7 350°F - 175°C 150°F - 65°C 2 - 3 (med-rare) Standing Rib Roast 5 - 7 350°F - 175°C 185°F - 85°C 2 - 3...
-
Page 40: Care And Cleaning
CARE AND CLEANING Steam clean function 4. Press the oven mode knob. • If the inside temperature is above 167°F (75°C) CAUTION the display shows: • Remove any food residues or large spills from previous cooking operations from the inside of the oven. - Page 41 CARE AND CLEANING 6. Pour approximately 13.5 fl. oz. (400 cc - 1.7 End of Steam clean function cups) of water onto the bottom of the oven. At the end of the cleaning cycle, a buzzer sounds and Make sure it does not overflow out of the cavity. “END”...
- Page 42 CARE AND CLEANING Surface type Cleaning recommendations Aluminum & chrome surfaces Use hot, soapy water and a cloth. Dry with a clean cloth. (rear backguard and handle tips) Plastic & Zamak alloy (control For general cleaning, use hot soapy water and a cloth. For more difficult to knobs) remove soil and built-up grease, apply a liquid detergent directly onto the soil.
- Page 43 CARE AND CLEANING Oven maintenance The oven lights will automatically turn ON when the oven door is opened. The oven lights may also be Removing the shelf supports manually operated by turning the oven temperature knob to the bulb icon (see “Inside lights”). IMPORTANT The oven light bulb is covered by a glass shield.
- Page 44 CARE AND CLEANING 3. Close the cover. Ensure that the molded part of Removing the oven door the glass (A) is facing the door. CAUTION The oven door is heavy. Be careful when removing and lifting the door. Do not lift the oven door by the handle.
- Page 45 CARE AND CLEANING 3. To reassemble the door, put the hinges in the Removing the internal glass panes relevant slots in the oven, making sure that the For easier cleaning, the internal glass panes of the grooved sections A are resting completely in door can be disassembled: the slots.
- Page 46 CARE AND CLEANING 4. Refit the panes in the reverse order in which • Do not slide anything metal or glass across the they were removed. Reposition the internal cooktop. glass pane. Take care to center and insert the 4 •...
- Page 47 CARE AND CLEANING Weekly routine cleaning Clean and maintain the cooktop once a week using a standard product for cleaning glass. Always follow the manufacturer's instructions. The silicone in these prod- ucts creates a protective water- and dirt-repellent film. All the dirt remaining on the film and can be removed easily.
-
Page 48: Before You Call
BEFORE YOU CALL Baking problems For best results, pre-heat the oven when baking cookies, breads, cakes, pies or pastries etc. There is no need to preheat the oven for roasting meats or baking casseroles. The cooking times and temperatures needed to bake a product may vary slightly from your previous appliance. - Page 49 BEFORE YOU CALL Let us help you troubleshoot your concern! This section will help you with common issues. If you need us, visit our website, chat with an agent, or call us. We may be able to help you avoid a service visit. If you do need service, we can get that started for you! 1-887-435-3287 (United States) 1-800-265-8352 (Canada)
- Page 50 BEFORE YOU CALL Excessive oven smoke during broiling Meat too close to the broiler element. Reposition the rack to pro- vide more clearance between the meat and the broiler. Pour a small amount of water into the broiler pan before cooking to pre- vent meat grease from producing smoke due to intense heating.
- Page 51 Electrolux at the addresses or phone numbers below. This warranty only applies in the USA and Canada. In the USA, your appliance is warranted by Electrolux Major Appliances North America, a division of Electrolux Home Products, Inc. In Canada, your appliance is warranted by Electrolux Canada Corp.
Need help?
Do you have a question about the ECFI3068AS and is the answer not in the manual?
Questions and answers