Table of Contents
Advertisement
Quick Links
Advertisement
Table of Contents

Related Manuals for Electrolux RKG600005W


Summary of Contents for Electrolux RKG600005W
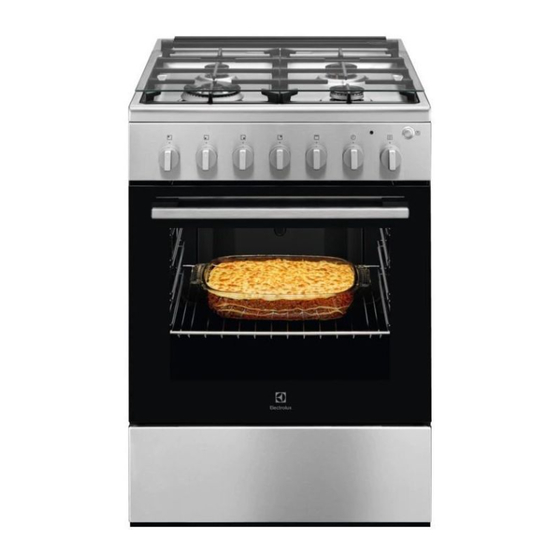
- Page 1 RKG600005W RKG600005X Cooker User Manual...
-
Page 2: Table Of Contents
16. ENVIRONMENTAL CONCERNS..............29 WE’RE THINKING OF YOU Thank you for purchasing an Electrolux appliance. You’ve chosen a product that brings with it decades of professional experience and innovation. Ingenious and stylish, it has been designed with you in mind. So whenever you use it, you can be safe in the knowledge that you’ll get great results every time. -
Page 3: Safety Information
ENGLISH SAFETY INFORMATION Before the installation and use of the appliance, carefully read the supplied instructions. The manufacturer is not responsible for any injuries or damage that are the result of incorrect installation or usage. Always keep the instructions in a safe and accessible location for future reference. - Page 4 WARNING: Unattended cooking on a hob with fat or • oil can be dangerous and may result in fire. NEVER try to extinguish a fire with water, but switch • off the appliance and then cover flame e.g. with a lid or a fire blanket.
-
Page 5: Safety Instructions
ENGLISH side walls. Install the shelf supports in the opposite sequence. WARNING: Use only hob guards designed by the • manufacturer of the cooking appliance or indicated by the manufacturer of the appliance in the instructions for use as suitable or hob guards incorporated in the appliance. - Page 6 WARNING! leakage trips and contactors. Risk of fire and explosion • The electrical installation must have an isolation device which lets you • Fats and oil when heated can release disconnect the appliance from the flammable vapours.
- Page 7 ENGLISH • Do not activate the cooking zones • Clean regularly the appliance to with empty cookware or without prevent the deterioration of the cookware. surface material. • Cookware made of cast iron, • Clean the appliance with a moist soft aluminium or with a damaged bottom cloth.
-
Page 8: Installation
2.8 Service manufacturer's authorized person, or your local solid waste operator. • To repair the appliance contact the • Disconnect the appliance from the Authorised Service Centre. mains supply. • Use original spare parts only. • Cut off the mains electrical cable close to the appliance and dispose of 2.9 Disposal... - Page 9 ENGLISH 3.4 Bypass diameters BURNER Ø BYPASS 1/100 mm Auxiliary 29 / 30 Semi-rapid Multi Crown Oven 1) Type of bypass depends on model. 3.5 Gas burners for NATURAL GAS G20 13 mbar BURNER NORMAL POW‐ REDUCED POWER kW INJECTOR MARK ER kW 1/100 mm Multi Crown...
- Page 10 3.8 Gas burners for LPG G31 30 mbar BURNER NORMAL REDUCED POW‐ INJECTOR NOMINAL GAS POWER kW ER kW MARK 1/100 FLOW g/h Multi Crown Semi-rapid 0.38 Auxiliary 0.85 0.31 Oven 0.78 3.9 Gas connection 3.10 Flexible nonmetal pipes...
- Page 11 ENGLISH The appliance is set for natural gas, you can change it to liquid gas, with the correct injectors. The gas rate is adjusted to suit. WARNING! Before you replace the injectors, make sure that the gas knobs are in the Off position.
- Page 12 Changing from liquid gas to natural gas 1. Unscrew approximately one turn the bypass screw position A. 2. Put the knob for the hob back. 3. Connect the appliance to the electricity. WARNING! Put the mains plug into the mains socket only if all parts are back into their initial position.
- Page 13 ENGLISH bypass screw dismount the control 7. Screw on slowly the bypass screw till panel before adjustment start. the flame becomes minimum and 3. With a thin and flat screwdriver adjust stable. the bypass screw A. 8. Put the knob for the oven functions The model determines the position of back.
- Page 14 If the space between the protection. bench cupboards is larger than the width of the appliance, you must adjust the side measurement to centre the appliance. If you changed the dimensions of the cooker, you must align the non-tip device correctly.
-
Page 15: Product Description
ENGLISH 4. PRODUCT DESCRIPTION 4.1 General overview Knobs for the hob Knob for the grill Knob for the Minute Minder Grill indicator Knob for the oven functions Button for the lamp Heating element Lamp Shelf support, removable Shelf positions 4.2 Cooking surface layout Auxiliary burner Semi-rapid burner Semi-rapid burner... -
Page 16: Hob - Daily Use
5.1 Initial Cleaning 3. Set the function and the maximum temperature. The maximum Remove all accessories and removable temperature for this function is shelf supports from the oven. 210 °C. Refer to "Care and cleaning" chapter. 4. Let the appliance operate for 15 minutes. -
Page 17: Hob - Hints And Tips
ENGLISH A. Burner cap The spark generator can B. Burner crown start automatically when you C. Ignition candle switch on the mains, after D. Thermocouple installation or a power cut. It is normal. 6.3 Turning the burner off 6.2 Burner overview To put the flame out, turn the knob to the off position WARNING! -
Page 18: Hob - Care And Cleaning
7.2 Diameters of cookware CAUTION! Make sure that the pots are WARNING! placed centrally on the Use cookware with burner in order to get the diameters applicable to the maximum stability and a size of burners. lower gas consumption. -
Page 19: Oven - Daily Use
ENGLISH 3. For the burner to operate correctly, conditions of the gas supply pipe and the make sure that the arms of the pan pressure adjuster, if fitted. supports are aligned with the centre of the burner. 8.5 Periodic maintenance Speak to your local Authorised Service Centre periodically to check the 9. - Page 20 9.3 Manual ignition of oven gas 9.6 Safety thermostat burner Incorrect operation of the oven or defective components can cause In case of absence of the electricity you dangerous overheating. To prevent this, can ignite the oven burner without an the oven has a safety thermostat which electrical device.
-
Page 21: Oven - Clock Functions
ENGLISH 9.8 Grill indicator when the oven reaches the correct temperature. It then cycles on and off to The grill indicator turns on when the grill show the temperature changes. cooking function is selected. It turns off 10. OVEN - CLOCK FUNCTIONS 10.1 Minute Minder Turn the knob for the timer as far as it goes, then turn it to necessary time... -
Page 22: Oven - Hints And Tips
12. OVEN - HINTS AND TIPS Trays in the oven can distort during WARNING! baking. When the trays are cold again, Refer to Safety chapters. the distortions disappear. For better results use the grill function for The temperature and baking 2 - 5 minutes at the end of cooking. - Page 23 ENGLISH Food Pre‐ Ther‐ Grill‐ Total Shelf Accessories heat‐ mostat cooking posi‐ posi‐ time time (min) tion time tion (min) (min) at the Apple pie 70 - 80 2 tins (diameter: 20 cm) on wire shelf Pastry 15 - 25 baking tray stripes Burgers...
-
Page 24: Oven - Care And Cleaning
Food / Dish Pre‐ Ther‐ Grill‐ Total Shelf Accessories (IEC heat‐ mostat cooking posi‐ 60350-1) posi‐ time time (min) tion time tion (min) (min) at the Trout wire shelf and tray 25 - 35 on level 2 Pork roast... - Page 25 ENGLISH Install the removed accessories in the opposite sequence. 13.4 Cleaning the oven door The oven door has two glass panels. 3. Close the oven door halfway to the You can remove the oven door and the first opening position. Then lift and internal glass panel to clean it.
- Page 26 The drawer below the oven can be removed for cleaning. 1. Pull the drawer out until it stops. 90° 7. First lift carefully and then remove the glass panel. 2. Slowly lift the drawer. 3. Pull the drawer out fully.
-
Page 27: Troubleshooting
ENGLISH 14. TROUBLESHOOTING WARNING! Refer to Safety chapters. 14.1 What to do if... Problem Possible cause Remedy There is no spark when The hob is not connected Check if the hob is correct‐ you try to activate the to an electrical supply or it ly connected to the electri‐... -
Page 28: Energy Efficiency
......... Product number (PNC) ......... Serial number (S.N.) ......... 15. ENERGY EFFICIENCY 15.1 Product information for hob according to EU 66/2014 Model identifi‐ RKG600005W cation RKG600005X Type of hob Hob inside Freestanding Cooker Number of gas burners Energy effi‐ Left rear - Auxiliary... -
Page 29: Environmental Concerns
ENGLISH • If it is possible, use a pressure cooker. Refer to its user manual. 15.3 Product information for ovens and Product Information Sheet* Supplier's name Electrolux RKG600005W 943003507 Model identification RKG600005X 943003506 Energy Efficiency Index 92.5 Energy efficiency class Energy consumption with a standard load, con‐... - Page 30 Return the...
- Page 32 www.electrolux.com/shop...
Need help?
Do you have a question about the RKG600005W and is the answer not in the manual?
Questions and answers