Table of Contents
Advertisement
Quick Links
Advertisement
Table of Contents

Subscribe to Our Youtube Channel
Related Manuals for Electrolux LKI64404NW


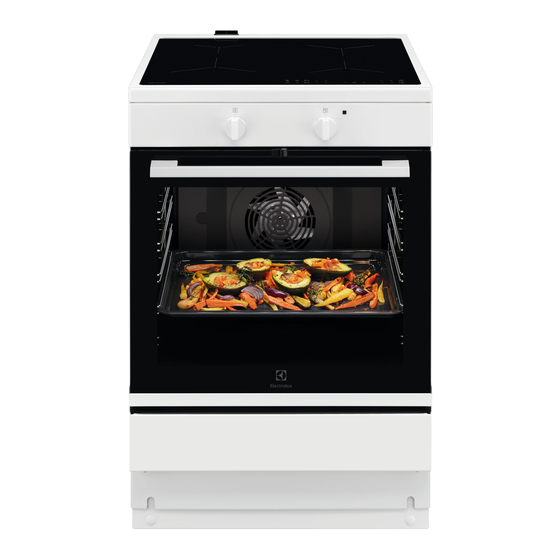
Summary of Contents for Electrolux LKI64404NW
- Page 1 EN User Manual | Cooker LKI64404NW...
-
Page 2: Table Of Contents
Welcome to Electrolux! Thank you for choosing our appliance. Get usage advice, brochures, trouble shooter, service and repair information: www.electrolux.com/support Subject to change without notice. CONTENTS 1. SAFETY INFORMATION................2 2. SAFETY INSTRUCTIONS................5 3. INSTALLATION....................7 4. PRODUCT DESCRIPTION................9 5. - Page 3 • Children should be supervised to ensure that they do not play with the appliance. • Keep all packaging away from children and dispose of it appropriately. • WARNING: The appliance and its accessible parts become hot during use. Keep children and pets away from the appliance when in use and when cooling down.
- Page 4 • CAUTION: The cooking process has to be supervised. A short term cooking process has to be supervised continuously. • WARNING: Danger of fire: Do not store items on the cooking surfaces. • Do not use a steam cleaner to clean the appliance. •...
-
Page 5: Safety Instructions
• To remove the shelf supports first pull the front of the shelf support and then the rear end away from the side walls. Install the shelf supports in the opposite sequence. • WARNING: Use only hob guards designed by the manufacturer of the cooking appliance or indicated by the manufacturer of the appliance in the instructions for use as suitable or hob guards incorporated in the appliance. - Page 6 the appliance from the mains at all poles. • Do not put flammable products or items The isolation device must have a contact that are wet with flammable products in, opening width of minimum 3 mm. near or on the appliance. •...
-
Page 7: Installation
• Before maintenance, deactivate the • Concerning the lamp(s) inside this product appliance. and spare part lamps sold separately: Disconnect the mains plug from the mains These lamps are intended to withstand socket. extreme physical conditions in household • Make sure the appliance is cold. There is appliances, such as temperature, the risk that the glass panels can break. - Page 8 WARNING! The power cable must not touch the part of the appliance shaded in the illustration. Make sure you install the anti-tilt protection at the correct height. 3.3 Anti-tilt protection For more information about the installation of the appliance refer to a separate installation CAUTION! booklet Install the anti-tilt protection to prevent...
-
Page 9: Product Description
4. PRODUCT DESCRIPTION 4.1 General overview Knob for the heating functions Control knob (for the temperature) Temperature indicator / symbol Heating element Lamp Shelf support, removable Cavity embossment Shelf positions 4.2 Hob overview Control Panel 4.3 Accessories • Wire shelf For cookware, cake tins, roasts. - Page 10 5.2 Using the sensor fields 2. Pull the door trim up and remove it. 3. Remove the lever 1, move it to the right 2 To activate the function press and hold the and put it back in. selected symbol on the display for at least 1 second.
-
Page 11: Hob - Daily Use
6. HOB - DAILY USE WARNING! Refer to Safety chapters. 6.1 Hob control panel Use the sensor fields to operate the appliance. The displays, indicators and sounds tell which functions operate. Sensor Function Comment field On / Off To activate and deactivate the hob. Hob²Hood To activate and deactivate the manual mode of the function. - Page 12 6.2 Heat setting displays Display Description The cooking zone is deactivated. The cooking zone operates. Pause operates. Automatic Heat Up operates. PowerBoost operates. There is a malfunction. + digit OptiHeat Control (3 step Residual heat indicator): continue cooking / keep warm / resid‐ ual heat.
- Page 13 • you use incorrect cookware. The symbol the induction cooking zone automatically sets back to the highest heat setting. comes on and the cooking zone deactivates automatically after 2 minutes. To activate the function for a cooking • you do not deactivate a cooking zone or zone: touch comes on.
- Page 14 To deactivate the function: activate the hob To stop the sound: touch with . Do not set any heat setting. Touch To deactivate the function: touch for 4 seconds. comes on. Deactivate then touch . The remaining time counts the hob with back to 00 To override the function for only one cooking time: activate the hob with...
- Page 15 raise the fan speed by one. When you reach Automat‐ Boiling 1) Frying 2) an intensive level and press again you will ic light set fan speed to 0 which deactivates the hood fan. To start the fan again with fan speed 1 Mode H4 Fan speed Fan speed...
-
Page 16: Hob - Hints And Tips
7. HOB - HINTS AND TIPS 7.2 Minimum cookware diameter WARNING! Refer to Safety chapters. Cooking Cookware diam‐ Power (W) zone eter (mm) 7.1 Cookware Left rear 125 - 140 1400/2500 Right rear 145 - 180 1800/2800 For induction cooking zones a strong Right front 145 - 180 1800/2800... -
Page 17: Hob - Care And Cleaning
Heat setting Use to: Time Hints (min) Keep cooked food warm. as neces‐ Put a lid on the cookware. sary 1 - 2 Hollandaise sauce; melt: butter, choco‐ 5 - 25 Mix from time to time. late, gelatine. Solidify: fluffy omelettes, baked eggs. 10 - 40 Cook with a lid on. -
Page 18: Oven - Daily Use
abrasive detergent. After cleaning, wipe • Remove shiny metallic discoloration: the hob dry with a soft cloth. use a solution of water with vinegar and clean the glass surface with a cloth. 9. OVEN - DAILY USE 9.1 Oven functions WARNING! Refer to Safety chapters. - Page 19 Symbol Oven function Application Moist Fan Baking This function was used to comply with the Energy Efficiency Class and Ecodesign Regulations (according to EU 65/2014 and EU 66/2014). Tests according to: IEC/EN 60350-1. The oven door should be closed during cooking so that the func‐ tion is not interrupted and to ensure that the oven operates with the highest energy efficiency possible.
-
Page 20: Oven - Hints And Tips
• All accessories have small indentations at the top of the right and left side to increase safety. The indentations are also anti-tip devices. • The high rim around the shelf is a device which prevents cookware from slipping. 10. OVEN - HINTS AND TIPS You can extend the baking time by 10 –... - Page 21 10.3 Hot Air Baking Food Temperature Time (min) Shelf posi‐ (°C) tion Bread rolls 175 - 185 15 - 20 2 + 4 Wholemeal rolls 165 - 180 20 - 30 2 + 4 Filled sandwiches 170 - 180 15 - 20 2 + 4 Pan loaf 170 - 190...
- Page 22 10.4 Hot Air Cooking Food Temperature (°C) Time (min) Shelf posi‐ tion Fish, boiling 150 - 160 2 + 4 Fish, frying 165 - 175 2 + 4 Meatloaf 165 - 175 60 - 70 2 + 4 Danish meatballs 165 - 175 35 - 45 2 + 4...
- Page 23 Food Temperature (°C) Time (min) Shelf posi‐ tion Rye bread baking 180 - 200 55 - 65 - baking 55 - 65 Baguettes 220 - 230 15 - 30 3 - 4 Pancake 170 - 180 50 - 60 2 - 3 Dish cake 170 - 180 35 - 45...
- Page 24 Food Temperature (°C) Time (min) Shelf posi‐ tion Tarts, home made - pre-baking, roll 190 - 210 15 - 25 Tarts, home made - finishing 190 - 210 20 - 30 Tarts, frozen 200 - 225 20 - 30 When frying or boiling fish, the cooking time depends on the thickness of the fish. The fish is finished when the flesh is white.
- Page 25 Cakes in tin Food Temperature (°C) Time (min) Shelf position Soufflè 30 - 40 Sponge flan base 20 - 30 Victoria sandwich 25 - 35 Fish Food Temperature (°C) Time (min) Shelf position Fish in pouches 300 g 25 - 35 Whole fish 200 g 25 - 35 Fish fillet 300 g...
- Page 26 10.10 Hot Air Roasting Beef Food Temperature (°C) Time (min / kg) Shelf posi‐ tion 80 - 120 2 - 3 Roast beef Rump steak - browning total 10 2 - 3 Rump steak - roasting 50 - 60 2 - 3 Roast beef 90 - 120 1 - 2...
- Page 27 Food Temperature (°C) Time (min / kg) Shelf posi‐ tion Roast turkey, stuffed 50 - 60 1 - 2 Turkey breast 70 - 80 2 - 3 Other. Can be browned off after roasting under the grill or with top / bottom heat at 250°C. If you are using a meat probe, remove it before grilling.
- Page 28 Poultry Food Temperature (°C) Time (min / kg) Shelf posi‐ tion Chicken, parted 55 - 65 55 - 65 Duck total around 5 hours Duck slow roasting Roast turkey, stuffed 50 - 60 Turkey breast 70 - 80 Whole chicken 60 - 90 Other.
- Page 29 Food Quantity Temperature Time (min) Shelf posi‐ (°C) tion Saddle of lamb 1 - 1.5 kg 160 - 180 40 - 60 Poultry Food Quantity Temperature Time (min) Shelf posi‐ (°C) tion Poultry portions 200 - 250 g each 200 - 220 30 - 50 Duck 1.5 - 2 kg...
- Page 30 10.14 Grilling in general • Grill only flat pieces of meat or fish. WARNING! Always grill with the oven door closed. • Always grill with the maximum temperature setting. • Set the shelf into the shelf position as The grilling area is set in centre of the shelf. recommended in the grilling table.
- Page 31 Fruit Shelf position Food Temperature (°C) Time (h) 1 position 2 positions Plums 60 - 70 8 - 10 2 / 4 Apricots 60 - 70 8 - 10 2 / 4 Apple slices 60 - 70 6 - 8 2 / 4 Pears 60 - 70...
-
Page 32: Oven - Care And Cleaning
11. OVEN - CARE AND CLEANING WARNING! Refer to Safety chapters. 11.1 Notes on cleaning Clean the front of the appliance only with a microfibre cloth with warm water and a mild de‐ tergent. Use a cleaning solution to clean metal surfaces. Clean stains with a mild detergent. - Page 33 1. Clean the oven floor with warm water and washing-up liquid, then dry it. 2. Set the function. 3. Set the oven temperature to 250 °C and let the oven operate for 1 hour. 4. When the appliance is cool, clean it with a soft and moist sponge.
- Page 34 4. Clean the door glass panels. To install panels, do the same steps in reverse. 11.7 Replacing the lamp 3. Clean the glass cover. WARNING! 4. Replace the lamp with a suitable 300 °C heat-resistant lamp. Risk of electric shock. 5.
-
Page 35: Troubleshooting
12. TROUBLESHOOTING WARNING! Refer to Safety chapters. 12.1 What to do if... Problem Possible cause Remedy You cannot activate the appliance. The appliance is not connected to Check if the appliance is correctly an electrical supply or it is connec‐ connected to the electrical supply. -
Page 36: Energy Efficiency
Do not remove the rating plate from the appliance cavity. 13. ENERGY EFFICIENCY 13.1 Product Information according to EU Ecodesign Regulations for Hob Model identification LKI64404NW Type of hob Hob inside Freestanding Cooker Number of cooking zones Heating technology Induction... - Page 37 13.3 Product Information Sheet and Product Information according to EU Energy Labelling and Ecodesign Regulations for Oven Supplier's name Electrolux Model identification LKI64404NW 947941546 Energy Efficiency Index 95.3 Energy efficiency class Energy consumption with a standard load, conventional mode 0.95 kWh/cycle Energy consumption with a standard load, fan-forced mode 0.82 kWh/cycle...
-
Page 38: Environmental Concerns
Help protect the environment and human health by recycling waste of electrical and Electrolux Appliances AB - Contact Address: electronic appliances. Do not dispose of Al. Powstancow Slaskich 26, 30-570 Krakow, appliances marked with the symbol... - Page 40 867363919-A-032024...
Need help?
Do you have a question about the LKI64404NW and is the answer not in the manual?
Questions and answers