Table of Contents
Advertisement
Quick Links
Advertisement
Table of Contents

Subscribe to Our Youtube Channel
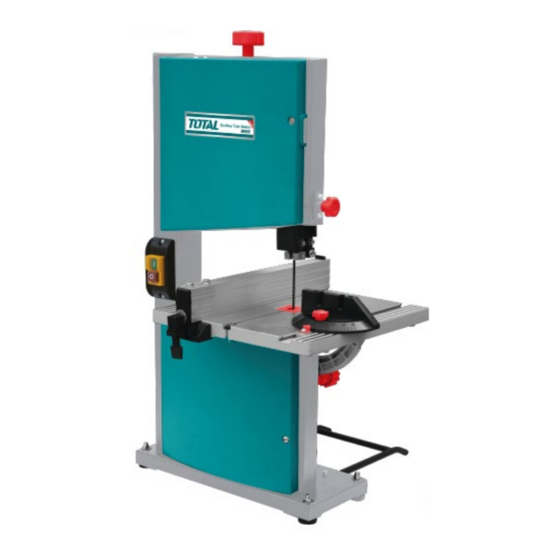
Summary of Contents for Total TS730301
- Page 1 BAND SAW...
-
Page 2: Security Instructions
Security instructions Caution Read all safety warnings and all instructions. Failure to follow the warnings and instructions may result in electric shock, fire, and/or serious injury. This manual must accompany the equipment at all times and must be kept in a safe place to be available. Note: Save all warnings and instructions for future reference. -
Page 3: Additional Security Warnings
b. Do not use the power tool if its power switch does not work. Any power tool that cannot be controlled with the switch is dangerous and must be repaired. c. Disconnect the plug from the power source before making any adjustments, changing accessories, or storing the tool to avoid accidental starting of the tool. - Page 4 Caveat To avoid mistakes that could cause serious injury, do not plug in the band saw until you have read and understand the following rules. • Read and become familiar with this entire instruction manual. Learn about the tool's applications, limitations, and possible dangers. •...
- Page 5 Caveat Exposure to excessive noise levels can result in permanent hearing loss. Always wear proper hearing protection, such as safety ear muffs or safety ear plugs. This will reduce noise levels when using the band saw. Additional safety instructions for the band saw To avoid injury from unexpected movement, make sure the saw is on a firm, level •...
-
Page 6: Technical Data
power cord or plug, do not connect the equipment-grounding conductor to a live terminal. Consult an electrician or service person if you do not fully understand the • grounding instructions, or if you are not sure if the tool is properly grounded. Caution Always check that the outlet in question is properly grounded. -
Page 7: Product Description
sheet width 6.35mm table size 300x300mm (12”x12”) Net weight 16kg max. depth of cut 80mm (3-1/8”) max. cutting width 230mm (9”) Product description 1. Saw blade tension screw 9. Additional support 2. Saw blade tension lever 10. Front leaf guide screw 3. -
Page 8: Assembly And Operation
17. Lower blade guide 21. Upper wheel 18. Transmission belt 22. Engine 19. Lower wheel 23. Saw blade peephole 20. Door Caveat This band saw is designed for indoor use only. Do not expose it to rain or use it in damp places. - Page 9 M6x30 screw and M5x20 hexagonal screw Table tilt lock lever Hex keys 3, 4, 5mm round head screws Mounting Caveat Before assembling the band saw, remove the safety key and unplug the power cord from the electrical outlet. The power cord must remain unplugged whenever you are working on your band saw.
- Page 10 Loosen the front blade guide screw to adjust the front blade guard. • • Attach the front blade guard and retighten the front blade guide screw. Secure the table in position with the adjusting screw (5) and the table tilt lock •...
- Page 11 Squeeze the table tilt lock lever to secure. • lock lever Dust extraction nozzle tilt meter Table tilt adjustment screw Connect a dust collection system (FIG.8) The band saw includes a dust extraction nozzle that is located on the motor side of the band saw.
- Page 12 Caveat Disconnect the band saw from the power source when changing or adjusting blades. Wear leather gloves when handling band saw blades. Do not wear gloves when using the saw. • Turn the blade tension lever on the back of the tool clockwise until it locks into position to release blade tension (see Figure 9).
- Page 13 Note: Adjust the blade guides only after the blade has been properly tensioned and aligned. Upper Blade Guides (Fig. 10-11) bearings socket head bolt bearings guide pin Screw Upper blade guides employ guide pins for side support and a ball bearing for rear •...
- Page 14 Screw guide pin bearings socket head bolt sheet thickness • Sheet thickness describes the distance between the sides of the sheet. A thicker blade has more stiffness and stronger teeth. A thick, narrow blade is used to cut curves, while a thin, wide blade is used to •...
-
Page 15: Maintenance
Tilt table to desired position by turning screw to adjust table tilt. • Lock the table in position by tightening the lock handle. • Miter gauge (Fig.13) angle guide Use an angle fence to secure and hold the workpiece at the desired angle to prevent angled cuts. -
Page 16: Problem Solving
Many accidents occur particularly in connection with problems and failures. So please note: 1. Always unplug before performing maintenance. 2. Check that all safety devices are operational again after each service. Note: In case the problem persists, contact your official Total dealer. Problem Possible cause Solution... -
Page 17: Exploded View
Blade too thin for the job Engine (Typical when cutting slippery or Use a blade with coarser teeth running too soft material) Excessive dirt and chips Clean thoroughly The saw does Have a qualified electrician check the loose electrical connections not start electrical connections Environment... - Page 18 BAND SAW...


Need help?
Do you have a question about the TS730301 and is the answer not in the manual?
Questions and answers