Table of Contents
Advertisement
Quick Links
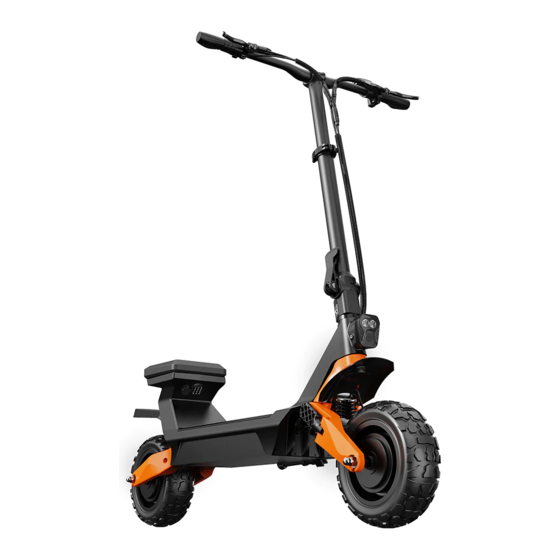
Fiido Beast
Folding Electric Scooter
D e ar u s e r s ! B ef o r e e n j o y i n g t h e r i d e , p l e as e b e s ur e t o r e ad t h e u s e r m a nu a l c ar e f u l l y , u nd ers ta nd th e re l ev a nt op e ra ti on
s p e c i fi c a t i o n s , a n d t a k e g o o d c a r e o f t h i s u s e r m an ua l a n d th e p r o d u c t c er ti fic a te a c co m p any i ng the ri d e .
D o n 't us e t h e E - s c o o t er u n t i l y o u f u l l y kn o w a b ou t t h e f u nc t io n.
Advertisement
Table of Contents

Related Manuals for Fiido Fiido Beast


Summary of Contents for Fiido Fiido Beast
- Page 1 Fiido Beast Folding Electric Scooter D e ar u s e r s ! B ef o r e e n j o y i n g t h e r i d e , p l e as e b e s ur e t o r e ad t h e u s e r m a nu a l c ar e f u l l y , u nd ers ta nd th e re l ev a nt op e ra ti on s p e c i fi...
- Page 2 2. Please operate by the instruction of the user manual, Fiido Beast is a recreational product. Before mastering riding skills, you need to practice. User is responsible for any injuries or damage caused by a rider's inexperience or failure to follow the instructions in this document.
- Page 3 8. Do not attempt to charge while the charger or power supply is wet, please follow the local safety regulations if you need to charge the E-scooter in public area. 9. Only use original parts from Fiido. 10. Any engineering/structure modifications to the product will void the warranty.
-
Page 4: Table Of Contents
CONTENTS 1.Product introduction 2. User guide 3. Maintenance precautions 4. Service directory 1.1 Product overview 2.1 Installation guide 3.1 Precautions 4.1 Troubleshooting methods 1.2 Packing list 2.2 First ride 3.2 Scooter maintenance & repair 4.2 Specifications 1.3 Product diagrams 2.3 keyless security system 3.3 Motor maintenance &... -
Page 5: Product Introduction
1. Product introduction 1.1 Product overview 1.2 Packing list 1.3 Product diagrams 1.4 Function description... -
Page 6: Product Overview
It is the perfect combination of electric scooter and go-kart. No matter for city commuting or off-road riding, it's easy to ride for both use. Fiido Beast redefines the riding way and use scenario of electric scooter. -
Page 7: Packing List
1.2 Packing list Scooter parts Stem*1 Riser*1 Scooter*1 Handlebar*1 Accessories Charger*1 User manual card*1 Magic strap*1 Tools Y-Type Allen Wrench*1 *Please carefully check whether all items are complete and intact. If there is any problem such as missing or damaged parts,please contact the official after-sales team immediately. -
Page 8: Product Diagrams
1.3 Product diagrams Handlebar Riser Stem Clamp Charging Port Stem Keyless Security System Stem Quick Release Saddle Front Light Rear Light Fender Front Suspension Rear Suspension Disc Brake Disc Brake Rear Motor Front Motor Front Tire Kickstand Battery Rear Tire Footrest for Go-Kart Position *Non professionals are forbidden to disassemble and assemble the battery.Please contact after-sales team for assist. -
Page 9: Function Description
USB Charging Port Rear/Dual Drive Switching Handle (For emergency charge ONLY) (Flip outward to switch the rear/dual driving mode) Battery Keyless Security System (Input the password to turn on the power or unlock the battery) Charging Port (Insert the Fiido charger ONLY) -
Page 10: User Guide
2. User guide 2.1 Installation guide 2.2 First ride 2.3 Keyless security system 2.4 Charging instructions 2.5 Folding instructions... -
Page 11: Installation Guide
2.1 Installation guide The basic installation of the E-scooter has been completed before leaving the factory. After receiving the scooter, you only need to unfold the stem and assemble the handle bar. Install the stem ① Take out the stem and riser from the accessories ②... - Page 12 Install the handlebar 15°-20° ① Remove the handlebar screws, hang the handlebar ② Using the hex wrench in the packing case, twist the four and keep the center of the handlebar in the stem, then screws into holes on the top of handlebars and lock them adjust the handlebar direction so that the brake level tightly (install two screws on each side), then the handlebar is in the direction of 15°~20°...
-
Page 13: First Ride
2.2 First ride Before first ride, please follow the installation guide to install components properly, check all the screws are well tightened, ensure sufficient power and wear protective gears. Step 1:Adjust the stem Please check whether the handlebar quick-release screw is tighted whether the handlebar angle is 90° with the stem. - Page 14 Step 3:Usage method E-Scooter mode or go-kart mode can be selected according to the cycling road conditions and user’s own needs. ① E-Scooter mode:Stand on the deck with one foot, push back on the ground with the other foot, start sliding.Then put the other foot on the deck,keep the balance, twist the right throttle for acceleration. ②...
- Page 15 Step 4:Mode choosing ① Gear switch:Before starting riding, please choose gear 1 for the safety consideration, later you can switch the gear according to the cycling road conditions and your own needs. Gear 1 is the ECO mode, which provides lower power/speed (1-15km/h) Gear 2 is the standard mode, which provides medium power/speed (1-20km/h) Gear 3 is the sport mode, which provides stronger power/speed (1-25km/h) ②...
-
Page 16: Keyless Security System
2.3 Keyless security system The original password is “012345”. Once the afferent password includes 012345, the coded lock may be able to turned on. Therefore we strongly suggest that after receiving the scooter, please customize the password as soon as possible.Please follow the following steps: Password modification steps 1. - Page 17 The password is used to turn on the E-scooter power, and remove the battery. Please follow the following steps: Turn on power 1. Input six-digit password, then click the“ON”to start 2. When the power supply starts successfully, there will the E-scooter power. be a long beep.If the startup fails, there will be two short beeps.
-
Page 18: Charging Instructions
2.4 Charging instructions The battery comes with a small amount of electricity, before the first time use, please make sure to charge it to full power before riding. Charging 1. Charging connection: Connect the charging interface to the charging port, then connect the power plug to the power socket. -
Page 19: Folding Instructions
2.5 Folding instructions Fold the stem ① Open the stem clamp. ② Lower the riser downward to the end, then close the clamp. ③ Press the safety hook , open the stem quick release ④ Gently turn the stem downward to the end to finish and keep it in open status. -
Page 20: Maintenance Precautions
3. Maintenance precautions 3.1 Precautions 3.2 Scooter maintenance & repair 3.3 Motor maintenance & repair 3.4 Controller maintenance & repair 3.5 Battery maintenance & repair... -
Page 21: Precautions
3.1 Precautions (3.1.1)Users should pay attention to the safety of scooter use 1. No parking in building foyers, evacuation stairs, walkways and safety exits. 2. No charging in residential buildings. Charging should be far away from combustible, and no longer than 15 hours. 3. - Page 22 (3.1.3)Examination before riding: please repair in time or go to the local maintenance point for repair, if there’s any abnormality. 1. Turn on the power, check the indicator light is normal, and the power supply is sufficient. 2. To confirm the normal power use, please lift the rear wheel make it off the ground(under the rear drive motot status). 3.
-
Page 23: Scooter Maintenance & Repair
3.2 Scooter maintenance & repair 1. The scooter has been adjusted well before leaving the factory. Please contact after-sales team if there’s any problems. 2. Make sure tire pressure in normal conditon -350kPa(50psi) . 3. Make sure the main parts like handlebar, stem. saddle, front/rear lights and brakes , axle, wheels are in normal use, nut and screw are tightened . -
Page 24: Battery Maintenance & Repair
3.5 Battery maintenance & repair 1. Battery life is closely related to how you use the scooter. Frequently charge the battery when not in use. 2. It is recommended to charge for 13 hours each time, and the longest time is not more than 15 hours. Lithium battery has no memory function, can be charged under any battery power capacity. -
Page 25: Service Directory
4. Service directory 4.1 Troubleshooting methods 4.2 Specifications 4.3 Warranty coverage 4.4 Repair record... -
Page 26: Troubleshooting Methods
4.1 Troubleshooting methods Fault code description Fault code Fault phenomenon Communication issues Throttle issues Brake lever issues Motor hall issues Motor issues Controller issues General fault Fault phenomenon Fault cause Rule out way Poor contact of regulating handlebar Change regularing handlebar Poor contact of brake cut-off... -
Page 27: Specifications
4.2 Specifications Property index Item Fiido Beast Before folding: Length*Width*Height (mm) 1310*710*1200 After folding: Length*Width*Height (mm) 1310*710*570 Product size Tires 90/65-6.5 Product weight Net weight (kg) 37.5 Maximum load (kg) Riding requirement Applicable age Applicable height 155cm(5.0') - 200cm(6.5') Serial numbe Location... - Page 28 Rated power (W) F500, R800 Rated speed(r/min) Motor Moter type Brushless gearless motor Undervoltage protection (V) 40±1 Controller Overcurrent protection (A) F18, R24 Input voltage (V) 100-240 Output voltage (V) 54.6 Charger Output current (A) Charging hours (h) Model LBC100201 Manufacturer SHENZHEN ATEN TECHNOLOGY CO.,LTD Front light...
-
Page 29: Warranty Coverage
4.3 Warranty coverage (4.3.1)What does this warranty cover? This warranty covers any defects in material or workmanship under normal use during the "Warranty Period". Warranty does not cover tyres, tubes, brake pads or chains. (4.3.2)Warranty scope and period Item Parts Guarantee time Service Natural deformation, desoldering fracture phenomenon,... - Page 30 For your own safety, do not modify the dirt bike without authorisation from Fiido. Fiido or its partners do not accept responsibility or liability for any loss, damage, cost or expense caused as a result...
-
Page 31: Repair Record
4.4 Repair record Warranty card Company User Phone Name Address Purchase date Color Model Order No. Frame No. Motor No. Repair record Date Maintenance Remarks... - Page 32 Shenzhen Fiido Technology Development Co.,Ltd Address:Shenzhen Fiido New Energy Technology Co.,Ltd 301,No.146,Hengping Road,Baoan Community,Yuanshan Street, Longgang District,SHENZHEN GUANGDONG 51800,CHINA Website:www.fiido.com Contact us:support@fiido.com If you have any questions or suggestions about this user manual, please contact us via following mail address.
Need help?
Do you have a question about the Fiido Beast and is the answer not in the manual?
Questions and answers