TMG PRO Series Product Manual
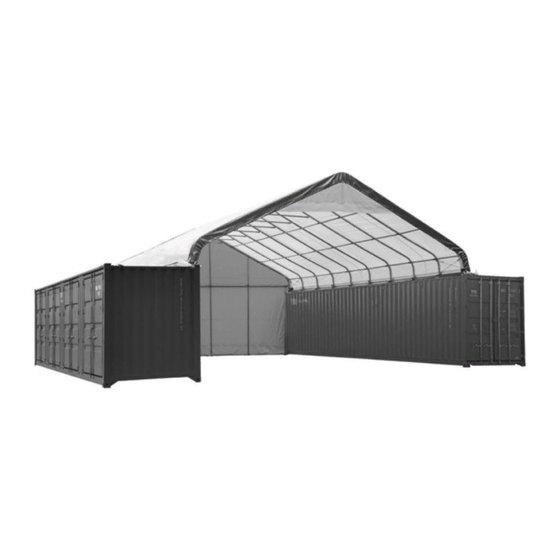
Container shelter 30ft x 40ft
Hide thumbs
Also See for PRO Series:
- Product manual (119 pages) ,
- Product manual (16 pages) ,
- Product manual (41 pages)

Related Manuals for TMG PRO Series


Summary of Contents for TMG PRO Series
-
Page 2: Main Specifications
Main Specifications : Overall assembled size : W9.15 x L11.97 x H3.0 (m) / 30 x 40 x 10(ft) Ridge Peak Height : 3 m / 10ft + container height Prior to assembly Please read the instructions carefully before installation. It is very important to follow your local safety regulations and industry standards during installation. - Page 3 Do not keep heat sources near the fabric cover. Keep the building surroundings clear at all times. TMG-ST3040CVF Part List Picture Description Quantity Peak arch tube Middle rafter tube Middle rafter tube Shoulder tube Shoulder tube...
- Page 4 Ratchet Ratchet straps Mounting base Cable connection plate Top cover tension tube (for both bottom sides) Top cover tension tube Rear cover tension tube Door frame lower tube (rear truss) Door frame lower tube (rear truss) Door frame upper tube (rear truss) Door frame upper tube (rear truss)
- Page 5 Hex bolt M10x30mm Hex bolt M10x50mm Self locking bolt M8x80mm Top cover Front cover panel Rear cover panel Braided rope (120m) Scratch resistant tape Water plug Expansion bolt ф16x150mm Step 2 : Place the containers making sure they are parallel and the correct width apart.
- Page 6 (2) Middle column baseplate (#4A) (3) Middle column baseplate (#4B) (10) Expansion bolt (#26) Picture 1 Step 3 : Connect all trusses Layout all truss components on the ground in the correct configuration before bolting them together. The building includes 10 trusses : (1) front truss, (1) rear truss, and (8) middle trusses. The front and the rear truss are to install with the fabric panel (#22 and #22A).
- Page 7 (1) Peak arch tube (#1) (2) Middle rafter tube (#2A) (2) Shoulder tube (#3) (1) Ceiling cross bar (#6A) (1) Ceiling cross bar (#6B) (2) Hex bolt (#19) (8) Half round head bolt (#17) (2) Hex bolt M10x30mm (#18) (2) Self locking bolt M8x80mm (#20) Picture 2 Parts used to install the rear truss in this step (refer to Picture 3) : (1) Peak arch tube (#1)
- Page 8 Parts used to install the middle truss in this step (refer to Picture 4) : (1x8) Peak arch tube (#1) (2x8) Middle rafter tube (#2) (2x8) Shoulder tube (#3) (1x8) Ceiling cross bar (#6) (8x8) Self locking bolt M8x70mm (#17) (2x8) Hex bolt M10x30mm (#18) Picture 4 Lay down all (10) trusses on the ground when the assembly is all completed and before...
- Page 9 Step 4 : Put up all trusses Install each truss on the base tube. Use bolt (#17) to secure the truss to the base tube firmly. We recommend to use a crane or forklift to lift the truss and have 2 to 3 people on site to work together.
- Page 10 Picture 7 Step 5 : Install the remaining parts on the front truss (refer to picture 8) Components are : (1) Door frame upper tube (#12A) (1) Self locking bolt M8x80mm (#20) Picture 8 W W W . T M G I N D U S T R I A L . C O M P 9 / 13 T o l l F r e e : 1 - 8 7 7 - 7 6 1 - 2 8 1 9...
- Page 11 Step 6 : Install the remaining parts on the rear truss (refer to picture 9) Components are : (4) Rear cover tension tube (#9B) (2) Door frame lower tube (#10) (3) Door frame lower tube (#11) (2) Door frame upper tube (#11A) (1) Door frame upper tube (#12) (2) Roof purlin (#13) (1) Roof purlin (#14)
- Page 12 Overall structural inspection : Check all components and trusses to ensure the entire structure is rectangular as specified in. All trusses must be 90 degrees straight up from the container. Secure and tighten all bolts and nuts on this step. But do not over tie! Otherwise you might damage the tubes or components.
- Page 13 Step 9 : Install the cover Expand the top cover (#21) on the ground, pull it carefully from one side into place, stay away from snagging on sharp edges, bolts, etc. Use the braided rope (#23) to tie both sides to the bottom tube rebar through the grommets. Also pull the front and rear cover and tie to the trusses.
-
Page 14: After Installation
After Installation Walk around and inspect the building periodically to make sure the parts are firmly fixed and the whole building is well supported. Check all bolts and hardware connectors to make sure they are in place and tightened. Check the base plates, adjust the ropes if necessary and clean the cover regularly.
Need help?
Do you have a question about the PRO Series and is the answer not in the manual?
Questions and answers