urmet domus IPerCom VOG 7 1761 Configuration Booklet
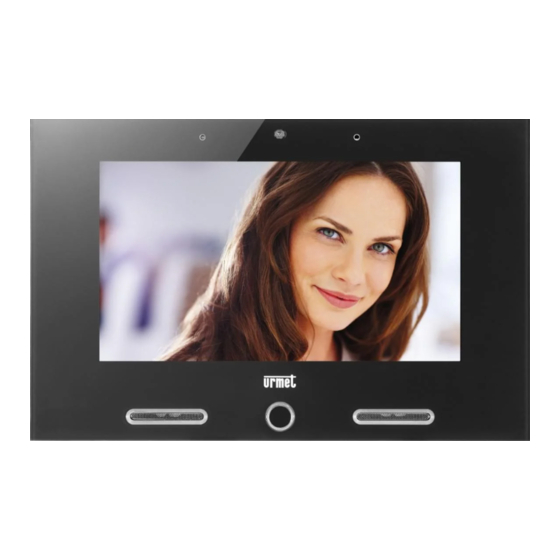
Ip 7” video door phone, white/black
Hide thumbs
Also See for IPerCom VOG 7 1761:
- Booklet (68 pages) ,
- User booklet (60 pages) ,
- Instructions for use manual (24 pages)

Related Manuals for urmet domus IPerCom VOG 7 1761


Summary of Contents for urmet domus IPerCom VOG 7 1761
- Page 1 Mod. 1761 DS 1761-026 LBT 21041 Interactive Links BBBBBBBBBBBB IP 7” VIDEO DOOR PHONE Ref. 1761/31 (White) Ref. 1761/33 (Black) PARAMETER CONFIGURATION BOOKLET...
- Page 2 The information contained in this booklet has been carefully collected and checked; however, the manufacturer may not be held responsible for any errors or omissions. The manufacturer reserves the right to introduce at any time and without notice improvements or changes in the products and services described in the booklet.
-
Page 3: Table Of Contents
The features described in the following booklet refer to version: 2.1.0_49_VER_7_8_0_R7 of the IP 1761/31 and 1761/33 Video door phone. Interactive Links The document contains INTERACTIVE LINKS for faster and more efficient consultation. INDEX 1. CONFIGURATIONS ..........................4 Configuration of video door phone parameters ................4 1.1.1 How to change the Home Page ..................4... -
Page 4: Configurations
CONFIGURATIONS The following booklet describes the parameter configurations of video door phone Ref. 1761/31 and /33. The parameter and function configurations are divided into two groups: • configuration of video door phone parameters and functions; • configuration of parameters and functions of the Video Door Phone application CONFIGURATION OF VIDEO DOOR PHONE PARAMETERS 1.1.1 How to change the Home Page To change the video door phone Homepage, follow the procedure below:... -
Page 5: Changing The Display Wallpaper
1.1.2 Changing the display Wallpaper To change the display Wallpaper, follow the procedure below: • Turn on the screen, if off, by tapping it at any point or by pressing the Home button. • Press the icon to access the Top Page. •... -
Page 6: How To Change The Time Format
1.1.4 How to change the time format To change the time format of the Video door phone, follow the procedure below: • Turn on the screen, if off, by tapping it at any point or by pressing the Home button. •... - Page 7 1.1.5.1 Restarting the system The following function allows restarting the video door phone system. To restart, proceed as follows: • In the maintenance menu, press Reboot. • A pop-up window is displayed on the screen to confirm the operation. DS1761-026...
- Page 8 • Press the Confirm button to confirm the operation and restart the video door phone. Press the Cancel button to cancel the operation and close the pop-up window. 1.1.5.2 Reset User Data The User Data Reset control deletes the stored data, i.e. existing chats, manually added contacts and the call log.
- Page 9 1.1.5.3 Reset factory settings The reset to factory settings deletes all configurations made on the video door phone. To reset to factory settings, proceed as follows: • In the maintenance menu, press Factory Reset. • A pop-up window is displayed on the screen to confirm the operation. •...
- Page 10 1.1.5.4 Saving user data to SD card Saving user data to SD card allows saving the configurations made by the user to an SD card. To save user data on an SD card, insert the memory card into its slot in the video door phone and follow the procedure below: •...
- Page 11 1.1.5.5 Restoring user data from SD card Restoring user data from SD card allows restoring a configuration previously saved on SD card on the video door phone. To restore user data, insert the memory card containing the previously saved data into its slot in the video door phone and follow the procedure below: •...
- Page 12 1.1.5.6 Firmware version of the video door phone It is possible to view the firmware version of the video door phone. • In the maintenance menu, scroll through the various items until displaying Version. The firmware version of the video door phone is displayed on the right, eg: 2.1.0_49_7_8_0_R7. 1.1.5.7 Ipercom Configuration It is possible to view the date of the last modification to the system configuration of the Ipercom system.
-
Page 13: Configure The Networks
1.1.6 Configure the Networks To configure the networks of the video door phone, follow the procedure below: • Turn on the screen, if off, by tapping it at any point or by pressing the Home button. • Press the icon to access the Top Page. •... -
Page 14: Wifi Network
1.1.6.1 Local LAN Port This network is used to connect the Video door phone to a second LAN using a wire (with Internet access). The parameters that can be configured are the following ones: • IP address: i.e. the address which identifies the Video door phone on the LAN (enter a static IP address coherent with the IP address of the router and its subnet mask;... -
Page 15: Show Configuration Qr Code
Select the network you want to connect to, enter the WiFi network password and configure the IP address setting modes. • DHCP: by selecting the IP address setting in DHCP mode all network parameters are automatically configured. A DHCP server must be present in the network. •... - Page 16 • Press Save Screen item to display the screen for activating and setting the function. • Activate the function by pressing the corresponding button in the upper right corner. • It is possible to select 3 types of Screen Saver: –...
-
Page 17: Activating The Screen Lock Function
The Save Screen function does not inhibit any of the video door phone functions of the device. • Press the icon to display a window where the various configuration parameters are listed. By selecting the various items from the menu and submenu, it is possible to see the value set for each video door phone parameter. -
Page 18: Configuration Of Video Door Phone Application Parameters
CONFIGURATION OF VIDEO DOOR PHONE APPLICATION PARAMETERS 1.2.1 How to change video door phone tunes To change video door phone tunes, follow the procedure below: • Turn on the screen, if off, by tapping it at any point or by pressing the Home button. Press the icon to access the Top Page and then the icon for the video door phone... -
Page 19: How To Change Screen Settings
• Tap the writing Audio. A window opens with the items “Ringtone Volume” and “Audio Volume”. • Tap Ringtone Volume to change the volume of ring tones, Audio Volume to change the volume of your speakers. At the right end on the same lines, the current volume setting is shown. •... -
Page 20: Device Mode Settings
1.2.3.1 Large buttons mode To activate the following mode, follow the procedure indicated: • Press the Video Appearance on Call parameter (see previous paragraph) and select Big Buttons mode. • When the following mode is activated, the call screens are displayed in 4:3 mode and the button icons appear larger than in the standard mode. - Page 21 • Press the Device Mode Settings item to display the screen with the configurable functions listed: The following chapters describe the functions shown above. 1.2.4.1 How to automatically open the door The following parameter allows opening the door automatically when a call is received without the need to answer, to activate the function follow the procedure below: •...
- Page 22 1.2.4.2 Video Door Phone Video Voicemail Follow the procedure below to activate or change the video door phone message service settings: • Press the Device Mode Settings parameter and then select Video Voicemail. • The screen with the various message service settings is displayed (the current value is shown to the right of each setting;...
- Page 23 1.2.4.3 Call divert settings To activate or change the settings for the call diversion function, follow the procedure below: • Press the Device Mode Settings parameter and then select Call divert settings. • The screen with the various function settings listed is displayed (the status of each setting is shown to the right): –...
- Page 24 – SIP ID: The following parameter allows displaying SIP ID (set in an Ipercom version lower than 2.1) of the CallMe account on which you receive calls on your smartphone The SIP ID is visible only if the CallMe Manager support has not been enabled during system configuration and if the “Call forwarding URI on MAX”...
-
Page 25: Accessibility
3. On the video door phone, press “Activate/Verify Call Forwarding Service”. 4. On the smartphone where the CallMe App is installed, start the application. 5. Press the button: “Settings” → “Service Management” → “My Devices” → “Add”. 6. The QR Code reader application on your smartphone is launched. Use your smartphone to scan the QR code displayed on the video door phone. - Page 26 • Press the Accessibility item to display the screen listing the different ways to use the video door phone: The following chapters describe the functions shown above. 1.2.5.1 Touchless actions The following parameter allows enabling gesture commands or vocal commands on the video door phone. •...
- Page 27 1.2.5.2 Visually impaired user mode The following parameter enables and configures the Visually impaired mode parameters. • Press the Accessibility parameter and then select Visually impaired mode. • The screen with the various settings and parameters of the usage mode is displayed. In this mode, it is not possible to access the address book of the video door phone due to the lack of visual feedback from the user.
- Page 28 1.2.5.2.1 Using visually impaired user mode Below is an example of the main screen with visually impaired user mode active. With the active mode, it is no longer possible to display all the various icons on the normal main screen (e.g.
- Page 29 After answering the call, it will be possible to open the door by means of a single tap on the screen. The video door phone will play the following voice message “THE DOOR IS OPEN”. Double-tap to open the gate and the video door phone will play the following voice message “THE GATE IS OPEN”. You can end the call by swiping left on the screen.
-
Page 30: Network Settings
1.2.6 Network settings The following menu item allows displaying the network settings of the video door phone. • Switch on the screen by tapping it any point or by pressing the Home button. • Press the icon to access the Top Page and then the icon for the video door phone application. -
Page 31: How To Restart Video Door Phone Application
• Select the required setting or tap the X icon at the top right to close the window without making any changes. WARNING! The Panic alarm function requires that: — the video door phone system has a switchboard; — the system has been properly set up (for more information, check the Ipercom manual on www. urmet.com);... -
Page 32: Information On The Software Version Of The Video Door Phone Application
1.2.9 Information on the software version of the video door phone application To view information on the software version of the video door phone application, follow the procedure below: • Switch on the screen by tapping it any point or by pressing the Home button. •...
Need help?
Do you have a question about the IPerCom VOG 7 1761 and is the answer not in the manual?
Questions and answers