Table of Contents
Advertisement
Advertisement
Table of Contents

Related Manuals for thomann Millenium NonaPad


Summary of Contents for thomann Millenium NonaPad
- Page 1 NonaPad sampling percussion pad user manual...
- Page 2 Thomann GmbH Hans-Thomann-Straße 1 96138 Burgebrach Germany Telephone: +49 (0) 9546 9223-0 Internet: www.thomann.de 26.01.2022, ID: 526188 (V2)
-
Page 3: Table Of Contents
Table of contents Table of contents General information......................4 1.1 Further information......................4 1.2 Notational conventions....................4 1.3 Symbols and signal words................... 5 Safety instructions......................... 6 Features............................7 Connections and operating elements................8 Operating..........................11 5.1 Menu control........................11 5.2 Playing drum pads......................11 5.3 Selecting a drum kit..................... -
Page 4: General Information
1.1 Further information On our website (www.thomann.de) you will find lots of further information and details on the following points: Download This manual is also available as PDF file for you to download. -
Page 5: Symbols And Signal Words
General information Instructions The individual steps of an instruction are numbered consecutively. The result of a step is indented and highlighted by an arrow. Example: Switch on the device. Press [Auto]. ð Automatic operation is started. Switch off the device. Cross-references References to other locations in this manual are identified by an arrow and the speci‐... -
Page 6: Safety Instructions
Safety instructions Safety instructions Intended use The Percussion Pad converts digital trigger signals from drum pads to various percus‐ sion sounds. Use the device only as described in this user manual. Any other use or use under other operating conditions is considered to be improper and may result in personal injury or property damage. -
Page 7: Features
Features Features Nine velocity-sensitive, freely programmable drum pads 608 preprogrammed sounds 30 preprogrammed drum kits 512 MB memory for WAV samples Recording function Programmable 3-band equalizer Reverb effect, Looper, Limiter Metronome function Two trigger inputs Mounting plate for snare drum stand optionally available NonaPad... -
Page 8: Connections And Operating Elements
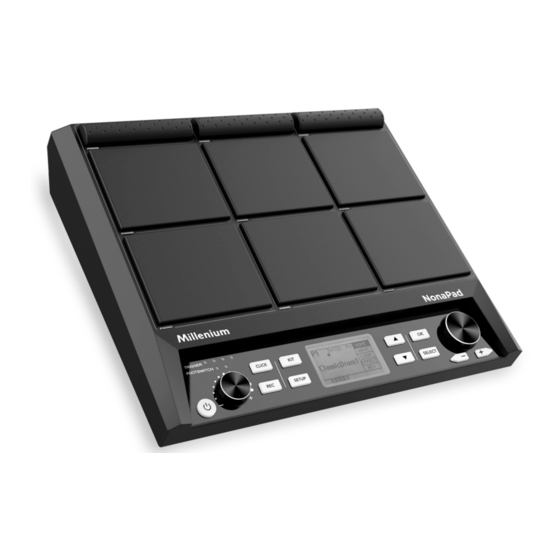
Connections and operating elements Connections and operating elements Front panel ö & sampling percussion pad... - Page 9 Connections and operating elements 1 Nine velocity-sensitive and freely programmable drum pads. When playing a pad, the respective LED below the pad lights up. 2 LED indicators Light up as soon as external triggers or foot switches are used, which are connected via the input sockets [TRIG 3/4], [TRIG 1/2], [FS2] and [FS1] on the rear of the device.
- Page 10 Connections and operating elements 15 [INPUT] Connection socket for the supplied 9V power adapter. 16 [TRIG 3/4] Input socket for connecting an external trigger, designed as ¼" jack socket. The two left [TRIGGER] LEDs on the front of the device light up as soon as a signal is received from the connected external trigger.
-
Page 11: Operating
Operating Operating 5.1 Menu control Press to select the desired menu. ð The display shows the respective submenus. When the display shows the desired menu, press [SELECT] repeatedly to switch between the submenus. Use the rotary control or press [–/+] to change the respectively displayed value. Press [OK] to confirm the new value. -
Page 12: Selecting A Sound
Operating 5.3.1 Home display structure ö Shows the number of the currently selected drum kit. ‘P1’ … ‘P30’ show the preset drum kits. ‘C1’ … ‘C20’ show the user drum kits that can be imported via a USB flash drive (USB stick). - Page 13 Operating 5.4.1 Sound displays structure ö Shows the currently selected pad. Shows the sample level of layer mode. In layer mode, the pads can be assigned in such a way that, depending on the intensity of the strike, different sounds in different volumes with different effects are generated on the same pad.
-
Page 14: Loops
Operating 5.5 Loops The percussion pad offers 17 pre-installed loops, as well as the option to record your own loops using the recording function. Hit the pad you want to play the loop back after you hit it. Press to select the ‘LOOP’ menu. ð... - Page 15 Operating 5.5.2 Recording loops 5.5.2.1 Record display structure ö Shows the current recording status. ‘START’ : The device is record-enabled. ‘STOP’ : The recording has ended. Confirm the selection with [OK]. Shows the name of the currently selected drum kit to which the currently edited pad is linked.
- Page 16 Operating 5.5.2.2 Start recording Hit the desired pad for which you want to record a loop. Press [REC] to open the record menu. Press [SELECT] repeatedly to switch between submenus. Use the rotary control or press [–/+] to change the respectively displayed value. Press to select ‘START’...
-
Page 17: Effects
Operating 5.5.2.5 Delete recording Press to select ‘DELETE’ . Use the rotary control or press [–/+] to select a recording. Press [OK] to delete the recording. ð The display shows ‘delete is complete’ and the recording was deleted without a security query. 5.6 Effects You can assign several effects to each single drum kit. -
Page 18: Settings
Operating 5.6.1 Effects display structure ö Shows the currently selected pad. Shows the signal portion that is sent to the FX channel. Use the rotary control or press [–/+] to change the signal portion. Confirm the selection with [OK]. Shows the 3-band equalizer &... - Page 19 Operating Press [OK] to confirm the new value. ð The display shows ‘Save successfully!’ . 5.7.1 ‘ADV’ display structure ö Shows the currently selected pad. Shows the tuning function. Use the rotary control or press [–/+] to adjust the pitch of the selected pad in 12 half-tone increments up or down.
-
Page 20: Favourites
Operating 5.8 Favourites The percussion pad offers the ability to create a user-defined order of drum kits as favourites and to switch between them quickly. The device supports five kit chains, each of which can be assigned eight different drum kits in any order. Press to select the ‘KITCH’... -
Page 21: Metronome
Operating 5.9 Metronome Press [CLICK] to turn the metronome on and off. ð The display shows the currently set tempo and the corresponding sub‐ menus. Setting the tempo Press to select the menu item ‘TAP’ . Use the rotary control or press [–/+] to change the metronome tempo between ‘20 bpm’... -
Page 22: Advanced Settings
Operating 5.10 Advanced settings 5.10.1 MIDI settings Press [SETUP] to enter the settings menu. ð The display shows the respective submenus. Press to select the menu item ‘MIDI’ . ð The display shows the MIDI value for each pad. Hit a pad and the corresponding MIDI value will be highlighted on the display. Use the rotary control or press [–/+] to set the MIDI value between ‘0’... - Page 23 Operating 5.10.2 Specific settings 5.10.2.1 Internal pads Hit the pad you want to edit. Press [SETUP] to enter the settings menu. ð The display shows the respective submenus. Press to select the menu item ‘PAD’ . Press [SELECT] repeatedly to switch between submenus. ö...
- Page 24 Operating 5.10.2.2 External foot switches You can connect external foot switches via inputs [FS1] and [FS2] and make specific settings on them via the ‘PAD’ menu. Hold down the foot switch and press [SETUP] to open the settings menu. ð The display shows the respective submenus. Press to select the menu item ‘PAD’...
- Page 25 Operating 5.10.3 Trigger settings You can connect external drum pads via the trigger inputs [TRIG 1/2] and [TRIG 3/4] and make specific settings on them via the ‘TRIG’ menu. Press [SETUP] to enter the settings menu. ð The display shows the respective submenus. Press to select the menu item ‘TRIG’...
-
Page 26: Using A Usb Flash Drive (Usb Stick)
Operating 5.10.4 Display settings Press [SETUP] to enter the settings menu. ð The display shows the respective submenus. Press to select the menu item ‘DISP’ . Press [SELECT] repeatedly to switch between submenus. ö Shows the display's contrast. Use the rotary control or press [–/+] to set the display contrast between ‘0’... - Page 27 Operating 5.11.1 User Samples Press [SETUP] and [OK] simultaneously to enter the USB menu. ð The display shows the respective submenus. Press to select the menu item ‘WAVE’ . ð The display shows the user samples imported to the Percussion Pad. Use the rotary control or press [–/+] to switch between the user samples.
- Page 28 ‘pad_wave’ and store the user samples to be imported as WAV files in it. Alternatively, use the software ‘Wave Manager’ which is available for down‐ load on the product page of our homepage www.thomann.de to create a file named ‘pad-content.hppd’ containing the user samples to be imported as WAV files.
- Page 29 Operating 5.11.4 Exporting data Press [SETUP] and [OK] simultaneously to enter the USB menu. ö ð The display shows the respective submenus. Press to select the menu item ‘SAVE’ . ð The display shows the respective submenus. Press [SELECT] repeatedly to switch between submenus. Indicates that a USB flash drive is connected.
- Page 30 Operating 5.11.5 Information about the USB flash drive (USB stick) Press [SETUP] and [OK] simultaneously to enter the USB menu. ö ð The display shows the respective submenus. Press to select the menu item ‘INFO’ . ð The display shows the respective submenus. Press [SELECT] repeatedly to switch between submenus.
-
Page 31: Device Version
Operating 5.12 Device version Press [SETUP] to enter the settings menu. ð The display shows the respective submenus. Press to select the menu item ‘VER’ . ð The display shows the versions of the software operating the device. Shows the version of the internal sounds. ö... -
Page 32: Firmware
5.14 Firmware The current firmware list is available for download on the product page of our home‐ page www.thomann.de. Save the downloaded firmware to a USB flash drive (USB stick). The percussion pad automatically detects the firmware update during installation. -
Page 33: Technical Specifications
Technical specifications Technical specifications Input connections Power supply 1 × socket for power adapter USB port 1 × USB type A USB-to-host interface 1 × USB type B Trigger connection 2 × 1/4" jack socket Foot switch 2 × 1/4" jack socket MIDI IN 1 ×... -
Page 34: Midi Implementation Chart
MIDI implementation chart MIDI implementation chart Function Sent Received Notes Basic Channel 1 - 16, OFF Memorized Mode Mode 3 Mode 3 Note Number 0 - 127, OFF 0 - 127, OFF Memorized Velocity Note Note ON Yes, 99H, V = 1 - 127 Note OFF Yes, 89H, V = 0... -
Page 35: Troubleshooting
Troubleshooting Troubleshooting Problem Possible causes and solutions The percussion pad does not work properly. 1. Simultaneously press , to restart the percussion pad. The percussion pad does not start after importing the sound 1. Simultaneously press , [KIT] and [OK] to delete the faulty kits and drum kits. -
Page 36: Plug And Connection Assignment
Plug and connection assignment Plug and connection assignment Introduction This chapter will help you select the right cables and plugs to connect your valuable equipment in such a way that a perfect sound experience is ensured. Please note these advices, because especially in ‘Sound & Light’ caution is indicated: Even if a plug fits into the socket, an incorrect connection may result in a destroyed power amp, a short circuit or ‘just’... -
Page 37: Protecting The Environment
Protecting the environment Protecting the environment Disposal of the packaging material For the transport and protective packaging, environmentally friendly materials have been chosen that can be supplied to normal recycling. Ensure that plastic bags, packaging, etc. are properly disposed of. Do not just dispose of these materials with your normal household waste, but make sure that they are collected for recycling. - Page 38 Notes sampling percussion pad...
- Page 40 Musikhaus Thomann · Hans-Thomann-Straße 1 · 96138 Burgebrach · Germany · www.thomann.de...
Need help?
Do you have a question about the Millenium NonaPad and is the answer not in the manual?
Questions and answers