Table of Contents
Advertisement
Quick Links
G4 Pro Series
User Manual
G4 Pro Series
Date: March 2022
Doc Version: 1.1
English
Thank you for choosing our product. Please read the instructions carefully
before operation. Follow these instructions to ensure that the product is
functioning properly. The images shown in this manual are for illustrative
purposes only.
P a g e
| 1
For further details, please visit our Company's website
www.zkteco.com.
Copyright©2022 ZKTECO CO., LTD. All rights reserved.
User Manual
Advertisement
Table of Contents

Related Manuals for ZKTeco G4 Pro Series


Summary of Contents for ZKTeco G4 Pro Series
- Page 1 Follow these instructions to ensure that the product is functioning properly. The images shown in this manual are for illustrative purposes only. For further details, please visit our Company’s website www.zkteco.com. P a g e Copyright©2022 ZKTECO CO., LTD. All rights reserved.
- Page 2 ZKTeco supplied equipment vests in and is the property of ZKTeco. The contents hereof should not be used or shared by the receiver with any third party without express written permission of ZKTeco.
- Page 3 G4 Pro Series User Manual ZKTeco in no event shall be liable to the user or any third party for any incidental, consequential, indirect, special, or exemplary damages, including, without limitation, loss of business, loss of profits, business interruption, loss of business information or any pecuniary loss, arising out of, in connection with, or relating to the use of the information contained in or referenced by this manual, even if ZKTeco has been advised of the possibility of such damages.
- Page 4 Recognition Cameras, Elevator/floor access controllers, Turnstiles, License Plate Recognition (LPR) gate controllers and Consumer products including battery-operated fingerprint and face-reader Door Locks. Our security solutions are multi-lingual and localized in over 18 different languages. At the ZKTeco state- of-the-art 700,000 square foot ISO9001-certified manufacturing facility, we control manufacturing, product design, component assembly, and logistics/shipping, all under one roof.
- Page 5 The general information which helps in performing the operations faster. The information which is significant. Care taken to avoid danger or mistakes. The statement or event that warns of something or that serves as a cautionary example. P a g e Copyright©2022 ZKTECO CO., LTD. All rights reserved.
-
Page 6: Table Of Contents
5.3 HOLIDAY SETTINGS ..........................52 5.4 VERIFICATION COMBINATION ......................54 5.5 ACCESS GROUP SETTINGS ........................55 5.6 ANTI-PASSBACK SETUP .......................... 56 5.7 DURESS ALARM SETTINGS ........................57 6 ATTENDANCE SEARCH ........................57 P a g e Copyright©2022 ZKTECO CO., LTD. All rights reserved. - Page 7 10.11 AUTO-TESTING ............................ 97 10.12 ADVANCED SETTINGS ........................98 10.13 ABOUT DEVICE ............................ 99 10.14 SECURITY SETTING ........................... 100 10.15 RESTART ............................. 101 11 CONNECT TO ZKBIOSECURITY SOFTWARE ................... 102 P a g e Copyright©2022 ZKTECO CO., LTD. All rights reserved.
- Page 8 REQUIREMENTS OF LIVE COLLECTION AND REGISTRATION OF VISIBLE LIGHT FACE IMAGES ..108 REQUIREMENTS FOR VISIBLE LIGHT DIGITAL FACE IMAGE DATA ............109 APPENDIX 1 ............................110 PRIVACY POLICY ............................110 ECO-FRIENDLY OPERATION ........................113 P a g e Copyright©2022 ZKTECO CO., LTD. All rights reserved.
-
Page 9: Overview
QR Sensor support QR code with Mobile APP, as well as improves security performance in all aspects. G4 Pro Series has two models, G4 Pro[TI] is the upgraded version of G4 Pro with thermal imaging intelligent engineering facial recognition algorithm. -
Page 10: Instructions For Use
NOTE: Place your phone within 15 to 50cm of the device (distance depends on the size of the phone screen), do not block the device QR code scanner and QR code in the phone screen. P a g e | 10 Copyright©2022 ZKTECO CO., LTD. All rights reserved. -
Page 11: Standing Position, Facial Expression
Place your palm in the palm multi-mode collection area, such that the palm is placed parallel to the device. Make sure to keep space between your fingers. P a g e | 11 Copyright©2022 ZKTECO CO., LTD. All rights reserved. -
Page 12: Face Registration
When registering a face, maintain a distance of 40cm to 80cm between the device and the face. Be careful not to change your facial expression. (smiling face, drawn face, wink, etc.) P a g e | 12 Copyright©2022 ZKTECO CO., LTD. All rights reserved. -
Page 13: Finger Placement
Avoid using the thumb or pinky, as they are difficult to accurately tap onto the fingerprint reader. NOTE: Please use the correct method when pressing your fingers onto the fingerprint reader for registration and identification. P a g e | 13 Copyright©2022 ZKTECO CO., LTD. All rights reserved. -
Page 14: Standby Interface
If a super administrator has already been registered for this device, you will need the permission of the super administrator to enter the main menu. P a g e | 14 Copyright©2022 ZKTECO CO., LTD. All rights reserved. -
Page 15: Virtual Keyboard
ID and card number (static QR code only includes card number) information. The QR code can replace a physical card on a specific device to achieve contactless authentication. Please refer to 11.3 Mobile Credential. P a g e | 15 Copyright©2022 ZKTECO CO., LTD. All rights reserved. -
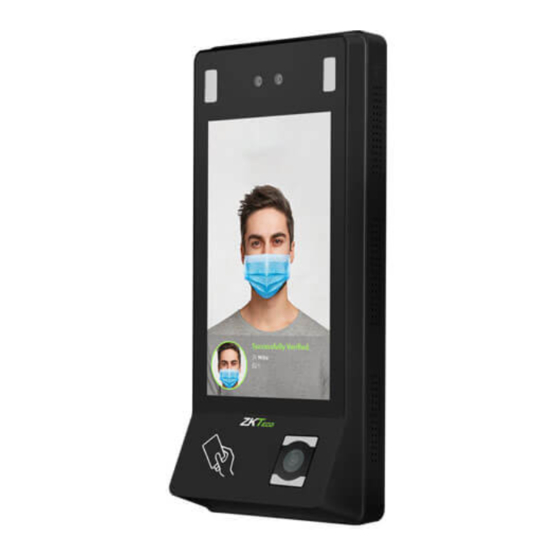
Page 16: Facial Verification
In this verification mode, the device compares the collected facial images with all face data registered in the device. The following is the pop-up prompt of a successful comparison result. P a g e | 16 Copyright©2022 ZKTECO CO., LTD. All rights reserved. - Page 17 (Note: This function is only applicable to products with temperature measurement module.) NOTE: The temperature measurement data is only for reference, and not for any medical purposes. P a g e | 17 Copyright©2022 ZKTECO CO., LTD. All rights reserved.
- Page 18 As shown in the images below: NOTE: The temperature measurement data is only for reference, and not for any medical purposes. P a g e | 18 Copyright©2022 ZKTECO CO., LTD. All rights reserved.
- Page 19 If the user has registered palm, card, password and fingerprint★ in addition to face, and the verification method is set to face/ palm/ card/ password/ fingerprint★ verification, the following screen will appear. P a g e | 19 Copyright©2022 ZKTECO CO., LTD. All rights reserved.
- Page 20 After the prompt "Please verify your face ", adjust your face in the center of the device screen for face verification. Below are the sample for successful and unsuccessful verification: Successful Verification Failed Verification P a g e | 20 Copyright©2022 ZKTECO CO., LTD. All rights reserved.
-
Page 21: Palm Verification
ID. Press on the main interface and enter the 1:1 palm verification mode and enter the user ID and press [OK]. P a g e | 21 Copyright©2022 ZKTECO CO., LTD. All rights reserved. - Page 22 After the prompt "Please swipe your palm to verify! ", adjust your palm in the center of the device screen for palm verification. P a g e | 22 Copyright©2022 ZKTECO CO., LTD. All rights reserved.
- Page 23 G4 Pro Series User Manual Below are the sample for successful and unsuccessful verification: Successful Verification Failed Verification P a g e | 23 Copyright©2022 ZKTECO CO., LTD. All rights reserved.
-
Page 24: Card Verification
If the user has registered face, palm, password and fingerprint★ in addition to card and the verification method is set to face/ palm/ card/ password/ fingerprint★ verification, the following screen will appear. P a g e | 24 Copyright©2022 ZKTECO CO., LTD. All rights reserved. - Page 25 After the prompt "Please swipe your card to verify ". Below are the sample for successful and unsuccessful verification: Successful Verification Failed Verification P a g e | 25 Copyright©2022 ZKTECO CO., LTD. All rights reserved.
-
Page 26: Password Verification
Select the icon to enter the password verification mode. After the prompt "Please enter the password". P a g e | 26 Copyright©2022 ZKTECO CO., LTD. All rights reserved. -
Page 27: Fingerprint Verification
This method compares the fingerprint of the user that is being pressed onto the fingerprint reader with all the fingerprint data that is pre- stored in the device. To enter fingerprint identification mode, simply tap your finger on the fingerprint reader. P a g e | 27 Copyright©2022 ZKTECO CO., LTD. All rights reserved. - Page 28 Press on the main interface and enter the 1:1 fingerprint verification mode and enter the user ID and press [OK]. P a g e | 28 Copyright©2022 ZKTECO CO., LTD. All rights reserved.
- Page 29 Select the icon to enter the fingerprint verification mode. After the prompt "Please verify your fingerprint ". P a g e | 29 Copyright©2022 ZKTECO CO., LTD. All rights reserved.
-
Page 30: Combined Verification
Personnel ID in the Device. This method compares the entered verification of a person with all the verification template previously stored to that Personnel ID in the Device. P a g e | 30 Copyright©2022 ZKTECO CO., LTD. All rights reserved. - Page 31 (both the Face and the Password) previously stored to that Personnel ID in the Device. But as the employee has registered only the Face but not the Password, the verification will not get completed and the Device displays “Verification Failed”. P a g e | 31 Copyright©2022 ZKTECO CO., LTD. All rights reserved.
-
Page 32: Main Menu
To set the parameters related to the system, including network, date and time, attendance data setting, cloud service, wiegand, display and sound, System Settings serial port, biometric parameters, detection management, auto testing, advanced and security, reset to factory. P a g e | 32 Copyright©2022 ZKTECO CO., LTD. All rights reserved. -
Page 33: User Management
[User Management] interface to enter the user creation interface. Register Basic User Information On the New User interface, tap User ID and enter the unique identification number, and then tap Username and enter the username. P a g e | 33 Copyright©2022 ZKTECO CO., LTD. All rights reserved. - Page 34 It is recommended to face the lens and then adjust the position. On the User Photo interface, tap on the camera button to capture a photo. P a g e | 34 Copyright©2022 ZKTECO CO., LTD. All rights reserved.
- Page 35 But a Super Administrator will have more privileges like access to the main menu and will also have the same access as the Normal user. P a g e | 35 Copyright©2022 ZKTECO CO., LTD. All rights reserved.
- Page 36 On the User Management interface, tap on the required username from the user list to set the user privilege. On the User Information interface, tap [User Roles], and then tap [Normal User] or [Super Administrator] to set the required privilege. P a g e | 36 Copyright©2022 ZKTECO CO., LTD. All rights reserved.
- Page 37 On the New User interface, tap on the required verification mode (Palm, Card Number, Password, Face, Fingerprint★) to register for verification. Register Palm On the New User interface, tap [Palm] to enter the palm registration interface. P a g e | 37 Copyright©2022 ZKTECO CO., LTD. All rights reserved.
- Page 38 On the New User interface, tap Card Number to enter the card number registration page. On the Register a card number interface, swipe the card to register. And once a successful prompt is displayed, tap Save to update the card details. P a g e | 38 Copyright©2022 ZKTECO CO., LTD. All rights reserved.
- Page 39 Tap on this button to make the password visible. If the password, entered in both fields does not match, then re-enter the correct password. The password which has been registered can be deleted or modified. P a g e | 39 Copyright©2022 ZKTECO CO., LTD. All rights reserved.
- Page 40 On the User information interface, tap [Password] to delete or modify. On the pop window, tap Delete/ Overwrite to delete or modify the password. P a g e | 40 Copyright©2022 ZKTECO CO., LTD. All rights reserved.
- Page 41 Tap on the required button ( left or right) situated on the left and right side of the screen and then tap on the required finger to register. P a g e | 41 Copyright©2022 ZKTECO CO., LTD. All rights reserved.
- Page 42 If the fingerprint is successfully registered, "Continue to enroll the next Fingerprint?’’ dialog box will appear. Tap Yes to record the next fingerprint, or No to return to the fingerprint registration interface. P a g e | 42 Copyright©2022 ZKTECO CO., LTD. All rights reserved.
- Page 43 Employee will be able to verify attendance only during this set time. And if the Employee authenticates attendance before or after the defined time, the attendance will be invalid. P a g e | 43 Copyright©2022 ZKTECO CO., LTD. All rights reserved.
- Page 44 On the New User interface, tap Access Control Role to set the access level. Set the Access Group On the User Access Control Role, tap on Access Group to assign the registered users to different groups for better management. P a g e | 44 Copyright©2022 ZKTECO CO., LTD. All rights reserved.
- Page 45 If the time-period is not applied, the access time of the specific user should be set. Such configuration will not affect the time settings of other group members. NOTE: A total of 50 time-rules can be set. P a g e | 45 Copyright©2022 ZKTECO CO., LTD. All rights reserved.
-
Page 46: Search User
Edit User On the User Management interface, tap on the required user from the list to edit. P a g e | 46 Copyright©2022 ZKTECO CO., LTD. All rights reserved. -
Page 47: Delete User
On the “User Management” interface, select the required user to delete and tap on the Delete button to delete. On the pop-up window, tap OK to confirm the deletion. P a g e | 47 Copyright©2022 ZKTECO CO., LTD. All rights reserved. -
Page 48: Access Control Settings
Access Control Options Access Control Options are used for setting the access parameters. On the Main menu, tap [Access Control]. The Access Control Options includes the following functions. P a g e | 48 Copyright©2022 ZKTECO CO., LTD. All rights reserved. - Page 49 When the state of the door sensor is inconsistent with that of the door Door sensor alarm sensor type, an alarm will be triggered after a specific time period, i.e. the P a g e | 49 Copyright©2022 ZKTECO CO., LTD. All rights reserved.
-
Page 50: Time Rules Settings
"or". When the verification time falls in any one of these time periods, the verification is valid. The time period format is HH:MM-HH:MM in the 24-hour system with precision to minute. P a g e | 50 Copyright©2022 ZKTECO CO., LTD. All rights reserved. - Page 51 End Time is later than the Start Time, (such as 08:00~23:59). The default Time Zone 1 indicates that door is open all day long and it cannot be edited. P a g e | 51 Copyright©2022 ZKTECO CO., LTD. All rights reserved.
-
Page 52: Holiday Settings
[Next]. On this interface, tap either Finish to successfully add the newly created holiday, or tap Continue to create another holiday. P a g e | 52 Copyright©2022 ZKTECO CO., LTD. All rights reserved. - Page 53 Select the holiday which you would like to delete, tap on the button in the lower right corner. On the pop-up window, tap OK to confirm deletion. P a g e | 53 Copyright©2022 ZKTECO CO., LTD. All rights reserved.
-
Page 54: Verification Combination
It is mainly used in some special occasions with relatively high requirements. There can be a maximum of 5 personnel in each group, and a maximum of 10 groups can be set. The interface is as follows: P a g e | 54 Copyright©2022 ZKTECO CO., LTD. All rights reserved. -
Page 55: Access Group Settings
The Access Control group setting is used to create an Access Group and configure Time Period as per the requirements. For the newly created access control group, the Verification mode, Time period and Holiday can be set accordingly. The interface is given below: P a g e | 55 Copyright©2022 ZKTECO CO., LTD. All rights reserved. -
Page 56: Anti-Passback Setup
This access direction depends on the selection of the control direction of the device, corresponding to the state of the device. The interface is shown below: P a g e | 56 Copyright©2022 ZKTECO CO., LTD. All rights reserved. -
Page 57: Duress Alarm Settings
Enter the query conditions such as the User ID, First or Last name of an employee in the search bar. Automatically the system displays the users with information that is relevant to the search query. P a g e | 57 Copyright©2022 ZKTECO CO., LTD. All rights reserved. - Page 58 [Starting Date] and [Ending Date] to search the records. After setting the Start and End date, tap on [OK]. P a g e | 58 Copyright©2022 ZKTECO CO., LTD. All rights reserved.
-
Page 59: Data Management
Attendance data, Delete All Data, Delete Attendance Photos, Delete Unregistered User Photos, Clear Admin Rights, Delete User Photos, Delete Wallpapers and Delete User Photo Templates. On the Main menu, tap on Data Management to manage the data. P a g e | 59 Copyright©2022 ZKTECO CO., LTD. All rights reserved. -
Page 60: Usb Management
The specific functions of the USB management interface are USB disk upload, USB disk download and USB disk settings. On the Main menu, tap USB Management to manage the USB settings P a g e | 60 Copyright©2022 ZKTECO CO., LTD. All rights reserved. -
Page 61: Alarm Management
It will stop ringing once the set time is elapsed. On the Main menu, tap Alarm Management to configure the alarm settings. P a g e | 61 Copyright©2022 ZKTECO CO., LTD. All rights reserved. -
Page 62: Add Alarm
G4 Pro Series User Manual Add Alarm On the Alarm interface, tap on the button to set the alarm, and then tap Save to save and update. P a g e | 62 Copyright©2022 ZKTECO CO., LTD. All rights reserved. -
Page 63: Delete Alarm
On the Alarm interface, tap on the delete button, then select the required alarm clock to delete. And then tap on button that is displaying in the lower-right corner of the screen. P a g e | 63 Copyright©2022 ZKTECO CO., LTD. All rights reserved. -
Page 64: System Settings
When the device is not connected to the network, tap [TCP/IP settings] on the Network settings interface. The following screen will display: P a g e | 64 Copyright©2022 ZKTECO CO., LTD. All rights reserved. - Page 65 0.0.0.0; when the device is connected to the network, the parameters such as IP address and subnet mask are automatically displayed as set values. P a g e | 65 Copyright©2022 ZKTECO CO., LTD. All rights reserved.
-
Page 66: Wi-Fi Settings
Connect to Wi-Fi I (Save). When the Wi-Fi is connected successfully, prompt "Successfully save!" display on the Wi-Fi list, and the initial interface will display the Wi-Fi logo. P a g e | 66 Copyright©2022 ZKTECO CO., LTD. All rights reserved. -
Page 67: Mobile Network Settings
Please insert the IOT card into the 4G module before enabling. Then tap on [Mobile data] to enable or disable mobile network in the Network settings interface. Once turned on, the device is automatically connected. P a g e | 67 Copyright©2022 ZKTECO CO., LTD. All rights reserved. -
Page 68: Comm. Connection Settings
0, there is no code status. The device ID ranges from 1 to 255. If the system is using the RS232/RS485 communication method, input device during software Device ID communication. P a g e | 68 Copyright©2022 ZKTECO CO., LTD. All rights reserved. -
Page 69: Date And Time
On the System settings interface, tap Date and time to enter the date and time settings interface. Tap Set date and swipe up and down to set the year, month, and day. After setting required Date, tap OK. P a g e | 69 Copyright©2022 ZKTECO CO., LTD. All rights reserved. -
Page 70: Date And Time Format Settings
After setting time, tap OK. 10.2.2 Date and Time Format Settings On Date and time interface, tap Date format. On Date format interface, select a required date format. P a g e | 70 Copyright©2022 ZKTECO CO., LTD. All rights reserved. - Page 71 The default time zone is GMT + 8: 00, China Standard Time. Users can select Select time zone time zone as per their requirements. P a g e | 71 Copyright©2022 ZKTECO CO., LTD. All rights reserved.
-
Page 72: Attendance Parameters
Add Attendance Events Tap on [Attendance events]. On the Attendance Events interface, tap on to open the attendance event interface. In the attendance event creation wizard, tap on [Start]. P a g e | 72 Copyright©2022 ZKTECO CO., LTD. All rights reserved. - Page 73 NOTE: The maximum length of the name is 24 characters. The status values must be unique and cannot be duplicated. The value ranges from 6 to 250. P a g e | 73 Copyright©2022 ZKTECO CO., LTD. All rights reserved.
- Page 74 If the input status value repeats or exceeds the limit, the following message will appear. If the attendance event is created successfully, the success message appears as shown below: P a g e | 74 Copyright©2022 ZKTECO CO., LTD. All rights reserved.
- Page 75 Tap on [Name] or [Status value] to edit. NOTE: The first 6 attendance events cannot be edited. The status values must be unique and cannot be duplicated. P a g e | 75 Copyright©2022 ZKTECO CO., LTD. All rights reserved.
- Page 76 NOTE: The first 6 events cannot be deleted, so the delete button will not appear). Tap on [OK] on the appearing window to delete the attendance event. P a g e | 76 Copyright©2022 ZKTECO CO., LTD. All rights reserved.
-
Page 77: Status Mode
Disable mode: The Status mode will not be used. Timed State Transition After selecting the [Timed State Transition] button, tap on the button to set the related parameters. P a g e | 77 Copyright©2022 ZKTECO CO., LTD. All rights reserved. - Page 78 When the [Repeat daily] option is enabled, the following screen will be displayed. Tap on the [Time] button and swipe up and down to set the time. Tap on [OK]. P a g e | 78 Copyright©2022 ZKTECO CO., LTD. All rights reserved.
- Page 79 After applying the settings, the interface appears as shown below: NOTE: The settings process for "Clock out", "Break out", "Break in", "Overtime in", and "Overtime out" is the same as "Clock in". P a g e | 79 Copyright©2022 ZKTECO CO., LTD. All rights reserved.
- Page 80 The status mode is set to Fixed mode, tap on the button to open the Fixed Mode options menu. In the Fixed mode selection menu, select the attendance status that the user would like to set. P a g e | 80 Copyright©2022 ZKTECO CO., LTD. All rights reserved.
-
Page 81: Widget Function Rules
Select the Status mode as "Disable Mode". 10.3.3 Widget Function Rules Tap on the [Execute] toggle button to enable. The main interface will display the attendance status widget. P a g e | 81 Copyright©2022 ZKTECO CO., LTD. All rights reserved. -
Page 82: Camera Mode
Save after failed verification: When the user verification is failed, the photo is captured and saved. 10.3.5 Verification Settings Here, the user can configure the parameters for user verification. P a g e | 82 Copyright©2022 ZKTECO CO., LTD. All rights reserved. - Page 83 0, the function will be disabled. photos Delay duration of This is the length of time that a user’s information will display on the the confirmation P a g e | 83 Copyright©2022 ZKTECO CO., LTD. All rights reserved.
-
Page 84: Validity Period Of User Information
This is used to determine if user validity periods are enabled or disabled when registering users. Tap User validity settings to enable. When User validity settings is enabled, the following interface will display. Select the setting you would like to configure. P a g e | 84 Copyright©2022 ZKTECO CO., LTD. All rights reserved. -
Page 85: Cloud Service Settings
If it is enabled, it needs to restart to take effect, and the data is Open HTTPS uploaded to the push terminal. The address is changed from HTTP to HTTPS. P a g e | 85 Copyright©2022 ZKTECO CO., LTD. All rights reserved. -
Page 86: Wiegand Settings
(bit) Wiegand format in Wiegand Format. The user can input User ID or Card number. ID type P a g e | 86 Copyright©2022 ZKTECO CO., LTD. All rights reserved. - Page 87 “C “denotes the card number; “E” denotes the even parity bit; “O” denotes the odd parity bit; “F“ denotes the facility code; “M” denotes the manufacturer code; “P” denotes the parity bit; and “S” denotes the site code. P a g e | 87 Copyright©2022 ZKTECO CO., LTD. All rights reserved.
-
Page 88: Wiegand Out
The time interval between pulses. Pulse interval (us) Select the ID type as User ID or Card number. ID type P a g e | 88 Copyright©2022 ZKTECO CO., LTD. All rights reserved. -
Page 89: Display Settings
(including sub-menus) will not automatically close. Users must tap "Exit" to exit the menu. Customization of wallpaper Choose your favourite wallpaper from the Wallpaper and theme theme wallpaper interface P a g e | 89 Copyright©2022 ZKTECO CO., LTD. All rights reserved. -
Page 90: Serial Port Settings
Hence, a higher baud rate can be used when the communication distance is short; when the communication distance is long, choosing a lower baud rate would be more reliable. P a g e | 90 Copyright©2022 ZKTECO CO., LTD. All rights reserved. -
Page 91: Sound Settings
It is used for adjusting volume. This can only be used if audio prompts are Voice volume enabled. It can be set from 0-15. P a g e | 91 Copyright©2022 ZKTECO CO., LTD. All rights reserved. -
Page 92: Biometric Parameters
Select whether to enable or disable Template Facial Parameters 1:1 Matching When conducting 1:1 face verification, face data is threshold collected and instantly compared with face data using a P a g e | 92 Copyright©2022 ZKTECO CO., LTD. All rights reserved. - Page 93 The size of the face when face recognition. The range is Face size for 65-320 cm. The smaller the value, the farther the detection detectable distance is otherwise, the closer it is. P a g e | 93 Copyright©2022 ZKTECO CO., LTD. All rights reserved.
-
Page 94: Detection Management
On the System settings interface, tap Detection management to enter into detection management interface. This interface is added for enabling temperature screen with infrared and mask detection. P a g e | 94 Copyright©2022 ZKTECO CO., LTD. All rights reserved. - Page 95 Temperature deviation correction environments (humidity, extreme room temperature and such), the users may set the deviation value here to reflect the true P a g e | 95 Copyright©2022 ZKTECO CO., LTD. All rights reserved.
- Page 96 Trigger external alarm not worn by the person, it will trigger an alarm. P a g e | 96 Copyright©2022 ZKTECO CO., LTD. All rights reserved.
-
Page 97: Auto-Testing
Voice testing mainly test if the device's audio files are complete and if the audio effects are in good working order. Tap on the back key to exit testing. P a g e | 97 Copyright©2022 ZKTECO CO., LTD. All rights reserved. -
Page 98: Advanced Settings
It is used for restoring the settings of the device, including communication Reset to factory settings, system settings, to the factory settings. settings Cloud service Whether to enable ZKClouds upgrade. upgrade settings P a g e | 98 Copyright©2022 ZKTECO CO., LTD. All rights reserved. -
Page 99: About Device
It displays the device's extension and card module, push version. Firmware version It displays all the versions of all the system's apps, such as the system Version settings, data management, and other installed apps. P a g e | 99 Copyright©2022 ZKTECO CO., LTD. All rights reserved. -
Page 100: Security Setting
It displays the device's name, device type, serial number, MAC address, ADB network algorithm version, platform information, and manufacturer. Display the device's privacy policy. Privacy Policy P a g e | 100 Copyright©2022 ZKTECO CO., LTD. All rights reserved. -
Page 101: Restart
G4 Pro Series User Manual 10.15 Restart On the System settings interface, tap Restart, the device will pop-up, please choose whether to restart according to your needs. P a g e | 101 Copyright©2022 ZKTECO CO., LTD. All rights reserved. -
Page 102: Connect To Zkbiosecurity Software
In the main menu, click System settings > Cloud server settings to set the server address and server port. Server address: Set the IP address as of ZKBioSecurity server. Server port: Set the server port as of ZKBioSecurity (The default is 6609). P a g e | 102 Copyright©2022 ZKTECO CO., LTD. All rights reserved. -
Page 103: Add Device On The Software
Click [Add] in operation column, a new window will pop-up. Select Icon type, Area, and Add to Level from each dropdown and click [OK] to add the device. P a g e | 103 Copyright©2022 ZKTECO CO., LTD. All rights reserved. -
Page 104: Mobile Credential
QR code status according to the actual situation. The default is Dynamic, the valid time of the QR code can be set. On the Server, choose [System] > [Authority Management] > [Client Register] to add a registered App client. P a g e | 104 Copyright©2022 ZKTECO CO., LTD. All rights reserved. - Page 105 Tap [Mobile Credential] on the App, and a QR code will appear, which includes employee ID and card number (static QR code only includes card number) information. P a g e | 105 Copyright©2022 ZKTECO CO., LTD. All rights reserved.
- Page 106 The QR code is automatically refreshed for every 30s, and it also supports manual refresh. NOTE: For other specific operations, please refer to ZKBioSecurity Mobile App User Manual. P a g e | 106 Copyright©2022 ZKTECO CO., LTD. All rights reserved.
-
Page 107: Real-Time Monitoring On The Zkbiosecurity Software
NOTE: For other specific operations, please refer to ZKBioSecurity User Manual. P a g e | 107 Copyright©2022 ZKTECO CO., LTD. All rights reserved. -
Page 108: Requirements Of Live Collection And Registration Of Visible Light Face Images
Do not include more than one face in the capturing area. 9) 50cm - 80cm is recommended for capturing distance adjustable subject to body height. Image1 Face Capture Area P a g e | 108 Copyright©2022 ZKTECO CO., LTD. All rights reserved. -
Page 109: Requirements For Visible Light Digital Face Image Data
The captured person should be clearly visible, natural in color, no harsh shadow or light spot or reflection in face or background. The contrast and lightness level should be appropriate. P a g e | 109 Copyright©2022 ZKTECO CO., LTD. All rights reserved. -
Page 110: Privacy Policy
Privacy Policy Notice: To help you better use the products and services of ZKTeco and its affiliates, hereinafter referred as “we”, “our”, or “us”, the smart service provider, we consistently collect your personal information. Since we understand the importance of your personal information, we took your privacy sincerely and we have formulated this privacy policy to protect your personal information. - Page 111 Upon noticing that we have collected personal information of minors without the prior consent from verifiable parents, we will delete such information as soon as possible. P a g e | 111 Copyright©2022 ZKTECO CO., LTD. All rights reserved.
- Page 112 Welcome to visit our official website at any time to learn our latest privacy policy. P a g e | 112 Copyright©2022 ZKTECO CO., LTD. All rights reserved.
-
Page 113: Eco-Friendly Operation
The components which contain toxins or harmful elements are included due to the current economic or technical limitations which prevent their replacement with non-toxic materials or elements. P a g e | 113 Copyright©2022 ZKTECO CO., LTD. All rights reserved. - Page 114 ZKTeco Industrial Park, No. 32, Industrial Road, Tangxia Town, Dongguan, China. Phone : +86 769 - 82109991 : +86 755 - 89602394 www.zkteco.com Copyright © 2022 ZKTECO CO., LTD. All Rights Reserved.
Need help?
Do you have a question about the G4 Pro Series and is the answer not in the manual?
Questions and answers