
Related Manuals for ZKTeco LPRS2000


Summary of Contents for ZKTeco LPRS2000
- Page 1 Installation Guide LPRS2000 Hybrid Recognition Integrated Machine Version: 1.0 Date: March,2018...
- Page 2 1. Installation Tools Inner hexagon spanner, ground drill (the latter is not delivered with the product). 2. Safety Precautions Carefully read this installation guide before installing and using the product. After the installation is complete, strictly check the terminal connection according to the wiring terminal diagram.
- Page 3 4. Installation Location It is important for the integrated machine to quickly and accurately output license plate recognition results and capture high-quality license plate pictures. Adjust the angle and distance of the camera and the reader to ensure that complete and clear license plate pictures are captured.
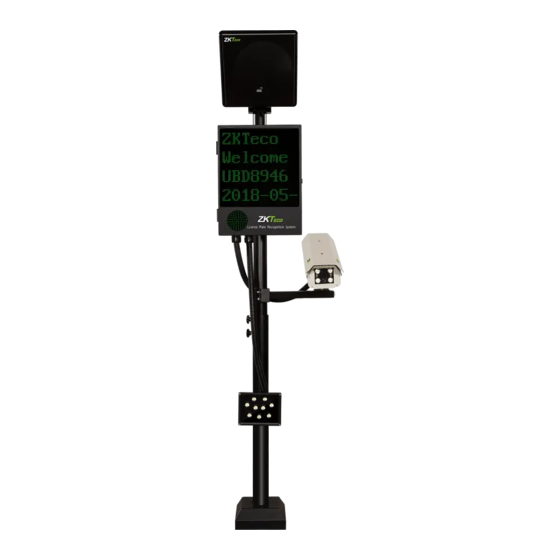
- Page 4 5. Installation Procedure Step 1:Place the mounting sticker to the place where device needs to be installed and drill. Step 2:Insert the cover into the column 2; lay the cables from the hole of column 2 and then screw it. Step 3:Insert the column 1 into the column 2 and tighten it in by hand screws, as shown in figure 1.
- Page 5 M6 screws Reader holder Figure 3 Sponge mats Reader holder M6 screws Column 1 Collet Reader Reader support Figure 4 Step 5:Place the sponge mats on column 1, then lock the chassis holder and chassis support with a collet and M6 screws as shown in figure 2. Step 6:Place the sponge mats on column 1, fasten the cardan joint and install the camera as shown in figure 5, 6.
- Page 6 Camera Cardan joint M6 screws Collet Column 1 Camera support Figure Step 7: Place the sponge mats on column 2, then install the fill light. Adjust the angle as shown in figure 7. Figure 6. Cable Connection Description Wiring terminal diagram Camera control panel Chassis Barrier...
- Page 7 Air Switch ZKParking Danger Electric Shock...
Need help?
Do you have a question about the LPRS2000 and is the answer not in the manual?
Questions and answers