Table of Contents
Troubleshooting

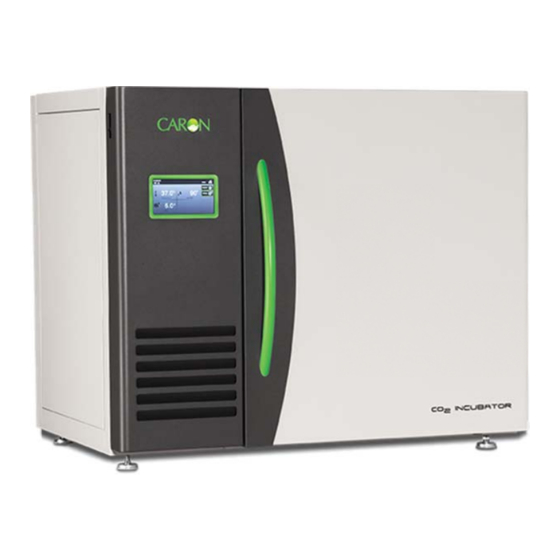
Related Manuals for caron 7404-10


Summary of Contents for caron 7404-10
- Page 1 B B ENCH HTOP CO2 IN NCUBA ATOR ERATI IONS M MANUA R MOD 404-10 PO B Box 715 Marie etta, OH 4 45750 740-373 800-6 648-3042 3-6809 Fax 7 740-374-3 3760 www. .caronpro ducts.com servic ce@caron nproducts s.com...
- Page 2 At CARON, we are committed to continuous quality improvement. Our goal is to supply our customers with highly reliable equipment at a fair price. In order to openly monitor our performance, we would appreciate your feedback on our products and services.
-
Page 3: Table Of Contents
Built in Gas Guard System (GASG302) Ultraviolet Germicidal Lamp (LGHT602) Interior Electrical Outlet (OUTL305-OUTL309) Built in Temp or Temp/Rh 6” Pen Recorders (RCDR316/RCDR317) Built in Temp or Temp/Rh 10” Thermal Recorders (RCDR318/RCDR319) 7404-10 Operations Manual Rev A 7/25/2014 Page 3 of 82... - Page 4 Section 13 – Specifications ................77 Section 14 – Electrical Schematics ............. 78 Section 15 – Troubleshooting ..............79 Section 16 – Spare Replacement Parts ............80 Appendix A – Declaration of Conformity ............ 82 7404-10 Operations Manual Rev A 7/25/2014 Page 4 of 82...
-
Page 5: Section 1 - Warranty
Parts and labor for a period of two (2) years from date of shipment. Any part found defective will be either repaired or replaced at CARON's discretion, free of charge, by CARON in Marietta, OH. Parts that are replaced will become the property of CARON. - Page 6 This writing is a final and complete integration of the agreement between CARON and the customer. CARON makes no other warranties, express or implied, of merchantability, fitness for a particular purpose or otherwise, with respect to the goods sold under this agreement. This warranty cannot be altered unless CARON agrees to an alteration in writing and expressly stated herein shall be recognized to vary or modify this contract.
- Page 7 EQUIPMENT INTERNATIONAL LIMITED WARRANTY Please review this section before requesting warranty service. At CARON, one of our primary goals is to provide customers with high levels of personal service and top quality products, delivered on time, backed by technical service and supported for the life of the product.
- Page 8 This writing is a final and complete integration of the agreement between CARON and the customer. CARON makes no other warranties, express or implied, of merchantability, fitness for a particular purpose or otherwise, with respect to the goods sold under this agreement. This warranty cannot be altered unless CARON agrees to an alteration in writing and expressly stated herein shall be recognized to vary or modify this contract.
- Page 9 TERNAT TIONAL S SYMBOL LS AND DEFINIT TIONS Help nformation Warning of hazardou us area Warning of dangerou us electric c voltage arth (grou und) prote ctive onductor ARNIN ocal gove rnment m may require e proper d disposal 7404 4-10 Operati ions Manual v A 7/25/20...
-
Page 10: Section 2 - Equipment Overview
CTION 2 2 – EQU UIPMENT T OVERV VIEW ngratulatio ons! You u have jus st purchas sed the la atest tech hnology in n incubato ors. Befo usin ng the eq quipment , familiar ize yours self with key com ponents of the p roduct an... - Page 11 SECTION N 2 – EQ QUIPME NT OVE ERVIEW -- CONT TINUED atus Bar Actual Actu Day / Time Humidit mperature Set po oint Menu Speaker Settin Menu Lockout icon Parameter Display Zones Current creen ndicator Navigation Pane (indicates menu dep pth) ubmenu ca ategories...
-
Page 12: Section 3 - Installation
Choose a location where these facilities are, or can be made available. If a water source, or a drain is not available, contact CARON customer service and ask about our CRYS102 product line or click this web link for information on the product: http://www.caronproducts.com/65... -
Page 13: Preliminary Cleaning
Installing the Port Stoppers The 7404-10 has an access port built into the right side of the cabinet. The port is designed to allow customer access for equipment validation and for installation of other equipment inside the incubator. -
Page 14: Stacking Two Units
Stacking two Units The 7404-10 is designed to allow two units to be stacked. When units are stacked they must be bolted together for safety. A stacking adaptor kit, STCK301 with instructions is available through CARON customer service. Failure to install the stacking adaptor kit can result in the top unit falling causing serious injury or death. -
Page 15: Connecting The Water Supply
If a floor drain is not available, CARON offers a water recirculation system accessory (CRSY102) that acts as both a water supply and a drain for humidified incubators. This system continuously recycles any excess water not needed by the incubator, filters and conditions it, and reuses it to control humidity. -
Page 16: Connecting Co2 Supply
15-20 psi. tank regulators can be purchased through CARON customer service. Once the cylinder regulator is installed, connect the outlet of the regulator to the hose barb fitting using the tubing and clamps provided. An inline HEPA filter is provided to remove any contaminants in the CO2 gas supply. -
Page 17: Connecting Electrical Power
230V, 60Hz, 8A FLA NEMA 6-15 230V, 50Hz, 6A FLA CEE 7/7 When the required electrical connection is available, plug the provided power cord into the unit and the electrical outlet. 7404-10 Operations Manual Rev A 7/25/2014 Page 17 of 82... -
Page 18: Section 4 - Optional Accessory Installation
Terminal Connection Unit off Normal Alarm N/O to C Closed Open Closed N/C to C Open Close Open 7404-10 Operations Manual Rev A 7/25/2014 Page 18 of 82... -
Page 19: Installing The Carboy Water System (Botl301)
Attach the preassembled tubing provided with the carboy to the water inlet on the rear of the incubator. Fill the carboy with water as described in the “connecting a water supply” section of the manual. Tubing to water inlet 7404-10 Operations Manual Rev A 7/25/2014 Page 19 of 82... - Page 20 nnecting Analog O Outputs ( (OUTP302 2, OUTP3 303) h the pur rchase of f OUTP30 02 or OU UTP303, t he contro ols are eq quipped w with analo outp puts. OUT TP302 pr rovides 2 connectio ons for m monitoring temperat ture and...
-
Page 21: Installing Drain Water Pump (Pump301)
Internal Level Switch In applications where a floor drain is not available and a CARON water recycling system is not being used, a drain pump can be purchased to pump any excess condensate from the chamber to a local sink or drain. The pump is located near the middle of the back of the chamber. -
Page 22: Installing The Stacking Kit (Stck301)
Place the bottom incubator into its location. Using a lift or jack, place the other incubator on top. Bolt into place both brackets (back side, right & left) and secure the two together with 12 screws. 7404-10 Operations Manual Rev A 7/25/2014 Page 22 of 82... -
Page 23: Section 5 - Operation
Here is an overview of the home screen. Status Bar Actual Actual Day / Time Humidity Temperature Setpoint Speaker Menu Settings Lockout Menu icon Parameter Display Zones Main screen 7404-10 Operations Manual Rev A 7/25/2014 Page 23 of 82... -
Page 24: Using The Keypad
If an invalid entry is made with an entry below the range (such as a ‘4’ followed by the ‘Ent’ button), then the entry will clear and the range will be re-displayed. 7404-10 Operations Manual Rev A 7/25/2014 Page 24 of 82... -
Page 25: Learning The Screen Saver
To ensure long product life, the touchscreen display will automatically enter screen saver mode after 15 minutes. At this time, the screen will be completely blank (ie. black). The illuminated Caron logo (see Equipment Overview section) shows that the unit is powered on and functioning. -
Page 26: Changing The Temperature Set-Point
Once the Setpoint screen appears, press the (Temperature Setpoint) button. (In this example the temperature set point initially has a value of ’37.0’; this will vary with different initial set point values.) 7404-10 Operations Manual Rev A 7/25/2014 Page 26 of 82... - Page 27 Setpoint display with the new value of 20.0 °C in the temperature set point button. Home Temperature Setpoint Button Press the (Home) button to return to the main screen. 7404-10 Operations Manual Rev A 7/25/2014 Page 27 of 82...
-
Page 28: Changing The Humidity Set-Point
To set the humidity set-point, press the (Setpoint) button on the right side of the screen Humidity Setpoint Button Once the setpoint screen appears, press the (Humidity Setpoint) button. Keypad 7404-10 Operations Manual Rev A 7/25/2014 Page 28 of 82... - Page 29 Enter the new humidity set point on the keypad as desired and press (Enter) when complete. Home Button Press the (Home) button to return to the main screen. 7404-10 Operations Manual Rev A 7/25/2014 Page 29 of 82...
-
Page 30: Changing The Co2 Set-Point
Setpoint Button Actual CO To set the CO set-point, press the (Setpoint) button on the right side of the screen Setpoint Button Once the setpoint screen appears, press the Setpoint) button. 7404-10 Operations Manual Rev A 7/25/2014 Page 30 of 82... - Page 31 Keypad Enter the new CO set point on the keypad as desired and press (Enter) when complete. Home Button Press the (Home) button to return to the main screen. 7404-10 Operations Manual Rev A 7/25/2014 Page 31 of 82...
- Page 32 Decontamination Cycle The 7404-10 incubator is equipped with a moist heat decontamination cycle. purpose of the cycle is to eliminate common microbial contamination in your incubator and extend the time between manual cleaning cycles. The decontamination cycle is intended to be used as a reactive system to eliminate contamination. It is not necessary to run the cycle at a fixed time interval.
- Page 33 rting the D Decon Cy ycle proce ess, from t the home screen, Settings button ess the (Settings s) button. Deco n Cycle ess the (Decon Cycle) bu utton on th he left side e of the sc creen. sure and read the informatio on that is o...
- Page 34 To check the status of the Decon Cycle press the (Decion Info) icon in the Status Bar, The Decon Cycle Info Screen will appear displaying the current stage that the Decon Cycle is in. 7404-10 Operations Manual Rev A 7/25/2014 Page 34 of 82...
- Page 35 (Close Window) button to return to the main screen. Extended Temperature Range (EXTD301) The extended temperature range is a factory installed option for model 7404-10. This extends the temperature range down to 10°C. Simply enter a lower temperature value when entering the temperature set point.
-
Page 36: Section 6 - Optional Accessory Operation
After re-attaching the carboy, connect the tubing by simply pressing the plastic fittings into each other. Screw Cap Mounting Screws (4 total) Tubing Connects/ Disconnect to Tubing To Carboy Incubator 7404-10 Operations Manual Rev A 7/25/2014 Page 36 of 82... -
Page 37: Built In Gas Guard System (Gasg302)
0-2000 psig range, and the low pressure gauge should adjust from 0-30 psig. When connecting the gas supplies, adjust each tank output to 20-25 psig. If the appropriate regulators are not available, contact CARON customer service to purchase them. - Page 38 The unit will swap from the master tank to the alternative tank whenever a low gas pressure condition is detected. 7404-10 Operations Manual Rev A 7/25/2014 Page 38 of 82...
-
Page 39: Ultraviolet Germicidal Lamp (Lght602)
3. Unclip green wire with ground clip from UV light housing. UV Light Housing Cap Green Wire with Ground Clip 4. Pull UV light housing cap from UV light housing. Connected UV lamp will come out with it. 7404-10 Operations Manual Rev A 7/25/2014 Page 39 of 82... - Page 40 8. Re-attach ground clip. Ground clip must be securely attached to UV light housing to reduce risk of electrical shock. Install left access panel. 10. Plug power cord in and turn chamber on. 7404-10 Operations Manual Rev A 7/25/2014 Page 40 of 82...
-
Page 41: Interior Electrical Outlet (Outl305-Outl309)
OUTL306 European “Schuko” outlet is 220V/50Hz fused at 2.0A OUTL307 UK, British outlet is 220V/50Hz fused at 2.0A OUTL308 Australia outlet is 220V/50Hz fused at 2.0A OUTL309 Brazil outlet is 220V/50Hz fused at 2.0A 7404-10 Operations Manual Rev A 7/25/2014 Page 41 of 82... - Page 42 Operation of Temp or Temp/Rh 6” Recorders (RCDR316/RCDR317) Built in 6” ink pen temperature and or humidity recorders can be purchased with CARON incubators. The recorders are shipped installed on the outer door of the incubator from the factory and require no installation.
- Page 43 m be remo oved as a an assem mbly. Unsn nap the p plastic "U" " clip tab of the pe en cartridg from m the me tal pen a arm, remo ove and d discard th e old pen n cartridg ge.
- Page 44 Having a 9 volt DC battery back-up in place, will allow the recorder to continue to function normally for approximately 24 hours in the event of a power failure. 7404-10 Operations Manual Rev A 7/25/2014 Page 44 of 82...
- Page 45 Operation of Temp or Temp/Rh 10” Recorders (RCDR318, RCDR319) Built in 10” thermal pen recorders can be purchased with CARON incubators. The recorders are shipped installed on the outer door of the incubator from the factory and require no further installation. Unlike ink pen recorders, the thermal recorders draw their own chart and control lines.
- Page 46 4.) LED flashing slowly (.8 seconds ON / .8 seconds OFF) indicates recorder is in Set-Up mode. Refer to section CONFIGURING THE RECORDER. 5.) LED is Off indicates that there is no power to the recorder. Check A/C power to the recorder. 7404-10 Operations Manual Rev A 7/25/2014 Page 46 of 82...
- Page 47 5) Never lift the pen arm more than is necessary to remove and replace the chart paper. Excessive lifting may cause a decrease in the pen tip pressure and cause light printing. 7404-10 Operations Manual Rev A 7/25/2014 Page 47 of 82...
-
Page 48: Section 7 - Calibration
If the unit has been in operation, allow a minimum of 3 hours of stable operation at all set-points. If you do not have the appropriate reference instruments to perform calibration, contact CARON’s service department for on-site calibration at service@caronproducts.com. Caron also provides validation services which ensures that the unit is functioning properly according to IQ, OQ and PQ protocols which satisfy FDA guidelines for qualification verification of equipment. - Page 49 Calibrate Button Once the settings screen appears, press the (Calibrate) button. Temperature Calibrate Button Humidity CO2 Calibrate Calibrate Button Button 7404-10 Operations Manual Rev A 7/25/2014 Page 49 of 82...
-
Page 50: Calibrating The Temperature
Enter the temperature offset by using the keypad and pressing (Enter) when complete. A positive value will move the temperature ‘up’ and a negative value ‘down’. Press the ‘home’ button and verify the proper temperature is displayed. 7404-10 Operations Manual Rev A 7/25/2014 Page 50 of 82... -
Page 51: Calibrating The Humidity
A positive value will move the humidity ‘up’ and a negative value ‘down’. Press the ‘home’ button and verify the proper humidity is displayed. 7404-10 Operations Manual Rev A 7/25/2014 Page 51 of 82... -
Page 52: Section 8 - Alarms
The flashing (Alarm) icon will appear on the status bar and the alarm pop-up window will automatically appear. Audible speaker Alarm icon The flashing (Alarm) icon will appear on the status bar. 7404-10 Operations Manual Rev A 7/25/2014 Page 52 of 82... -
Page 53: Snoozing The Speaker
60 minutes time. It will not reset the 60 minutes alarm countdown time if the alarm condition is viewed on the pop up window. 7404-10 Operations Manual Rev A 7/25/2014 Page 53 of 82... -
Page 54: Muting The Speaker
1 hour.) When the speaker is muted, the alarm icon continues to flash and the remote alarm contacts (optional) remain in the ‘alarm’ state. To mute the speaker: Settings Button Press the (Settings) button. Speaker icon Speaker Mute button Press the (Speaker Mute) button. 7404-10 Operations Manual Rev A 7/25/2014 Page 54 of 82... - Page 55 Speaker Mute Speaker Mute icon button “On”, indicator The Speaker Mute button toggles to the “on” position ,and the speaker icon changes to “ Speaker Muted” icon. 7404-10 Operations Manual Rev A 7/25/2014 Page 55 of 82...
-
Page 56: Changing Alarm Set-Points
To change the alarm set points: Settings Button Press the (Settings) button. Alarms Button Press the (Alarms) button. CO2 Alarm Temperature Button Alarm Button Humidity Alarm Button 7404-10 Operations Manual Rev A 7/25/2014 Page 56 of 82... - Page 57 (Alarms) button on the navigation menu to go back to the Alarms screen. Press the (CO2 Alarm) and (Humidity Alarm, Controlled Humidity only) buttons and repeat the same steps for CO2 and humidity. 7404-10 Operations Manual Rev A 7/25/2014 Page 57 of 82...
-
Page 58: Section 9 - Alerts
The Alerts are cleared through the Maintenance screen. Alert icon Press the (Alert icon). The Alert pop up window will appear displaying the alert message. 7404-10 Operations Manual Rev A 7/25/2014 Page 58 of 82... - Page 59 After service has been completed, the item needs reset and the alert will disappear. Press the (Settings) button. Once the settings screen appears press the (Maintenance) button. 7404-10 Operations Manual Rev A 7/25/2014 Page 59 of 82...
-
Page 60: Maintenance
Status Bar until the Maintenance item is corrected and the (Reset) button is pressed resetting the replacement time to “new” status. Press the (Home) button to return to the main screen. 7404-10 Operations Manual Rev A 7/25/2014 Page 60 of 82... -
Page 61: Section 10 - Info
Info condition(s). Info Button (Info) icon will appear on the status bar. Info Screen Press the (Close Window) button to return to the main screen. 7404-10 Operations Manual Rev A 7/25/2014 Page 61 of 82... -
Page 62: Section 11 - Advanced Features
To keep the clock accurate, it will need to be adjusted manually for daylight savings time changes. To set the day & time: Settings Button Press the (Settings) button. Setup Button Press the (Setup) button. 7404-10 Operations Manual Rev A 7/25/2014 Page 62 of 82... - Page 63 (Hour) button. The Enter New Time in Hours window will appear. Enter the hour by using the keypad and pressing (Enter) when complete. Follow same procedure for setting up minutes. 7404-10 Operations Manual Rev A 7/25/2014 Page 63 of 82...
- Page 64 Press the (Home) button to return to the main screen. 7404-10 Operations Manual Rev A 7/25/2014 Page 64 of 82...
-
Page 65: Locking The Controls
To lock the touchscreen, Settings Button Control Lock Icon “unlocked” Press the (Settings) button. Password Button Press the (Password) button. 7404-10 Operations Manual Rev A 7/25/2014 Page 65 of 82... - Page 66 Press the (Lock Keypad) button. The Enter the Current Passcode Keypad screen will appear. Enter digits “1 2 3 4”; press (Enter) when complete. 7404-10 Operations Manual Rev A 7/25/2014 Page 66 of 82...
- Page 67 Home Screen. To un-lock the touchscreen, From the previous Alert “Keypad is Locked” pop up screen, press the (Unlock) button. The Enter New Passcode window will pop up. 7404-10 Operations Manual Rev A 7/25/2014 Page 67 of 82...
- Page 68 Enter the digits “1 2 3 4”; press (Enter) when complete. The Control Lock Icon will change back to the “unlocked” position. Control Lock Icon “unlocked” 7404-10 Operations Manual Rev A 7/25/2014 Page 68 of 82...
-
Page 69: Changing The Passcode
4-digit passcode. The current passcode is required to change the passcode. To lock the touchscreen, Settings Button Control Lock Icon “unlocked” Press the (Settings) button. Password Button Press the (Password) button. 7404-10 Operations Manual Rev A 7/25/2014 Page 69 of 82... - Page 70 Press the (Change Passcode) button. The Enter Current Passcode Keypad screen will appear. Enter digits “1 2 3 4”; press (Enter) when complete. 7404-10 Operations Manual Rev A 7/25/2014 Page 70 of 82...
- Page 71 The Lockout screen will tell you that the Passcode has been changed to a new value. This is only time that the Passcode will be displayed on the Lockout screen. 7404-10 Operations Manual Rev A 7/25/2014 Page 71 of 82...
-
Page 72: Factory Menu & Troubleshooting
See the percent output of the control system Manually and individually toggle any output To access the Factory Menu, Settings Button Press the (Settings) button. Factory Button Press the (Factory) button. 7404-10 Operations Manual Rev A 7/25/2014 Page 72 of 82... - Page 73 (Configuration) button to view the chamber’s configuration Model Software Number revisions System Functions & Options From the Factory screen, press the (Output Percent) button to view the current percent output level of each control parameter. 7404-10 Operations Manual Rev A 7/25/2014 Page 73 of 82...
- Page 74 (Output 1) button. Note: Based on the chamber model number and options, not all functions will be present. Each item can be turned on to check the condition of that device or parameter to aide in diagnosing a problem. 7404-10 Operations Manual Rev A 7/25/2014 Page 74 of 82...
- Page 75 Factory screen all parameters that were selected in Output 1 or Output 2 screens will reset to “off’ position. Press the (Home) button to return to the main screen. 7404-10 Operations Manual Rev A 7/25/2014 Page 75 of 82...
-
Page 76: Section 12 - Preventative Maintenance
Check to ensure the drain in the bottom of the unit is draining properly. Check front air intake filter. If it is dirty replace it with CARON part number FLTR301. Washing the filter will result in poor performance. -
Page 77: Section 13 - Specifications
Specifications are subject to change without notice. Environmental Conditions: Temperature 15ºC to 25ºC, Humidity non-condensing *See graph for details **Includes export shipping crate *This unit has forced internal air flow of 225 cfm (6,400 LPM)* 7404-10 Operations Manual Rev A 7/25/2014 Page 77 of 82... -
Page 78: Section 14 - Electrical Schematics
SECTION 14 – ELECTRICAL SCHEMATIC 7404-10 Operations Manual Rev A 7/25/2014 Page 78 of 82... -
Page 79: Section 15 - Troubleshooting
Has the inner door been recently opened for an extended period of time? Is the access port stopper in the right and left side of the cabinet installed? 7404-10 Operations Manual Rev A 7/25/2014 Page 79 of 82... -
Page 80: Section 16 - Spare Replacement Parts
RH Sensor PMP-150 24VDC RH Pressure Pump NOZ-101 Precision RH Spray Nozzle SOL-135 Humidification Solenoid REL-152 Humidification Solid State Relay TUB-168 Drain Tubing, Blue, 3/8” TUB-132 Water Supply Tubing, Black, ¼” 7404-10 Operations Manual Rev A 7/25/2014 Page 80 of 82... - Page 81 10 inch recorder thermal paper RCDR318, RCDR319 TUB-174 1/2” I.D. silicone tubing PUMP301 TUB-145 1/4” I.D. vinyl tubing GASG302, REGL101 TUB-174 1/2” I.D. silicone tubing PUMP301 WIR-102 20/3 conductor shielded wire ALRM302 7404-10 Operations Manual Rev A 7/25/2014 Page 81 of 82...
-
Page 82: Appendix A - Declaration Of Conformity
DECLARATION OF CONFORMITY Caron Products and Services, Inc. 27640 State Route 7 Marietta, OH 45750 USA Declares that the product: Designation: 7404 Model Numbers: 7404-10-3 Classification: Electrical equipment intended for residential, commercial and lighting industrial environments Rated Voltage: 220-240 ~ (ac)
Need help?
Do you have a question about the 7404-10 and is the answer not in the manual?
Questions and answers