Fostex DV824 Owner's Manual
Fostex dvd multitrack recorder owner's manual dv824
Hide thumbs
Also See for DV824:
- Owner's manual supplement (9 pages) ,
- Brochure & specs (8 pages) ,
- Owner's manual (4 pages)
Table of Contents
Advertisement
Quick Links
Advertisement
Table of Contents

Related Manuals for Fostex DV824


Summary of Contents for Fostex DV824
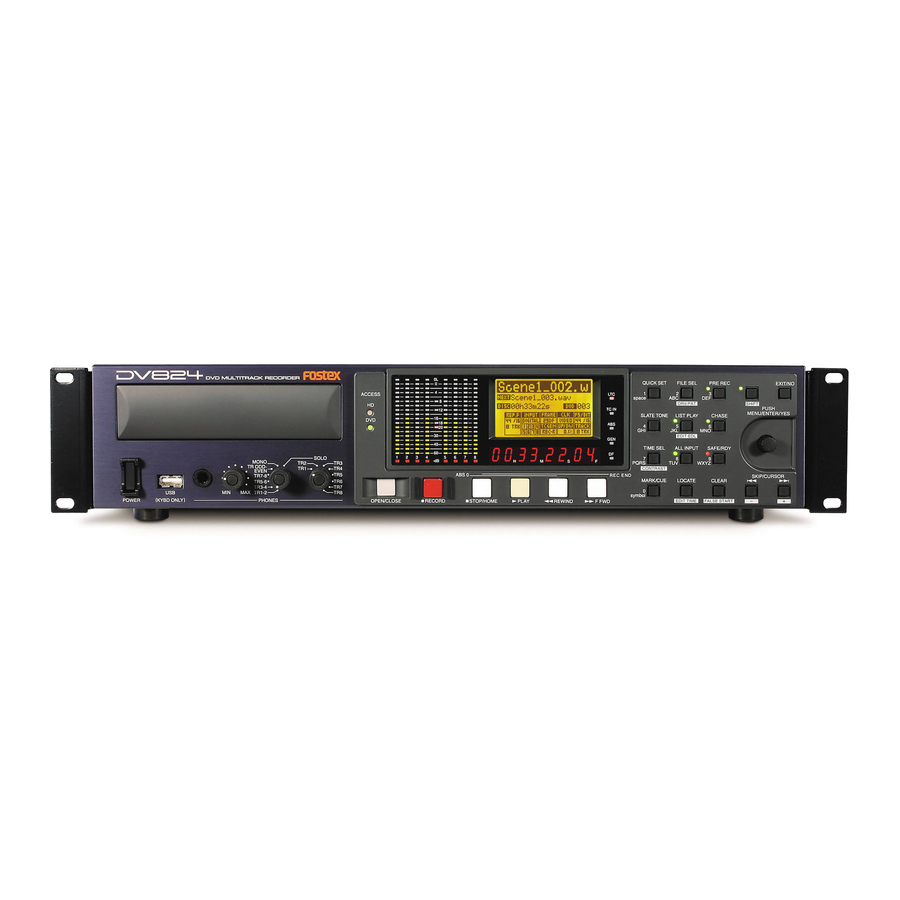
- Page 1 DVD MULTITRACK RECORDER Owner’s Manual...
-
Page 2: Safety Instructions
DVD Multitrack Recorder DV824 DVD Multitrack Recorder DV824 DVD Multitrack Recorder DV824 DVD Multitrack Recorder DV824 DVD Multitrack Recorder DV824 CAUTION RISK OF ELECTRIC SHOCK DO NOT OPEN CAUTION: TO REDUCE THE RISK OF ELECTRIC SHOCK, DO NOT REMOVE COVER (OR BACK). -
Page 3: Important Safety Instructions
Protect the power cord from being walked on or pinched particularly at plugs, convenience receptacles, and the point where they exit from the apparatus. DVD Multitrack Recorder DV824 DVD Multitrack Recorder DV824 DVD Multitrack Recorder DV824 DVD Multitrack Recorder DV824... -
Page 4: Table Of Contents
Precautions of installation ...10 Chapter-1: Introduction ...11 Main features/functions ...12 What is in the box ...13 DV824 options and related Fostex products ...13 Chapter-2: Preparation before using the DV824 ...15 Power (AC adaptor) connection ... Turning of the power ... - Page 5 Audio CD playback ...64 Setting CD stop mode ...65 List play function ...66 Setting list play mode/Executing list play ...68 DVD Multitrack Recorder DV824 DVD Multitrack Recorder DV824 DVD Multitrack Recorder DV824 DVD Multitrack Recorder DV824 DVD Multitrack Recorder DV824...
- Page 6 Login name/password setting ...77 TCP/IP Enable mode on/off setting ...77 Mac address checking ...77 File transfer example between the DV824 and a PC...78 Time code recording/playback (the optional Model 8348 required) ...80 Recording time code ...80 Frame rate setting ...80 TC generator mode setting ...80...
- Page 7 UBIT setting of playback time code [Ref TC Ubit] ...133 Time code output while paused [Rep pause TC] ...134 Reference time code selection [Ref TC sel] ...134 DVD Multitrack Recorder DV824 DVD Multitrack Recorder DV824 DVD Multitrack Recorder DV824 DVD Multitrack Recorder DV824...
- Page 8 DVD Multitrack Recorder DV824 DVD Multitrack Recorder DV824 DVD Multitrack Recorder DV824 DVD Multitrack Recorder DV824 DVD Multitrack Recorder DV824 Chase mode selection [Chase mode] ...135 Chase offset setting [Chase offset] ...136 Chase offset editing ...136 Chase offset trimming ...137 Chase offset ...137...
-
Page 9: About This Manual
About this manual This manual intends to be used as a guide for using the Fostex DV824 DVD multitrack recorder. This manual is written assuming that you have experience of using pro- fessional digital recorders and basic knowledge of digital recording. -
Page 10: Precautions On Installation
<About replacing the lithium battery> The DV824 uses a lithium battery internally. To replace the battery, ask your dealer or the nearest FOSTEX service station. If the battery is not cor- rectly replaced, there may be a risk of explosion, etc. -
Page 11: Chapter-1: Introduction
DVD Multitrack Recorder DV824 DVD Multitrack Recorder DV824 DVD Multitrack Recorder DV824 DVD Multitrack Recorder DV824 DVD Multitrack Recorder DV824 Chapter-1: Introduction... -
Page 12: Main Features/Functions
• The recording file format is conformed to the BWF interleave 1 file specification. When a file is imported to a DAW from the DV824, it can be separated to multiple mono files. (Note that the DAW must support interleave files.) -
Page 13: What Is In The Box
DV824 options and related Fostex products The following DV824 options and related products are available. Ask your local Fostex dealer or sale office for details about them such as prices, specifications, etc. You can also get product information from our web site. - Page 14 DVD Multitrack Recorder DV824 DVD Multitrack Recorder DV824 DVD Multitrack Recorder DV824 DVD Multitrack Recorder DV824 DVD Multitrack Recorder DV824...
-
Page 15: Chapter-2: Preparation Before Using The Dv824
Chapter-2: Preparation before using the DV824 This chapter explains what you should do before using the DV824 for the first time, including power connection, internal clock setting and initial formatting of the DVD-RAM disk supplied with the unit. Power (AC adaptor) connection ...16 Turning on the power ...16... -
Page 16: Power (Ac Adaptor) Connection
DVD Multitrack Recorder DV824 DVD Multitrack Recorder DV824 DVD Multitrack Recorder DV824 DVD Multitrack Recorder DV824 DVD Multitrack Recorder DV824 Connect the supplied AC adaptor as shown below. <Notes>: Only use the AC adaptor provided. Using another AC adaptor may cause damage of the unit due to the mismatch of the power voltage or polarity. -
Page 17: Realtime Clock Setting
Realtime clock setting The realtime clock is built in the DV824. The realtime clock data is used for date/time of creation of a file. By default, the realtime clock is set according to local date/time of the factory. There- fore, set the clock correctly according to your local date/time before using. -
Page 18: About Recommended Disks
DVD Multitrack Recorder DV824 About recommended disks DVD-RAM disks used with the DV824 4.7GB Type 2 single-sided or 9.4GB Type 4 double-sided DVD-RAM disks can be used with the unit. When the unit is shipped, a 34.7GB Type 2 single-sided disk is supplied as standard. - Page 19 The disk must be fixed by the guide. <Note>: disk. An uncovered disk only can be played back. DVD Multitrack Recorder DV824 DVD Multitrack Recorder DV824 DVD Multitrack Recorder DV824 DVD Multitrack Recorder DV824 DVD Multitrack Recorder DV824 <Figure 2>...
-
Page 20: Initial Format Of A Dvd-Ram Disk
DVD Multitrack Recorder DV824 DVD Multitrack Recorder DV824 DVD Multitrack Recorder DV824 DVD Multitrack Recorder DV824 DVD Multitrack Recorder DV824 Initial format of a DVD-RAM disk To make recording/playback by the unit, you have to format a DVD-RAM disk in the UDF Rev 1.5 format. - Page 21 You can format a DVD-RAM disk you purchase in the same manner as above. <Note>: To reformat a formatted DVD-RAM disk or to physically format a well- used disk, see "Formatting a disk" on page 149. DVD Multitrack Recorder DV824 DVD Multitrack Recorder DV824 DVD Multitrack Recorder DV824 DVD Multitrack Recorder DV824...
-
Page 22: Adjusting Display Contrast
DVD Multitrack Recorder DV824 DVD Multitrack Recorder DV824 DVD Multitrack Recorder DV824 DVD Multitrack Recorder DV824 DVD Multitrack Recorder DV824 Adjusting display contrast The display contrast of the unit is adjusted suitably when shipped. If you want to change the contrast, follow the procedure described below. -
Page 23: Chapter-3: Names And Functions
Disk remaining ...33 File number ...33 File/disk/partition protection ...33 Status information ...34 Screen examples ...35 7-segment LED time indicator ...36 DVD Multitrack Recorder DV824 DVD Multitrack Recorder DV824 DVD Multitrack Recorder DV824 DVD Multitrack Recorder DV824 DVD Multitrack Recorder DV824 Front panel... -
Page 24: Front Panel
DVD Multitrack Recorder DV824 DVD Multitrack Recorder DV824 DVD Multitrack Recorder DV824 DVD Multitrack Recorder DV824 DVD Multitrack Recorder DV824 DVD RECORDER TR ODD- MONO EVEN TR7-8 TR5-6 TR3-4 TR1-2 POWER (KYBD ONLY) PHONES About Non-shift mode and Shift mode *Some keys have the secondary function which is available when the SHIFT indi- cator is lit (i.e. - Page 25 Pressing this key brings up the "EDIT EDL FILE" menu item of the MENU mode. This menu item allows you to create or edit the ALE file for exporting recorded audio files to the AVID system (see page 99 for details). DVD Multitrack Recorder DV824 DVD Multitrack Recorder DV824 DVD Multitrack Recorder DV824...
- Page 26 DVD Multitrack Recorder DV824 DVD Multitrack Recorder DV824 DVD Multitrack Recorder DV824 DVD Multitrack Recorder DV824 DVD Multitrack Recorder DV824 [PRE REC/3, D, E, F] key Pressing this key turns on or off the Pre rec mode. While the Pre rec mode is on, the indicator lights and you can starts recording from the audio data stored in the buffer (see page 54 for details).
- Page 27 "GEN" and "LTC" in that order (see page 51 for details). When the display shows a screen for alphanumerical character entry, this key is used for entering "7", "P (p)", "Q (q)", "R (r)" or "S (s)". DVD Multitrack Recorder DV824 DVD Multitrack Recorder DV824 DVD Multitrack Recorder DV824...
- Page 28 DVD Multitrack Recorder DV824 DVD Multitrack Recorder DV824 DVD Multitrack Recorder DV824 DVD Multitrack Recorder DV824 DVD Multitrack Recorder DV824 When SHIFTed: Pressing this key enters the contrast adjustment mode and you can adjust the display contrast (see page 22 for details).
- Page 29 According to the connected keyboard, set the “keyboard type” menu item in the “SYS SETUP” menu of the MENU mode appropriately (see page 123 for details). DVD Multitrack Recorder DV824 DVD Multitrack Recorder DV824 DVD Multitrack Recorder DV824 DVD Multitrack Recorder DV824...
-
Page 30: Rear Panel
DVD Multitrack Recorder DV824 DVD Multitrack Recorder DV824 DVD Multitrack Recorder DV824 DVD Multitrack Recorder DV824 DVD Multitrack Recorder DV824 ANALOG INPUT BALANCED [+4dBu] 1:GND 2:HOT 3:COLD ANALOG OUTPUT BALANCED [+4dBu] [ANALOG INPUT BALANCED] connectors These XLR-3-31 type balanced connectors receive analog audio signals for channels 1 through 8 (+4dBu). - Page 31 Cooling fan This fan ventilates the DV824. If the ventilation is disturbed, the DV824 may overheat. Therefore, do not block the vent of the cooling fan. [DC IN 12V] connector This connector is used to connect to the supplied AC adaptor (Model AD-15C).
- Page 32 DVD Multitrack Recorder DV824 DVD Multitrack Recorder DV824 DVD Multitrack Recorder DV824 DVD Multitrack Recorder DV824 DVD Multitrack Recorder DV824 [ETHERNET] port This port is used to connect to the Ether network. The connector type is RJ45 (conformed to 100/10BASE-T FTP).
-
Page 33: Display
When the current disk (or partition) is protected, the " " icon is shown on the right of the disk remaining information. DVD Multitrack Recorder DV824 DVD Multitrack Recorder DV824 DVD Multitrack Recorder DV824... -
Page 34: Status Information
DVD Multitrack Recorder DV824 DVD Multitrack Recorder DV824 DVD Multitrack Recorder DV824 DVD Multitrack Recorder DV824 DVD Multitrack Recorder DV824 Status information The current settings of menu items are shown. The current clock reference setting is shown (the default is "INT"). -
Page 35: Screen Examples
[ENTER/YES] key. Sixteen menu items regarding time code recording/ playback, synchronization to an external device, etc. are available in the "TC SETUP" menu. DVD Multitrack Recorder DV824 DVD Multitrack Recorder DV824 DVD Multitrack Recorder DV824 DVD Multitrack Recorder DV824 DVD Multitrack Recorder DV824... -
Page 36: 7-Segment Led Time Indicator
DVD Multitrack Recorder DV824 DVD Multitrack Recorder DV824 DVD Multitrack Recorder DV824 DVD Multitrack Recorder DV824 DVD Multitrack Recorder DV824 TCP/IP SETUP menu screen This menu screen is shown when selecting "TCP/IP SETUP" from the MENU list screen in the MENU mode and pressing the [ENTER/YES] key. -
Page 37: Chapter-4: Connection
Connection to a film machine (for the optional TC/SYNC card) ...40 Connection to a personal computer (for the optional IEEE1394/USB card) ...40 Other connection ...41 USB keyboard connection ...41 DVD Multitrack Recorder DV824 DVD Multitrack Recorder DV824 DVD Multitrack Recorder DV824 DVD Multitrack Recorder DV824... -
Page 38: Basic Connection
+4 dBu analog audio signals. Digital audio connection The DV824 accepts digital signals conformed to IEC 60958 (AES/EBU) or IEC 60958 (S/P DIF) format (the format of the digital source is automatically detected). The digital connection is made via the D-sub 25-pin DIGITAL I/O connector. -
Page 39: External Parallel Controller Connection
(see page 71 for details). Sync signal (word clock) connection The DV824 provides the [WORD INPUT] connector which is used to lock the DV824 to an external digital device. The connector accepts a word clock from an external device. -
Page 40: Connection For Optional Cards
1) The time code runs forward continuously. 2) The sync clock and frame rate of the time code match the DV824 setting. 3) The time code has very few dropouts. The [TIME CODE OUTPUT] connector outputs SMPTE/EBU time code. The connector is XLR-3- 32 type (pin 2=hot). -
Page 41: Other Connection
USB keyboard connection The DV824 provides the [USB] port on the front panel, which is dedicated to a USB keyboard. By connecting a USB keyboard to this connector, you can enter file and label names, as well as carry out some of menu operations, from the keyboard. - Page 42 DVD Multitrack Recorder DV824 DVD Multitrack Recorder DV824 DVD Multitrack Recorder DV824 DVD Multitrack Recorder DV824 DVD Multitrack Recorder DV824 ALT key + F key Acts the same as the [FILE SEL] key on the panel. ALT key + D key ALT key + C key Acts the same as the [MARK/CUE] key on the panel.
-
Page 43: Chapter-5: Recording/Playback
Locating to the beginning or end of a file ...61 Locating to the last located point ...61 Locating to a desired time point ...62 Locating to a desired cue point ...62 DVD Multitrack Recorder DV824 DVD Multitrack Recorder DV824 DVD Multitrack Recorder DV824 DVD Multitrack Recorder DV824... -
Page 44: Basic Audio Recording
DVD Multitrack Recorder DV824 DVD Multitrack Recorder DV824 DVD Multitrack Recorder DV824 DVD Multitrack Recorder DV824 DVD Multitrack Recorder DV824 Basic audio recording Before making basic analog or digital audio recording, you need to make some set- tings. If you set a blank disk and start up the unit, "-No files!-" is shown on the display, while the indicators shown below are lit. -
Page 45: Entering The Quick Setup Mode
"Setup digital in" menu item in the "SYS SETUP" menu of the MENU mode appropriately ( see page 119 for details ). You can select signal source between analog and digital in two channel pairs. DVD Multitrack Recorder DV824 DVD Multitrack Recorder DV824 DVD Multitrack Recorder DV824... -
Page 46: Tc Frame Rate Selection
DVD Multitrack Recorder DV824 DVD Multitrack Recorder DV824 DVD Multitrack Recorder DV824 DVD Multitrack Recorder DV824 DVD Multitrack Recorder DV824 <Note>: The INPUT section in the status information area shows as below de- pending on the selection between "Analog" and "Digital". -
Page 47: System Clock Reference Selection
LTC jammed to this start time (Ext Run) code. In other words, every file has LTC which starts from "01h00m00s00f". DVD Multitrack Recorder DV824 DVD Multitrack Recorder DV824 DVD Multitrack Recorder DV824... -
Page 48: Recording Track Selection
DVD Multitrack Recorder DV824 DVD Multitrack Recorder DV824 DVD Multitrack Recorder DV824 DVD Multitrack Recorder DV824 DVD Multitrack Recorder DV824 <Note>: The LTC start time is set to "01h00m00s00f" by default. You can edit it via the "Default LTC start" menu item in the "TC SETUP" menu of the MENU mode ( see page 131 for details ). -
Page 49: Next File Name Setting
"Date" if you want. When setting it to "Date", the realtime clock data is reflected to a file name. See "Default file name setting" on page 115 for details. DVD Multitrack Recorder DV824 DVD Multitrack Recorder DV824... -
Page 50: Other Settings
Lit when "-12dB" is selected. Lit when "-18dB" is selected. Recording level setting The DV824 does not provide a function for adjusting the recording level. When recording analog audio signals, you should adjust the recording level by controlling the source output level. -
Page 51: Time Display Mode Selection
TR5-6 Monitors tracks 5 and 6. TR3-4 Monitors tracks 3 and 4. Monitors tracks 1 and 2. TR1-2 DVD Multitrack Recorder DV824 DVD Multitrack Recorder DV824 DVD Multitrack Recorder DV824 DVD Multitrack Recorder DV824 DVD Multitrack Recorder DV824 TC IN... -
Page 52: Starting Recording
After making the necessary settings for recording appropriately, you can start recording. The DV824 automatically creates a new audio file (BWF) on the disk each time you make recording. In the following description, it is assumed that a formatted blank DVD-RAM disk is set to the disk tray and the unit is receiving correct analog or digital audio signals. - Page 53 During recording, you can set cue points which can be used as markers (see page 56 for details). You can also record the slate tone at the beginning of the audio file (see page 55 for details). DVD Multitrack Recorder DV824 DVD Multitrack Recorder DV824 DVD Multitrack Recorder DV824 DVD Multitrack Recorder DV824...
-
Page 54: Canceling Recording (False Start)
Recording in Pre rec mode The DV824 features the "Pre recording" function (in this manual, we say "Pre rec mode" for the DV824 status when the "Pre recording" function is active). In the Pre rec mode, recording is made from the audio pooled in the buffer. -
Page 55: Recording The Slate Tone
[ANALOG OUT] connectors. You can record the slate tone to the beginning of an audio file during recording, as well as match the level between the DV824 and an external device. Level meters for all chan- nels show the slate tone level. -
Page 56: Cue Point Setting
DVD Multitrack Recorder DV824 DVD Multitrack Recorder DV824 The DV824 provides the following two ways of setting a cue point. During audio recording, you can set a cue point "on-the-fly" at the desired point. During playback or while stopped, you can set a cue point using the cue point list on the screen. -
Page 57: Editing A Cue Point
If you want to play back all data of this file during list play, delete the cues labeled " BC$START " and " BC$END " or edit " BC$START " and " BC$END " to other labels. Before editing DVD Multitrack Recorder DV824 DVD Multitrack Recorder DV824 DVD Multitrack Recorder DV824... -
Page 58: Editing Cue Point Data
DVD Multitrack Recorder DV824 DVD Multitrack Recorder DV824 DVD Multitrack Recorder DV824 DVD Multitrack Recorder DV824 DVD Multitrack Recorder DV824 Editing cue point data To edit cue point data, use the [MENU] dial to select "Position" while "Label" is flashing and press the [ENTER/YES] key. -
Page 59: Basic Playback
Normal playback <Note>: The DV824 provides the list play function. Using the list play function, you can link multiple audio files which have the same number of tracks and FS, and play them back continuously. See "List play function" in "Advanced operations" on page 66 for details. -
Page 60: Cueing Playback
DVD Multitrack Recorder DV824 DVD Multitrack Recorder DV824 DVD Multitrack Recorder DV824 DVD Multitrack Recorder DV824 DVD Multitrack Recorder DV824 Press the [ PLAY] key to start playback of the selected audio file. See page 51 for details about how to monitor the sound. -
Page 61: Skip/Locate Functions
Skip/locate functions The DV824 offers comprehensive skip/locate functions. Skipping through files When more than one audio file is recorded on the current DVD-RAM disk, you can quickly skip to the beginning (ABS 0) of a desired audio file. By pressing the [ stopped, you can skip forward or backward a file. -
Page 62: Locating To A Desired Time Point
While the unit is stopped (or playing back), press the [SHIFT] key to light the [SHIFT] indicator, followed by the [LOCATE/ The DV824 enters the time edit mode and the popup window for entering time data appears on the display. -
Page 63: Chapter-6: Advanced Operations
Login name/password setting ...76 TCP/IP Enable mode on/off setting ...76 Mac address checking ...76 File transfer example between the DV824 and a PC ...78 Time code recording/playback (the optional Model 8348 required) ...80 Recording time code ...80 Frame rate setting ...80 TC generator mode setting ...80... -
Page 64: Audio Cd Playback
DVD Multitrack Recorder DV824 DVD Multitrack Recorder DV824 The DV824 can play back audio CDs (in the CD-DA format), as well as play back files on a DVD-RAM disk. You can operate the DV824 for playing back an audio CD in a similar way to an ordinary CD player. -
Page 65: Setting Cd Stop Mode
• Use the [MENU] dial to select the desired CD stop mode. • Press the [ENTER/YES] key to confirm the selection. • Press the [STOP/HOME] key to exit the MENU mode. DVD Multitrack Recorder DV824 DVD Multitrack Recorder DV824 DVD Multitrack Recorder DV824... -
Page 66: List Play Function
DVD Multitrack Recorder DV824 DVD Multitrack Recorder DV824 DVD Multitrack Recorder DV824 DVD Multitrack Recorder DV824 DVD Multitrack Recorder DV824 The LIST PLAY function allows linking multiple audio files recorded with the same FS on the disk and play back them continuously. - Page 67 Immediately after the unit finishes playback of the last file (006), playback automati- cally stops. File No. 001 File No. 002 File No. 003 01H00M00S00F 01H01M00S00F 01H01M25S00F DVD Multitrack Recorder DV824 DVD Multitrack Recorder DV824 DVD Multitrack Recorder DV824 DVD Multitrack Recorder DV824 DVD Multitrack Recorder DV824 01h01m25s00f 01h02m00s00f 30 seconds...
-
Page 68: Setting List Play Mode/Executing List Play
DVD Multitrack Recorder DV824 DVD Multitrack Recorder DV824 DVD Multitrack Recorder DV824 DVD Multitrack Recorder DV824 DVD Multitrack Recorder DV824 Setting list play mode/Executing list play Before executing list play, you must set the maximum number of tracks of a file which can be linked and the link mode appropriately. - Page 69 Repeat back of the last file in the list, it starts playback from the first file in the list. The unit repeats playback until you stop. DVD Multitrack Recorder DV824 DVD Multitrack Recorder DV824 DVD Multitrack Recorder DV824 DVD Multitrack Recorder DV824...
-
Page 70: Viewing Linked Audio Files
DVD Multitrack Recorder DV824 DVD Multitrack Recorder DV824 DVD Multitrack Recorder DV824 DVD Multitrack Recorder DV824 DVD Multitrack Recorder DV824 <Note>: When playing back a file while the link mode is set to "Song-Link", if "CUE 01 (BC$START)" and "CUE 02 (BC$END)" are set in a linked file, the unit only plays back the file within the range between "CUE 01 (BC$START)"... -
Page 71: Controlling The Unit From A Video Editor
ANALOG OUTPUT BALANCED [+4dBu] Necessary setting (RS422 SETUP menu) To control the DV824 from an external video editor, etc., you must make necessary settings via the "RS422 SETUP" menu of the MENU mode by following the procedure below. While the unit is stopped, press the [ENTER/YES] key to enter the MENU mode. -
Page 72: Device Type Setting
The sync play functions. The unit locks to the incoming video reference. Editor preset setting You can preset the DV824 to work with an editor in the best condition by setting this item appropriately. Use the [MENU] dial to select between "Video" and "Lynx" and press the [ENTER/ YES] key to confirm your selection. -
Page 73: File Data Transfer Using Ftp Server Function
By connecting the [ETHERNET] port on the DV824 to your personal computer using a LAN cable, the DV824 acts as an FTP (File Transfer Protocol) server, allowing trans- ferring audio file data between the DV824 and your personal computer via TCP/IP. -
Page 74: Setting Example Of Pc Connection
Connecting DV824 directly to PC The following procedure shows how to connect the DV824 directly to a PC, without connecting to LAN. It is assumed that the DV824 is connected to the PC using a cross cable. Set the items in the "TCP/IP SETUP" menu of the DV824 MENU mode as below (see page 76 for details). -
Page 75: Connecting Dv824 To Lan
Before transferring a file, set "Mode" to "Auto" and "Format" to "RawData". Connecting DV824 to LAN To connect the DV824 to a LAN, use a straight cable to connect the DV824 to a hub. For details about FTP application setting, see "Connecting DV824 directly to PC" de- scribed above. -
Page 76: Tcp/Ip Setup Menu Setting
After completing editing, press the [ENTER/YES] key to confirm the setting. • Sub net mask setting The "Sub net mask" item sets the sub net mask value in the network DV824 exists. In the case the Sub net mask is not used, you do not have to set this value. -
Page 77: Anonymous On/Off Setting
By selecting "Anonymous" and pressing the [ENTER/YES] key, the current setting is shown (by default, "On"). While the DV824 is connected to a PC and used as an FTP server, if "Anonymous" is set to "On", you do not need to set the login name and password. -
Page 78: File Transfer Example Between The Dv824 And A Pc
Click on "OK" in the "Session Properties" dialog box. You can now see the DV824 drive (and the partitions of the optional hard disk drive if it is installed) in the right window, as below. Click on the desired drive. - Page 79 As shown in the window example below, audio files recorded in the selected partition are shown under the Info. folder. You can now transfer an audio file from the DV824 to the PC or vice versa. • Transferring an audio file from the DV824 to the PC Highlight an audio file in the right window (for the DV824) and click on "<-".
-
Page 80: Time Code Recording/Playback (The Optional Model 8348 Required)
Time code recording/playback Recording time code By installing the optional TC/SYNC card (Model 8348) to the DV824, you can record time code generated by the internal TC generator along with audio signals, or record incoming external time code. Furthermore, you can record internal generator time code which jams to external time code. -
Page 81: Playing Back Time Code
Using the jam function, even if time code connection is cut after lock is achieved, the DV824 time code generator can run with extreme accuracy (its own crystal accu- racy). Therefore, the DV824 can stripe time code in sync with the separated external machine. -
Page 82: Executing Jam Function
<Note>: If you are going to jam the external time code into the generator while the frame rate of external time code does not match the DV824 frame rate, "Illegal Frame!" is shown on the display for warning. If you are going to initiate the jam function while external time code is not normally fed to the DV824, "Void LTC in!"... -
Page 83: Auto Copy Function (The Optional Model 9057 Required)
Immediately mode DVD-RAM disk. <Note>: In this mode, if no DVD-RAM disk is set, the DV824 cancels the auto copy mode and returns to the normal recording mode. Immediately after the DV824 ends recording to the partition and stops, the copy starts. - Page 84 After the display shows "Setup auto copy" followed by "Ready auto copy", the selected mode is set. The setting is stored to the DV824 flash ROM. In this procedure example, it is assumed that "IMME" (Immediately) is selected. Press the [STOP/HOME] key to exit the MENU mode.
-
Page 85: Making Auto Copy
"Backup Copy Finished!" is shown. In the "BGRD" (background) mode, even if no DVD-RAM disk is set, the DV824 makes recording to the partition. In such a case, the copy data remains internally after recording to the partition finishes, therefore, auto copy is executed when set- ting a blank DVD-RAM disk. -
Page 86: Disk Copy Function (The Optional Model 9057 Required)
DVD Multitrack Recorder DV824 DVD Multitrack Recorder DV824 DVD Multitrack Recorder DV824 DVD Multitrack Recorder DV824 DVD Multitrack Recorder DV824 Disk copy function The disk copy function fully copies all audio files recorded on a DVD-RAM disk (or hard disk partition) to another DVD-RAM disk (or hard disk partition). -
Page 87: File Copy Function (The Optional Model 9057 Required)
During disk copy, the display shows estimated time and space remaining progress indication for disk copy. When disk copy completes, "Completed!" is shown on the display and the DV824 stops disk access. Press the [STOP/HOME] key to exit the MENU mode. - Page 88 (on the screen example below, audio file 002 is selected). After making audio file selection, press the [ENTER/YES] key. The DV824 starts file copy to the destination medium (disk or partition). During file copy, the display shows estimated time and space remaining progress indication for file copy.
-
Page 89: Dual Drive Recording (The Optional Model 9057 Required)
A DVD-RAM disk which is the partner of the current drive formatted for "dual drive recording" is called a "mirror disk". When formatting the DV824 internal hard disk partition for "dual drive record- ing", a DVD-RAM disc set to the DVD-RAM drive is automatically assigned as a "mirror disk". - Page 90 DVD Multitrack Recorder DV824 DVD Multitrack Recorder DV824 DVD Multitrack Recorder DV824 DVD Multitrack Recorder DV824 DVD Multitrack Recorder DV824 Use the [MENU] dial to select "Format" and press the [ENTER/YES] key. The display now shows the screen for format setting.
-
Page 91: Making Dual Drive Recording
To execute dual drive recording, you must set a mirror disk to the DVD-RAM disk drive. If a wrong disk is set to the DVD-RAM disk drive or no disk is set, the DV824 detects an error when scanning the mirror disk, and shows a caution message ("Difference! DDR mirror disk", etc.). -
Page 92: Chasing External Tc (The Optional Model 8348 Required)
In the following connection example, a VTR is a master, while the DV824 (with the Model 8348) is a slave. The DV824 receives time code recorded on the master VTR and chase the master. A word sync reference signal is also fed to the DV824 from the master VTR. -
Page 93: Data Export To Pc (The Optional Model 8370 Required)
[IEEE1394] (or [USB]) connector, audio file data can be transferred between the DV824 and a personal computer. DV824 audio data can be copied to a hard disk on the personal computer, or ex- ported to a software application such as Digidesign Pro Tools. -
Page 94: Connecting Pc To The Unit
Set the "IEEE1394" menu item in the "SYS SETUP" menu of the MENU mode to "CONNECT". How to unmount the DV824 from the PC To unmount the DV824 from the PC, make the PC side ready for unmounting the DV824, disconnect the IEEE1394 cable, and set the "IEEE1394" menu item to "DIS- CONNECT". -
Page 95: Example Of Exporting Data To A Computer Application
Pro Tools. Note that the screen examples below may look different from the screen you actually see. Also note that the procedure below is assumed that the DV824 is connected to the PC and the "IEEE1394" menu in the Utility mode is set to "CONNECT". - Page 96 DVD Multitrack Recorder DV824 DVD Multitrack Recorder DV824 DVD Multitrack Recorder DV824 DVD Multitrack Recorder DV824 DVD Multitrack Recorder DV824 bwff Select “bwff”. The selected audio file is shown. Select a saving file and click on "Select" (indicated by an arrow 6).
- Page 97 " , the "original time stamp" time currently shown is set to the "Start" time. Then clicking on "OK" starts importing audio data from the specified position. DVD Multitrack Recorder DV824 DVD Multitrack Recorder DV824 DVD Multitrack Recorder DV824 DVD Multitrack Recorder DV824 DVD Multitrack Recorder DV824 Click on “OK”.
- Page 98 DVD Multitrack Recorder DV824 DVD Multitrack Recorder DV824 DVD Multitrack Recorder DV824 DVD Multitrack Recorder DV824 DVD Multitrack Recorder DV824...
-
Page 99: Chapter-7: Creating And Editing Ale Files (Edit Edl File Menu)
This chapter describes details about how to create an ALE (Avid Log Exchange) file for exporting audio data of the DV824 to an AVID system, as well as how to edit an existing ALE file. Creating a new ALE file ...100 Adding audio file entries to an ALE file ...103... -
Page 100: Creating A New Ale File
About an ALE file An ALE file is an EDL (Edit Decision List) file for exporting audio data created by the DV824 to an AVID system. Because it is a text file, a personal computer easily reads it. - Page 101 You need to set it to "On" when you select "29.97" for the TC frame. Entry files Adds/deletes an audio file to/from the ALE file. DVD Multitrack Recorder DV824 DVD Multitrack Recorder DV824 DVD Multitrack Recorder DV824 DVD Multitrack Recorder DV824...
- Page 102 DVD Multitrack Recorder DV824 DVD Multitrack Recorder DV824 DVD Multitrack Recorder DV824 DVD Multitrack Recorder DV824 DVD Multitrack Recorder DV824 While "Video format" is highlighted, press the [ENTER/YES] key. The display changes to show the screen on which you can select the video format. The current option flashes (the default is "PAL").
-
Page 103: Adding Audio File Entries To An Ale File
• Only audio file entries whose FS match the FS set for the ALE file can be added. • When playing back audio file entries in the DV824 list play mode, the condition follows the DV824 settings for the list play function, regardless of the ALE file settings. - Page 104 DVD Multitrack Recorder DV824 DVD Multitrack Recorder DV824 DVD Multitrack Recorder DV824 DVD Multitrack Recorder DV824 DVD Multitrack Recorder DV824 <Note> We recommend setting "Circle Take" to each audio file you want to add to an ALE file later. When "Circle Take" is set to the file, "@" is added to the beginning of the file name , so it is easy to select the file (see below for details).
-
Page 105: Viewing And Editing Audio File Entries
See the next page for details. If you want to exit the EDIT EDL FILE menu after viewing the list, press the [EXIT/NO] key repeatedly until exiting the EDIT EDL FILE menu. DVD Multitrack Recorder DV824 DVD Multitrack Recorder DV824 DVD Multitrack Recorder DV824... -
Page 106: Adding An Audio File Entry To An Existing Ale File
DVD Multitrack Recorder DV824 DVD Multitrack Recorder DV824 DVD Multitrack Recorder DV824 DVD Multitrack Recorder DV824 DVD Multitrack Recorder DV824 Adding an audio file entry to an existing ALE file On the entry list screen shown in step 3 of "Viewing audio file entries" in the previous page, use the [MENU] key to select "<New entry>"... -
Page 107: Editing An Ale File
The new name is confirmed and the display returns to the screen on which you can select an editing item. Press the [EXIT/NO] key repeatedly until you exit the EDIT EDL FILE menu. DVD Multitrack Recorder DV824 DVD Multitrack Recorder DV824 DVD Multitrack Recorder DV824... -
Page 108: Remarking An Ale File
If you select "Circle Take", "Sure?" flashes on the screen. Press the [ENTER/YES] key again. The DV824 remakes the ALE file, and the display returns to show the screen on which you can select an editing item. <Note>: As described above, executing "Circle Take"... -
Page 109: Deleting An Ale File
The ALE file is deleted and the display returns to show the screen for selecting an ALE file. Press the [EXIT/NO] key repeatedly until you exit the EDIT EDL FILE menu. DVD Multitrack Recorder DV824 DVD Multitrack Recorder DV824 DVD Multitrack Recorder DV824... - Page 110 DVD Multitrack Recorder DV824 DVD Multitrack Recorder DV824 DVD Multitrack Recorder DV824 DVD Multitrack Recorder DV824 DVD Multitrack Recorder DV824...
-
Page 111: Chapter-8: Menu Mode
Resume function On/Off setting [Resume] ...154 Partition protection On/Off setting [Part. protect] ...154 "LOAD SETUP" menu ...155 "SAVE SETUP" menu ...156 DVD Multitrack Recorder DV824 DVD Multitrack Recorder DV824 DVD Multitrack Recorder DV824 DVD Multitrack Recorder DV824 DVD Multitrack Recorder DV824... -
Page 112: About Menu Mode
DVD Multitrack Recorder DV824 DVD Multitrack Recorder DV824 DVD Multitrack Recorder DV824 DVD Multitrack Recorder DV824 DVD Multitrack Recorder DV824 In the MENU mode, various essential setting and execution menu items are available. While the unit is stopped, pressing the [ENTER/YES] key enters the MENU mode and the display shows the MENU list screen. -
Page 113: Sys Setup Menu
DVD (AUTO and PT1 through PT8 are also available when the optional hard disk Startup disk drive is installed.) * CD stop mode * Adjust RTC Version DVD Multitrack Recorder DV824 DVD Multitrack Recorder DV824 DVD Multitrack Recorder DV824 DVD Multitrack Recorder DV824 DVD Multitrack Recorder DV824 SYS SETUP menu... -
Page 114: Basic Procedure For Using The "Sys Setup" Menu
DVD Multitrack Recorder DV824 DVD Multitrack Recorder DV824 DVD Multitrack Recorder DV824 DVD Multitrack Recorder DV824 DVD Multitrack Recorder DV824 Basic procedure for using the "SYS SETUP" menu The basic procedure for using the "SYS SETUP" menu is as described below. -
Page 115: Default File Name Setting [Default File Name]
TAKE NUMBER TAKE NUMBER field, it is automatically set as "001". After making "Default file name" setting, press the [STOP/HOME] key to exit the MENU mode. DVD Multitrack Recorder DV824 DVD Multitrack Recorder DV824 DVD Multitrack Recorder DV824 DVD Multitrack Recorder DV824... -
Page 116: Default Track Name Setting [Default Track Name]
DVD Multitrack Recorder DV824 DVD Multitrack Recorder DV824 DVD Multitrack Recorder DV824 DVD Multitrack Recorder DV824 DVD Multitrack Recorder DV824 Default track name setting [Default track name] The "Default track name" menu item specifies the default track name for each track of a BWF file created when recording is made. -
Page 117: Recording Track Setting [Record Tracks]
Use the [MENU] dial to select the desired option and press the [ENTER/YES] key to confirm your setting. The current setting is shown in the status area on the Home screen. Press the [STOP/HOME] key to exit the MENU mode. DVD Multitrack Recorder DV824 DVD Multitrack Recorder DV824 DVD Multitrack Recorder DV824... -
Page 118: Pull Up/Down Setting [Pull Up/Down]
DVD Multitrack Recorder DV824 DVD Multitrack Recorder DV824 DVD Multitrack Recorder DV824 DVD Multitrack Recorder DV824 DVD Multitrack Recorder DV824 Pull up/down setting [Pull Up/Down] The "Pull Up/Down" menu item makes clock pull up/down setting when the unit is referenced to the internal clock. -
Page 119: Input Selection [Select Input]
"Digital in" menu item and lock to a digital clock while "Select input" is set to "Digi- tal". If the channels do not lock to a digital clock, analog inputs are selected auto- matically regardless of the "Digital in" and "Select input" setting. DVD Multitrack Recorder DV824 DVD Multitrack Recorder DV824 DVD Multitrack Recorder DV824... -
Page 120: Digital Output Signal Format Selection [Digital Out]
DVD Multitrack Recorder DV824 DVD Multitrack Recorder DV824 DVD Multitrack Recorder DV824 DVD Multitrack Recorder DV824 DVD Multitrack Recorder DV824 <Note>: The digital input signal format (AES/EBU or S/P DIF) is automatically de- tected by the unit. Digital output signal format selection [Digital out] The "Digital out"... -
Page 121: Auto Ee Mode Selection [Auto Ee Mode]
The pop tone at 1 kHz is recorded. The cycle of 0.5 sec tone and 0.5 sec mute record- 4 POP TONE ing is made four times repeatedly. DVD Multitrack Recorder DV824 DVD Multitrack Recorder DV824 DVD Multitrack Recorder DV824... -
Page 122: Peak Hold Time Setting [Peak Hold]
DVD Multitrack Recorder DV824 DVD Multitrack Recorder DV824 DVD Multitrack Recorder DV824 DVD Multitrack Recorder DV824 DVD Multitrack Recorder DV824 End pop tone On/Off setting Selectable between "On" and "Off" (the default is "Off"). The 1 kHz pop tone is recorded at the end of recording. -
Page 123: Skip Mode Setting [Skip Mode]
The setting is stored to the Flash ROM of the unit. Select the "Keyboard" menu item and press the [ENTER/YES] key. The current setting starts flashing and you can now select the desired option. DVD Multitrack Recorder DV824 DVD Multitrack Recorder DV824 DVD Multitrack Recorder DV824... -
Page 124: Startup Disk Selection [Startup Disk]
DVD Multitrack Recorder DV824 DVD Multitrack Recorder DV824 DVD Multitrack Recorder DV824 DVD Multitrack Recorder DV824 DVD Multitrack Recorder DV824 You can select between "US" and "JAPAN" (the default is "US"). A US keyboard can be connected. This is the default. -
Page 125: Tc Setup Menu
Chase Mode Sets chase offset value. Chase Offset Makes settings required for synchronizing to a film machine. BiPhase Setup DVD Multitrack Recorder DV824 DVD Multitrack Recorder DV824 DVD Multitrack Recorder DV824 DVD Multitrack Recorder DV824 DVD Multitrack Recorder DV824 TC SETUP menu... -
Page 126: Basic Procedure For Using The "Tc Setup" Menu
DVD Multitrack Recorder DV824 DVD Multitrack Recorder DV824 DVD Multitrack Recorder DV824 DVD Multitrack Recorder DV824 DVD Multitrack Recorder DV824 Basic procedure for using the "TC SETUP" menu The basic procedure for using the "TC SETUP" menu is as described below. -
Page 127: System Clock Selection [Sync Clock]
Using the "Sync clock" menu item, you can select the system clock reference. If you connect the DV824 to an external digital or video machine which does not have sync clock output facility, use the DV824 internal clock as the system master clock. -
Page 128: Generator Mode Selection [Gen Mode]
DVD Multitrack Recorder DV824 DVD Multitrack Recorder DV824 DVD Multitrack Recorder DV824 DVD Multitrack Recorder DV824 DVD Multitrack Recorder DV824 Generator mode selection [Gen mode] Using the "Gen mode" menu item, you can select the generator mode of the internal TC gen- erator. -
Page 129: Jam Mode Setting [Jam Mode]
<Note>: In the "Rec Run" mode, time code starts from the edited value when starting recording a new file. DVD Multitrack Recorder DV824 DVD Multitrack Recorder DV824 DVD Multitrack Recorder DV824 DVD Multitrack Recorder DV824 DVD Multitrack Recorder DV824 When “Rec Run”... -
Page 130: Jam Mode Setting [Jam Mode]
DVD Multitrack Recorder DV824 DVD Multitrack Recorder DV824 DVD Multitrack Recorder DV824 DVD Multitrack Recorder DV824 DVD Multitrack Recorder DV824 Jam mode setting [JAM mode] Using the "JAM mode" menu item, you can select the jam mode for the generator "Free Run"... -
Page 131: Time Code Output Source Selection [Sel. Tc Out]
The current LTC start time is shown (initially, "1h 00m 00s" is shown). Press the [ENTER/YES] key again. The second value flashes and you can now edit the default LTC start time. DVD Multitrack Recorder DV824 DVD Multitrack Recorder DV824 DVD Multitrack Recorder DV824... -
Page 132: Ltc Start Time Editing [Edit Ltc Start]
The LTC start time is recorded to the currently load file. <Note>: The DV824 records only the start time of LTC, and the internal gen- erator generates and outputs LTC with reference to the start time. On a "BWF" file, the start time is recorded as "Time Reference" in "Broadcast Audio Extension Chunk". -
Page 133: Ubit Setting Of Playback Time Code [Ref Tc Ubit]
• Date information (year, month and day) shows the original date of an audio file. • The event number, reel number, scene number, and take number must be set using the appropriate menu items in advance. DVD Multitrack Recorder DV824 DVD Multitrack Recorder DV824 DVD Multitrack Recorder DV824 DVD Multitrack Recorder DV824... -
Page 134: Time Code Output While Paused [Rep Pause Tc]
DVD Multitrack Recorder DV824 DVD Multitrack Recorder DV824 DVD Multitrack Recorder DV824 DVD Multitrack Recorder DV824 DVD Multitrack Recorder DV824 Time code output while paused [Rep pause TC] Using the "Rep pause TC" menu item, you can select whether time code is output from the [TIME CODE OUTPUT] connector or not while the recorder is paused. -
Page 135: Chase Mode Selection [Chase Mode]
When activating the chase mode, the [CHASE] indicator starts flashing. When the unit locks to the reference time code, the [CHASE] indicator is steadily lit. DVD Multitrack Recorder DV824 DVD Multitrack Recorder DV824 DVD Multitrack Recorder DV824... -
Page 136: Chase Offset Setting [Chase Offset]
DVD Multitrack Recorder DV824 DVD Multitrack Recorder DV824 DVD Multitrack Recorder DV824 DVD Multitrack Recorder DV824 DVD Multitrack Recorder DV824 Chase offset setting [Chase offset] Using the "Chase offset" menu item, you can make chase offset editing, chase offset trimming and catch offset. -
Page 137: Chase Offset Trimming
The current offset value when pressing the [ENTER/YES] key is set to the chase offset value. Press the [STOP/HOME] key to exit the MENU mode. DVD Multitrack Recorder DV824 DVD Multitrack Recorder DV824 DVD Multitrack Recorder DV824 DVD Multitrack Recorder DV824... -
Page 138: Synchronization To A Film Machine [Bi-Phase Setup]
DVD Multitrack Recorder DV824 DVD Multitrack Recorder DV824 DVD Multitrack Recorder DV824 DVD Multitrack Recorder DV824 DVD Multitrack Recorder DV824 Synchronization to a film machine [Bi-Phase setup] When the optional TC/SYNC card is installed to the unit, you can set the following items for synchronizing the unit to a film machine. -
Page 139: Editing The Film Start Time
You can select from among "0 feet", "12ft/16mm", "12ft/35mm" and "15ft/35mm". Use the [MENU] dial to select the desired option and press the [ENTER/YES] key to confirm your setting. DVD Multitrack Recorder DV824 DVD Multitrack Recorder DV824 DVD Multitrack Recorder DV824... -
Page 140: Disk Utility Menu
DVD Multitrack Recorder DV824 DVD Multitrack Recorder DV824 DVD Multitrack Recorder DV824 DVD Multitrack Recorder DV824 DVD Multitrack Recorder DV824 In the DISK UTILITY menu, 12 menu items for settings regarding recording media and recorded audio files are available. This section explains the following ten menu items in the table below. -
Page 141: Basic Procedure For Using The "Disk Utility" Menu
Pressing the [EXIT/NO] key goes up the level one by one. Therefore, you can exit the MENU mode by pressing the [EXIT/NO] key repeatedly. You can, how- ever, exit the MENU mode directly by pressing the [STOP/HOME] key. DVD Multitrack Recorder DV824 DVD Multitrack Recorder DV824 DVD Multitrack Recorder DV824... -
Page 142: Editing A File Name [Edit File Name]
DVD Multitrack Recorder DV824 DVD Multitrack Recorder DV824 DVD Multitrack Recorder DV824 DVD Multitrack Recorder DV824 DVD Multitrack Recorder DV824 Editing a file name [Edit file name] The "Edit File name" menu item edits a file name of the currently loaded audio file. -
Page 143: Viewing A File Information And Editing Descriptor Information [File Info.]
BWF sound sequence information. By rotating the [MENU] dial, the sound sequence information is scrolled. See the next page for details about the sound sequence information. DVD Multitrack Recorder DV824 DVD Multitrack Recorder DV824 DVD Multitrack Recorder DV824... - Page 144 "<New line>" at the bottom is used for adding a new descriptor information. See "Adding descriptor information" for details. The table below shows the details of the descriptor information which Fostex registers by default, as shown on the screen example above.
-
Page 145: Editing Descriptor Information
Press the [CLEAR] key repeatedly to clear the whole information, and press the [ENTER/YES] key. The line is deleted, while the subsequent lines move up. DVD Multitrack Recorder DV824 DVD Multitrack Recorder DV824 DVD Multitrack Recorder DV824 DVD Multitrack Recorder DV824... -
Page 146: Deleting An Unnecessary Audio File [Delete File]
DVD Multitrack Recorder DV824 DVD Multitrack Recorder DV824 DVD Multitrack Recorder DV824 DVD Multitrack Recorder DV824 DVD Multitrack Recorder DV824 Deleting an unnecessary audio file [Delete file] The [Delete file] menu item deletes an unnecessary audio file. You can delete only the currently loaded audio file, therefore, you must load the desired audio file before deleting it. -
Page 147: Restoring A Deleted Audio File [Restore Del. File]
Press the [STOP/HOME] key to exit the MENU mode. <Note>: The restored file has the same file number as when it was deleted. DVD Multitrack Recorder DV824 DVD Multitrack Recorder DV824 DVD Multitrack Recorder DV824 DVD Multitrack Recorder DV824... -
Page 148: Optimizing A Disk [Optimize Disk]
DVD Multitrack Recorder DV824 DVD Multitrack Recorder DV824 DVD Multitrack Recorder DV824 DVD Multitrack Recorder DV824 DVD Multitrack Recorder DV824 Optimizing a disk [Optimize disk] Using the "Optimize disk" menu item, you can optimize a current disk (a DVD-RAM disk or hard disk partition). -
Page 149: Formatting A Disk [Format]
"Reel No", the next item, is automatically highlighted. <Note>: If the optional hard disk drive is not installed, "DVD-RAM" is the only option. DVD Multitrack Recorder DV824 DVD Multitrack Recorder DV824 DVD Multitrack Recorder DV824 DVD Multitrack Recorder DV824 DVD Multitrack Recorder DV824 Selects a medium to be formatted. - Page 150 See "Dual Drive Recording" on page 86 in "Advanced operation" for details about "DDR" mode formatting. When formatting a DVD-RAM disk in the "Normal" mode, the DV824 <Note>: performs brief inspection of dirt, dust and defect on the medium even if "Physi- cal Format"...
- Page 151 A DVD-RAM disk (or a hard disk partition) is formatted in a simple manner. We recommend selecting this option for a relatively new DVD-RAM disk (or a hard disk partition). The DV824 also performs simple inspection of dirt, dust and defect on a DVD-RAM disk when formatting.
-
Page 152: Editing The Reel Number (Volume Label) [Reel No.]
DVD Multitrack Recorder DV824 DVD Multitrack Recorder DV824 DVD Multitrack Recorder DV824 DVD Multitrack Recorder DV824 DVD Multitrack Recorder DV824 Editing the reel number (Volume label) [Reel No.] Using the "Reel No." menu item, you can edit the reel number of the currently se- lected disk (or partition). -
Page 153: Record Protection On/Off Setting [Rec Protect]
<The current file is protected.> <Note>: The DV824 can protect each partition of the optional hard disk drive. See "Partition protection On/Off setting [Part. protect]" on the next page for details. DVD Multitrack Recorder DV824... -
Page 154: Resume Function On/Off Setting [Resume]
DVD Multitrack Recorder DV824 DVD Multitrack Recorder DV824 DVD Multitrack Recorder DV824 DVD Multitrack Recorder DV824 DVD Multitrack Recorder DV824 Resume function On/Off setting [Resume] Using the "Resume" menu item, you can select "On" or "Off" of the resume function. -
Page 155: Load Setup Menu
The data is immediately loaded. After "Completed!" is shown, the display returns to show the MENU list screen. To exit the MENU mode, press the [STOP/HOME] key. DVD Multitrack Recorder DV824 DVD Multitrack Recorder DV824 DVD Multitrack Recorder DV824 DVD Multitrack Recorder DV824... -
Page 156: Save Setup Menu
DVD Multitrack Recorder DV824 DVD Multitrack Recorder DV824 DVD Multitrack Recorder DV824 DVD Multitrack Recorder DV824 DVD Multitrack Recorder DV824 Using the "SAVE SETUP" menu item, you can save the current data to a user box. The saved data can be loaded using the "LOAD SETUP" menu at any time. -
Page 157: Chapter-9: Specifications
DVD Multitrack Recorder DV824 DVD Multitrack Recorder DV824 DVD Multitrack Recorder DV824 DVD Multitrack Recorder DV824 DVD Multitrack Recorder DV824 Chapter-9: Specifications... - Page 158 DVD Multitrack Recorder DV824 DVD Multitrack Recorder DV824 DVD Multitrack Recorder DV824 DVD Multitrack Recorder DV824 DVD Multitrack Recorder DV824 *0 dBu=0.775 Vrms, 0 dBV=1 Vrms. Reference level : -12 dBFS/-18 dBFS/-20 dBFS (default: -20 dBFS, selectable in the "Ref. level" menu...
- Page 159 * " " is a trademark of DVD format/Logo Licensing Corporation. * Specifications and appearance are subject to change without notice for product improve- ment. DVD Multitrack Recorder DV824 DVD Multitrack Recorder DV824 DVD Multitrack Recorder DV824 DVD Multitrack Recorder DV824...
- Page 160 DVD Multitrack Recorder DV824 DVD Multitrack Recorder DV824 DVD Multitrack Recorder DV824 DVD Multitrack Recorder DV824 DVD Multitrack Recorder DV824 4:12V 3:NC 2:NC 1:GND DC-IN DVD RECORDER TR ODD- MONO EVEN TR7-8 TR5-6 TR3-4 TR1-2 POWER (KYBD ONLY) PHONES Physical dimensions...
-
Page 161: Declaration Of Ec Directive
In the electrical fast transient/burst requirements, surge, conducted disturbances by radio-frequency fields, power frequency magnetic field, radiate electromagnetic field requirements and static electricity discharging environment, this could be affected by generation of noise in some cases. FOSTEX DISTRIBUTORS LIST IN EUROPE * Including non-EU countries (as of October, 2003) <AUSTRIA>... - Page 162 FOSTEX CO. 3-2-35, Musashino, Akishima-shi, Tokyo, Japan 196-0021 FOSTEX AMERICA 15431, Blackburn Avenue, Norwalk, CA 90650, U. S. A. © PRINTED IN JAPAN OCT. 2004 8288 511 100 FX 413760...
Need help?
Do you have a question about the DV824 and is the answer not in the manual?
Questions and answers