LINET AVE 2 User Manual And Technical Description
Hide thumbs
Also See for AVE 2:
- Instructions for use and technical description (89 pages) ,
- Instructions for use and technical description (106 pages)

Subscribe to Our Youtube Channel
Related Manuals for LINET AVE 2


Summary of Contents for LINET AVE 2
- Page 1 AVE 2 Birthing Bed D9U004PPB-0110 Version: 01 Publication Date: 2017-03-07...
- Page 2 Želevčice 5 274 01 Slaný tel.: +420 312 576 111 fax: +420 312 522 668 e-mail: info@linet.com www.linet.com Birthing Bed AVE 2 Author: LINET, s.r.o. Related links: www.linet.com Version: 01 Publication Date: 2017-03-07 Copyright © LINET, s.r.o., 2017 Translation © LINET, 2017 All rights reserved.
-
Page 3: Table Of Contents
Content 1 INTRODUCTION ........................... 5 2 SAFETY AND DANGERS ........................9 2.1 Safety instructions ..................9 3 UN-PACKING MANUAL ........................11 4 OVERVIEW OF BASIC PARTS ......................19 4.1 Overview of basic versions ..............20 4.2 Overview of colour verisons ..............20 4.3 Safety ...................... - Page 4 6.6 GKB-076 Doctor's chair (ergonomic) ............58 6.7 ZK-05.X Doctor’s chair ................58 6.8 PPB-069 Front holder with protective elements ........59 6.9 PPB-070 Upper mattress (for 3,94 inch cushioning) ....... 59 6.10 PPB-071 Upper mattress (for 5,12 inch cushioning) ......59 7 CARE..............................
-
Page 5: Introduction
Please keep these instructions near the bed throughout its operation. Every person operating the birthing bed AVE 2 must read and understand the contents of these instructions. Very important information is marked throughout the manual by the following symbols:... - Page 6 Follow the instructions manual Designation of birthing bed for adult Equipotentiality Packaging material: “Keep dry” Packaging material: “Fragile!“ Packaging material: “This side up” Temperature limitation Transportation marking: „Relative air humidity“. Transportation marking: “Air pressure”. Marking according to the directive EC 2002/96/EC (Directive on disposal of old electric and electronic appliances).
- Page 7 Only suitable for indoor use Thermal protection for transformer No sitting on leg rest Warning: Do not push or pull infusion stand Warning: Do not place objects in this area Warning: Do not place objects on this cover Warning: Never step on the lifting column cover in movement. The space is indicated with a caution sticker.
- Page 8 Frequency unit in the SI system Electromagnetic compatibility High frequency Medical equipment CISPR International Special Committee on Radio Interference Pictogram in the user manual Meaning Caution or Warning Please address any potential queries to the authorized representative or directly to the producer LINET spol s.r.o.
-
Page 9: Safety And Dangers
2 Safety and Dangers 2.1 Safety instructions Follow the instructions carefully. Any non-observance of this manual may lead to injuries or material damage. Exclusively use the bed if it is in perfect working order. If necessary, check the bed functions daily or at each shift change. ... - Page 10 Close linen shelf before using the Reverse Trendelenburg position. Do not put any objects (e.g. accessories, infusions, cables) between or on siderails and movable parts. Use exclusively siderails for confused or disoriented patients. Before setting the lowest position, ensure there is no risk of any parts of the bed colliding with servers, accessories or body parts.
-
Page 11: Un-Packing Manual
Do not unpack and/or accept the consignment if the package has any visual damage! If so, issue a complaint. Personal qualification The persons authorised for installation and putting into operation of the product, i.e. those trained by Linet s.r.o. Personnel required for unpacking and installation Minimum two persons. - Page 12 Cut the plastic bag open carefully; ideally around the bottom edge of the pallet and remove the polythene from the chair including the bottom of the box. Cut the foil which holds the power supply cable carefully; plug the cable in. Then cut the band around the box containing the bed equipment and remove the bar (if contained in the package).
- Page 13 Remove the other container from the pallet, so that the upper part is free. Unscrew the medical chair (if it is included in the package). It is recommended to put the bed to a higher position.
- Page 14 Remove the bedhead (if it is contained in the package) from the holder and then unscrew it. Remove the rest of the packaging material off the bed.
- Page 15 Make sure that all wheels are facing forward alongside the longer part of the pallet and lock the wheels to move in a straight line. One by one remove the 4 pcs of safety screws; if possible, pull them down to the floor. The screws are under the wedges the chair is placed on.
- Page 16 Put two polystyrene ramps to the edge of the pallet. Carefully push the bed so that it gets from the anchoring wedges to the pallet and then move it down using the ramps.
- Page 17 Back-up battery connecting With regard to the possibility of unwanted switching on of AVE 2 upon packaging, transport and unpacking, the battery is normally disconnected from the equipment. The following pictures show how to connect the battery. Only service technician approved by manufacturer performs this procedure.
- Page 18 Put the protective cover in place and screw the Allen wrenches back on. Put the undercarriage cover back in place. Fitting of leg rest Insert the leg rest in the joint. Hold the controller and insert the lock pin with the other hand. Release the leg rest controller and secure the pin with a protective cap.
-
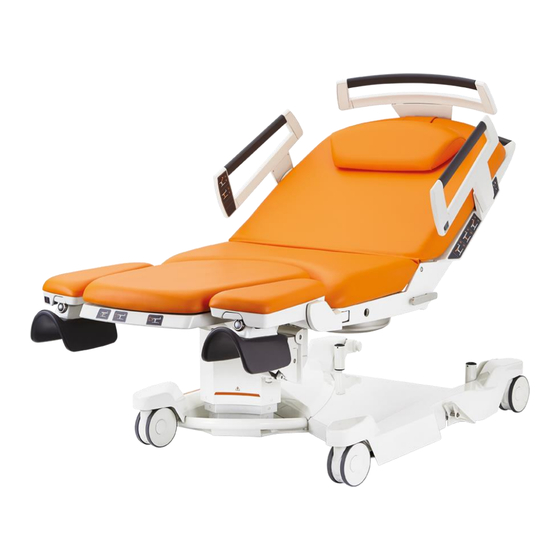
Page 19: Overview Of Basic Parts
4 Overview of basic parts back section seat section foot section castor, directional 1x castor with brake 3x plastic covers of chassis leg rests headrest back handle for transportation eurolath along seat section (accessories) tray on swinging holder side control panel control light for power supply holder for infusion stand hand grips... -
Page 20: Overview Of Basic Versions
4.1 Overview of basic versions PPB-AX basic type 4.2 Overview of colour verisons Substituted by the letter “X”. A – Purple M – Corn Yellow B – Brilliant Blue P - Orange F – Ocean Green T - Pink 4.3 Safety Standards The product meets the requirements of valid standards EN 60 601-1 ed. - Page 21 When using the delivery bed as part of the medical system, certain elements (medical devices) may interact. Before this application it is necessary to follow recommendations provided in the user manual of the birthing bed AVE 2. General instructions Birthing Bed is intended for use in the Application Environment 5 (according to IEC 60601-2-52).
- Page 22 The b i r t h i n g b e d AVE 2 must not be used in medical facilities with fire or explosion risks caused by air or in combination with nitrous oxide and anesthetics or cleaning agents.
- Page 23 27,5 kPa. Manual and declaration of the manufacturer - electromagnetic radiation The birthing bed AVE 2 is intended for use in electromagnetic environment. The customer or user of the birthing bed must ensure that the bed is used in such environment.
- Page 24 Manual and declaration of the manufacturer - electromagnetic resistance The birthing bed AVE 2 is intended for use in electromagnetic environment. The customer or user of the birthing bed must ensure that the bed is used in such environment. Resistance Test...
- Page 25 Resistance Test Test Level as per Level of Electromagnetic Environment IEC 60601 Compliance Conducted high 3 Vrms 3 Vrms It is recommended to use portable and frequency 150 kHz to 80 mobile HF communication equipment phenomena around the bed in distances defined IEC 61000-4-6 below: Radiated high-...
- Page 26 RF communications equipment and the birthing bed AVE2 The birthing bed AVE 2 is intended for use in an electromagnetic environment in which radiated RF disturbances are controlled. The customer or the user of the AVE 2 bed can help prevent electromagnetic interference by...
-
Page 27: Setting The Product
Mechanical safety: Warning: Caution No objects that may collide with the bed (furniture, stands etc.) may be located near it (20 cm minimum). Special caution must be taken when operating moving parts of the bed. Damage of the bed or patient injury may occur as result of the bed parts colliding with other objects! Before the mother in labor accesses the bed, the castor brakes must be engaged. - Page 28 Trained personnel must be also educated on appropriate height of infusion stand setting. The training is provided by LINET (manufacturer) representative or its authorized dealership. The birthing bed includes fully charged and flawless battery that enables the bed to function for three minutes.
- Page 29 bed), always secure the bed with the central brake. Otherwise you can cause injury to persons or damage to the device. The maximum threshold crossing height is 0,79 inch. During transport, pay attention to the leg rests, siderails, foot section and hand grips to prevent hitting doors and other objects.
-
Page 30: Transportation Of The Delivery Table From One Place To Another
4.4.2 Transportation of the delivery table from one place to another Follow the instruction below: Do not move the table over cables. Power cable of the delivery table must always be fixed in the hook (provided on front side of the table). -
Page 31: Operating The Bed
In case of fuse replacement pay attention to correct selection of a fuse type. Fuses need not be replaced by an authorized LINET service; it can be done by a qualified electrician. Pay attention to free passage of hoses, cannulae, and other free parts (in case infusions are used) so as not to get these pinched in the moving parts of the product (rails or leaning parts may be the risk locations). -
Page 32: Lowering Procedure
5.1.2 Lowering procedure To initiate lowering, push the trigger in the marked direction with one hand, then lower the rail to the lowest position possible. The parking position is suitable for birth mother to get easily on the bed, eventually for better access to the patient during birth. -
Page 33: Side Control Panel
5.2 Side control panel Warning: Caution Side control panel is located on both sides of AVE 2 birthing bed. The panel can be operated by trained personnel only. Toggle bed backlight Holding the on/off button initiates setting the bed to anti-shock... - Page 34 Lowering / lifting of the seat section Bed height adjustment Nurse Call Lowering / lifting of CPR lever the back section...
-
Page 35: Manual Setting Of The Cpr
5.3 Manual setting of the CPR Warning: Caution The CPR controller is marked with red information labels on both sides of the back section. The labels are marked with CPR text. To activate the function, use one hand to push the red lever in the specified direction. Use your other hand to pull down the back section by the handle on the back section. -
Page 36: Electric Setting Of Trendelenburg
5.4 Electric setting of Trendelenburg The controller is marked with orange on both sides of the back section. For positioning of the back section, push the above-marked button and hold it until the positioning comes to an end. To reset the back section to its original position, use motoric positioning (activates via hand control, side control panel or side rail panel). -
Page 37: Setting Of The Foot Section
5.5 Setting of the foot section Warning: Caution The load capacity of foot section is 150 kg maximum (330 lb.). The load capacity of foot section and leg rests together is 170 kg maximum (374 lb.). Foot section positioning (sliding in/out, lifting/lowering, inclination) always without load. 5.5.1 Folding/unfolding In lowered position, the foot section can be folded and locked in two positions: a) Folded... -
Page 38: Lifting/Lowering
Adjustment to any of these positions can be done by pressing the controller in the direction of the marked arrow and turning the foot section towards/outwards the operator. Once reached, the foot section will automatically lock in both positions. Warning: Caution Before folding, always make sure the foot section is in the lowest position and back section is not in Trendelenburg position! - Page 39 Lifting Pull the control lever with the right hand. At the same time grab the front edge of the foot section and pull upwards to the desired position. Releasing the control lever locks the selected position. Lowering Pull the control lever with the right hand and at the same time grab the front edge of the foot section and push downwards to the desired position.
-
Page 40: Tilting Up/Down
5.5.3 Tilting up/down Pull the control lever with the right hand. Then push the foot section downwards. You can lock the foot section in any position by releasing the control lever. Uninterrupted push downwards results in low horizontal position of the foot section. -
Page 41: Adjusting The Leg Rests
5.6 Adjusting the leg rests Warning: Caution The load capacity of one leg rest is 154lb maximum. The load capacity of foot section and leg rests together is 374lb maximum. Manipulation with the foot section or seating section and with the leg rests can cause a collision, especially when the leg rests are situated close to the foot section or above it. -
Page 42: Gynaecological Position
5.6.1 Gynaecological position For positioning pull „Turning the leg rest sideways“ control lever as on the picture below and with the same hand pull the leg rest in the desired position. - Page 43 Then pull the „Tilting of the leg rest“ control lever as in the picture below and with the same hand pull the leg rest in the desired position. Then adjust the leg rest tray. With one hand pull the „Folding/unfolding of the leg rest tray“control lever as on the picture below.
-
Page 44: Foot Rest Position
5.6.2 Foot rest position The leg rests can be adjusted in the Foot rest position. For positioning pull „Turning the leg rest sideways“ control lever as on the picture below and with same hand pull the leg rest in the desired position. - Page 45 Then pull the „Tilting of the leg rest“control lever as on the picture below and with same hand pull the leg rest in the desired position.
-
Page 46: Maximum Bed Surface Position
5.6.3 Maximum bed surface position The leg rests can be positioned horizontally along the sides of the foot section. Due to this function, one laying surface can be achieved together with the seat and back sections. For positioning, pull „Turning the leg rest sideways“... -
Page 47: Turning The Leg Rests Sideways
5.6.4 Turning the leg rests sideways The leg rests can be turned sideways for better access to a birth mother. For turning the leg rest sideways, pull the control lever as on the picture below. Then pull the leg rest to the desired position. Releasing the control lever locks the position. To reset the tray to its original position, repeat the procedure reversely. -
Page 48: Leg Rest Tray Ajdustment
5.6.5 Leg rest tray ajdustment Leg rest tray can be individually turned sideways according to the physical proportions of the birth mother. To do so, the leg rest must be in "Gynaecological position". Then with one hand pull the control lever as on the picture below. -
Page 49: Leg Rest Tray Height Adjustment
5.6.6 Leg rest tray height adjustment Leg rest tray can be individually adjusted according to the physical proportions of the birth mother. To do so, the leg rest must be in "Gynaecological position". Then with one hand pull the control lever as on the picture below. -
Page 50: Backup Battery
5.7 Backup Battery Warning: Caution Batteries may be exchanged only by service personnel! Battery replacement by insufficiently trained personnel can pose hazard or limit the medical device functionality! If you hear the sound signalling the back-up battery is about to die, it is necessary to plug in the bed in the power grid immediately. -
Page 51: Hand Grips
5.8 Hand grips Warning: Caution When simultaneously using hand grips and setting the leg rests to the Foot rest position, collision may occur! Hence, it is necessary to pay attention to avoid injury of the personnel and/or the mother in labor when adjusting the leg rests. -
Page 52: Tray On The Swinging Holder
5.9 Tray on the swinging holder Warning: Caution Tray may only be manipulated when the lying section of the foot rest section is adjusted in the low position! The stainless steel tray is foldable on the swinging holder forth and backwards. It is possible to remove the tray from the holder in the forth position. -
Page 53: Head Rest
5.11 Head rest Comfort head rest can support the head of the woman in childbirth. Thanks to its ergonomy it can also serve to fill the lumbar part of the patient as to support her back, so that the spine maintains its natural curving. -
Page 54: Exchangeability Of The Integrated Mattress
5.13 Exchangeability of the integrated mattress Warning: Caution Incompatabile integrated mattress can cause risk! When changing the bed, always make sure that the integrated mattress fits correctly on the seat and back sections of the bed. Spaces filled with fabric do not fulfil their function, do not hold silicone pins of the mattress a n d a s s u c h , p o s e a risk of injury of the labouring woman or damage to the plastic parts of the mattress. -
Page 55: Nurse Call
5.14 Nurse Call Warning: Caution The control elements of the Nurse Call function cannot be deactivated. The nurse call button is located on the inner side of the side handle control panel (on the side of the labouring woman). After pressing and releasing the button an indicator light lights up, indicating that a nurse has been called. -
Page 56: Accessories
6 Accessories 6.1 PPB-067 Supporting bar Warning: Caution Maximum weight load of the supporting bar is 70 kg in all direction (154 lb.). Supporting bar isn’t vertically locked up, it may be ejected from the holder in the upward direction! 6.2 Backlighting of the birthing bed The backlighting is turned on by short pressing the button on the side control panel of the birthing bed. -
Page 57: Infusion Stand, Stainless Steel, Telescopic
6.3 Infusion stand, stainless steel, telescopic Infusion stand is only used to hold infusion. It is restricted to use it for manipulation with birthing bed. It is also necessary to be cautious when manipulating with the bed in order to avoid the collision between the infusion stand holder or possibly the infusion stand and the other objects situated close to it. -
Page 58: Gkb-076 Doctor's Chair (Ergonomic)
6.6 GKB-076 Doctor's chair (ergonomic) 6.7 ZK-05.X Doctor’s chair... -
Page 59: Ppb-069 Front Holder With Protective Elements
6.8 PPB-069 Front holder with protective elements Warning: Caution Maximum weight capacity is 150 Kg (330 lb.). Accessories can be attached to the holder and it serves as foot section protection as well. The set contains two side bumpers. 6.9 PPB-070 Upper mattress (for 3,94 inch cushioning) The accessory is primarily used after post-partum;... -
Page 60: Care
7 Care All LINET products are designed for many years of service under the conditions of correct use. Please use your bed and its accessories carefully. Please follow these instructions and the herein described operation procedures. Avoid negligent handling. Do not, in case of a function failure, undertake any repairs and never use force! 7.1 Cleaning and disinfection... - Page 61 The manufacturer’s instructions on individual cleaning and disinfecting products must be followed at all times. LINET is not responsible for damage to the cushioning (e.g. cracking, paint flaking etc.), which would result from improper use of disinfectants. In such cases, warranty claim shall not apply.
- Page 62 Chassis cleaning Warning: Caution Be extremely cautious when cleaning the chassis parts! Prior to cleaning, always disconnect the device from the power supply. The bed must not be used without a properly fitted plastic chassis cover! By using an inadequate amount of water you risk water leakage into the motor parts of the product, which may damage the electric wiring and render the product not functional.
-
Page 63: Maintenance
8 Maintenance Warning: Caution From practical testing results, the technical lifetime of the product is 15 years. Lifetime of the battery is limited and must be replaced. batteries (these are provided with the warranty of 6 months). gas springs need to be replaced every 12 years. Treads of fastening screws or the joins on the frame parts may get degreased by disinfectants. -
Page 64: Technical Parameters
8.2 Technical parameters Total length of the lying area (including the foot section) 83,54 inch Minimum length in the default setting (without the foot section) 61,81inch Full with with the side rails in active position 38,58 inch Full with with the side rails in parked position 37,79 inch Maximum height of the seat section (Trendelenburg 40) 45 inch... -
Page 65: Electrical Parameters
8.3 Electrical parameters Batteries – back-up 24V/2,3 Ah Voltage – input 100 -120 V (50/60 Hz) Maximum input 570 VA Motor voltage 24 V Ingress protection of the birthing bed IPX4 Device protection class Classification of applied parts Functional description of motors: The birthing bed is fitted with electrical linear motors for moving the back section, seat section and for bed height adjustment. -
Page 66: Attached Parts Of Product
8.4 Attached parts of product The attached parts on the product are classified as Type B - they provide basic protection of the patient and comply with the applicable requirements of AAMI/ANSI/IEC 60601-1 ed. 2:2007, by which they meet the requirements on classification of Type B attached parts. Sample of a manufacturing nameplate (label with UDI) -
Page 67: Storage Instruction
(preferably in English) the manufacturer at: For repairs, please use only the original LINET spare parts and the services of trained service technicians licensed to repair products of this type. Unprofessional repairs shall be considered as a substantial breach... -
Page 68: Disposal
PCB or CFC. Noise emissions and vibrations meet the ® directives for healthcare facilities. LINET has taken care to ensure all wood used in the production of its bed systems is responsibly source (Mahagony, Jacaranda, Ebony, Teak or wood from Amazonian / rainforests are not used. -
Page 69: Warranty
10 Warranty LINET® will only be held responsible for the safety and reliability of products that are regularly serviced and used in accordance with the safety guidelines. Should a serious defect arise that cannot be repaired during maintenance: Do not continue to use the bed.
Need help?
Do you have a question about the AVE 2 and is the answer not in the manual?
Questions and answers