Table of Contents
Advertisement
Advertisement
Table of Contents

Subscribe to Our Youtube Channel
Related Manuals for EMOJO CADDY PRO


Summary of Contents for EMOJO CADDY PRO
- Page 1 OWNER’S MANUAL...
-
Page 2: Table Of Contents
CONTENTS Instructions Warnings Explanatory drawing of the overall bike configuration Schematic diagram of the electric bicycle Main technical parameters Throttle control Gears LCD Control keys Operation stages 10-11 P.A.S. Control 12-13 Error codes Charging your battery Battery mounting and removal 16-17 Front wheel installation and seat adjustment 18-19... -
Page 3: Instructions
Instructions 1. Please read the manual carefully before using the electric bicycle. 2. Make sure all parts are locked tightly, such as the frame joint, driver hand pipe, seat post and pedal, etc. before using. Do not use electric bicycle before carefully reading the instructions and knowing about the performance of the electric bicycle. Do not lend the electric bicycle to anyone who does not know how to operate it. -
Page 4: Warnings
Notice de la batterie! Attention Notice de la batterie! Attention WARNING: Risk of fire or electric shock. No user Serviceable Parts... - Page 5 Veuillez prêter attention aux éléments suivants pour votre sécurité: Assurez-vous de vérifier la sécurité et la stabilité du frein, de la selle, Le démontage et la assemblage du vélo peuvent entraîner des risques du cadre, du guidon, de la roue, etc., pour éviter les accidents. de sécurité...
-
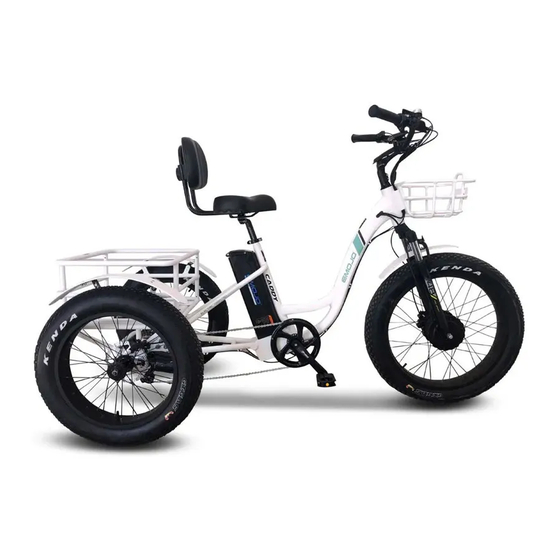
Page 6: Explanatory Drawing Of The Overall Bike Configuration
Explanatory drawing of the overall bike configuration Handlebar Seat with backrest Quick wiring connectors Front basket. Max. Rear basket. capacity: 55 Lbs Max. Seat pole capacity: 55 Lbs Battery Headlight Seat pole quick release lever Controller 7-gear cassete Rear disc brake Pedals Electric motor Rear dirrailleur... -
Page 7: Schematic Diagram Of The Electric Bicycle
Schematic diagram of the electric bicycle:... -
Page 8: Main Technical Parameters
Main Technical Parameters Item Index Total Weight lbs. Load weight (including the Weight of Cyclist) lbs. ::;330 Travel Mileage on a single Charge Miles w/pedal assist Winter::::25 Summer::::40 Power Consumption on a single Charge (kilowatt) <0.6 Power Consumption per Kilometer (kilowatt) <1.2 Type Lithium Ion Battery... -
Page 9: Throttle Control
Hand Throttle Control Your EMOJO electric bike is equipped with a power and throttle control which can be fixed on wither the on the right or left hand side. To power on your bike first make sure the switch to your battery is in the ON position. -
Page 10: Gears
Gears This EMOJO e-bike model is equipped with 7 speeds. The first gear is for easier and uphill pedaling, and the last gear is for maximum speed on level or downhill terrain. Change gears only while pedaling. The rear wheel contains seven chain sprockets. When the chain is around the largest sprocket, you are in 1st gear, or the lowest gear. -
Page 11: Lcd Control Keys
LCD Control keys There are several functions on the screen of your Caddy trike, all of the functions and settings are controlled by the 3 keys on the left side handlebar module. 3-Key control module on the left side of the handlebar The key operations consists of short press, long press or a combination of 2 keys: Short press UP/DOWN keys: Change PAS assist level during riding. -
Page 12: Operation Stages
Correct Operation Stages ! Warning: For your safety, please practice in open tracts the first time you ride. After mastering the controls of an electric bicycle, you may ride on regular roads and follow the traffic rules consciously. Do not let inexperienced people ride the electric bicycle, do not disassemble and refit the electric bicycle, please pay attention and brake in advance to allow longer braking distance in rainy or snowy weather. - Page 13 Instructions d'utilisation ! Attention: Pour votre sécurité, veuillez vous entraîner sur des pistes ouvertes la premiére fois que vous roulez. Aprés avoir maîtris´e les commandes d’un vélo électrique, vous pouvez rouler sur des routes réguliéres et suivre consciemment le code de la route. Ne laissez pas des personnes inexpérimentées conduire le véloélectrique, ne démontez pas et ne remontez pas le vélo ´electrique, veuillez faire attention et freiner á...
- Page 14 Pedal Assist Mode Control LCD Please read the following steps and images to help you understand how to read and operate all the functions. ◆Display Interface After switching on the E-bike system, the display shows current speed and total distance except, battery indicator and assistance level ◆To change the indicated information, press the MODE button to show in turn as follows: Current Speed (Km/h) →...
- Page 15 Display functions Pedal Assist Mode LCD Screen 1-Power On/Off Press the M button to power on the display. To power off display and power The LCD shows: Speed, Motor Power Ratio Disp l ay, Battery Leve l , supply to the bicycle press and hold for 3 seconds Error Indication, Tota l Mi l eage, Sing l e trip mi l eage, Cruise Contro l , 3-Riding Mode Sing l e Running Time, Light on.
-
Page 16: Control
Meaning Code Indications Front LED ligtht is ON 0x01 Normal condition 0x02 Brake problem(electromagnetism) Check brake lever 0x03 Brake problem(power off) Check brake lever 0x04 Throttle is not Initialization Check the throttle 0x05 Throttle is damaged Change the throttle 0x06 Battery low-voltage protection Check the battery voltage and capacity... -
Page 17: Charging Your Battery
Charging the battery 1. Always charge the battery fully for the first time. When the battery level is low plug it to charge it, use only the original charger provided with the battery. Slide open the protective hatch to access the charging port 2. -
Page 18: Battery Mounting And Removal
Attention: I. Make sure the charger is the original charger. 2. All charging plugs must be inserted tightly. 3. The average charging time of the whole battery pack is 6-8 hours, pl ease operate in strict accordance with above instructions and keep charger away from children. - Page 19 Attention: 1. Assurez-vous que le chargeur est d’origine. 2. Toutes les fiches de charge doiventêtre bien insérées. 3. Le temps de charge moyen de l’ensemble de la batterie est de 6 `a 8 heures, veuillez fonctionner en stricte conformité avec les instructions ci-dessus et garder le chargeur hors de portée des enfants.
-
Page 20: Front Wheel Installation And Seat Adjustment
Read the instructions carefully to identify and understand the components of the electric bicycle such as pedal, seat post etc. and the name of relevant spare parts. When specialized servicing of bike is required, please go to an authorized EMOJO repair shop or store or another trusted bike professional. - Page 21 Lisez attentivement les instructions pour identifier et comprendre les com-posants du vélo électrique tels que la pédale, la tige de selle, etc., ainsi que le nom des piéces de rechange pertinentes. Lorsqu’un entretien spécialise´ des vélos est nécessaire, veuillez vous rendre dans un atelier de réparation ou un magasin EMOJO agréé...
-
Page 22: Brakes
WARNING: • Disc brake rotors become hot during use. Do not touch Your EMOJO e-bike is equipped with disc brakes for maximum or come in contact with the disc rotor shortly after use. reliability. Applying hand pressure to the brake levers will engage the •... - Page 23 ATTENTION • Les disques des freins deviennent chauds pendant l’utilisation. Votre e-bike EMOJO est équipé de freins `a disque pour une fiabilité maxi-male. Ne pas toucher ni entrer en contact avec le disque peu de temps L’application d’une pression manuelle sur les leviers de frein engagera les plaquettes aprés l’utilisation.
-
Page 24: Pedals And Tire Adjustment
4. Pedal Installation and Adjustment: Take out pedals from the accessory box, install one of the pedals (pedals are marked with the letters "L" and "R" to indicate the side they belong to). When installing the pedals, insert the wrench stuck on the flat end of pedal axial head, and twist into the crank in clockwise direction. 5. - Page 25 4. Installation et réglage de la pédale: Retirez les pédales de la boîte d’accessoires, installez l’une des pédales (les pédales sont marquées des lettres L et R pour indiquer le côté auquel elles appartiennent). Lors de l’installation des pédales, Utilisez la clé sur la tête plate de l’axiale de la pédale et tournez dans le sens des aiguilles d’une montre. 5.
-
Page 26: Chain
7. Adjustment of Power Assisting Hall Sensor A: Turn the bike upside down, have it rest on the floor. I: The distance between the sensor and the disk shall be 3-5 millimeters :: Installing the sensor on the side of chain ring, when forwarding the chain ring, the power assistance is effective. - Page 27 7. Réglage du capteur `a effet Hall d’assistance électrique A: Retournez le vélo, posez-le sur le sol. B: la distance entre le capteur et le disque doit étre de 3 `a 5 millimétres C: Installation du capteur sur le côté du plateau, lors de l’avancement du plateau, l’assistance électrique est efficace Disque magn´etique 3-Smm Capteur...
- Page 28 Check the charger and power. Check whether the battery connection is in good condition and is stable. Check whether the charger plugs board fails. Check for any blown fuses in the battery case or any Battery Not Charging disconnected wiring. Vérifiez le chargeur et l’alimentation.
- Page 29 Power Shut Off Troubleshooting If your EMOJO Lynx experiences a sudden power shut off while in use, this can be related to several reasons but the problem has an easy fix. PROBLEM DIAGNOSTIC The LED module on the handlebar starts to blink repeatedly 1- Check the battery directly, press he power button to followed by a power shut off.
-
Page 30: Troubleshooting 27 Faq
The range with throttle only lasts about 20 miles (35 km) headwinds on my EMOJO electric bike? A. Yes. One of the main advantages of cycling on an EMOJO electric bicycle is that it How do I know when the battery is low? literally flattens hills and increases your average speed when tackling inclines and A. -
Page 31: Storage And Disposal
Stockage et élimination Veuillez suivre ces étapes pour prolonger la durée de vie de votre vélo EMOJO. 1.-Protége toujours votre tricycle électrique de la pluie, de la neige, de la grêle, etc. Entreposez-le toujours á l’intérieur ou dans un garage fermé. - Page 32 At EMOJO we are commited to the consumers and the experience first, put a smile on the face of each of EMOJO rider and revive childhood memories when riding a bike meant freedom regardless of your age or gender, life doesn’t stop and neither should you, that’s why we say: “RIDE LIFE”...
Need help?
Do you have a question about the CADDY PRO and is the answer not in the manual?
Questions and answers
I have a caddy pro that is displaying error code 25 and the throttle does not engage the motor. How do I fix it?
Error code 0x25 is not listed in the provided context. However, if the throttle does not engage the motor, check for related issues mentioned:
- 0x14: Motor temperature problem – the motor can still work but should be repaired.
- 0x21: Speed sensor problem – check the speed sensor.
- 0x22: BMS problem – check the Battery Management System.
- 0x30: Communication problem – change the display.
Inspect the motor, speed sensor, BMS, and display for issues. If none of these codes are shown, the throttle or its connection may be faulty, though this is not covered in the provided context.
This answer is automatically generated