Table of Contents
Advertisement
Advertisement
Table of Contents

Subscribe to Our Youtube Channel
Related Manuals for EMOJO BOBCAT PRO


Summary of Contents for EMOJO BOBCAT PRO
- Page 1 OWNER’S MANUAL...
-
Page 2: Table Of Contents
CONTENTS Instructions Warnings Explanatory diagram of the overall ebike configuration Schematic diagram of the electric bicycle Main technical parameters Throttle control Correct operation stages Pedal assist mode control Error codes Charging the battery 11,12 Seat adjustment Disc brakes Tire pressure and brake adjusment Chain adjustmen and Hall sensor Maintenance table Power shut off troubleshooting... -
Page 3: Instructions
8. Warranty will be void if a non-approved battery charger or other non-original EMOJO spare parts are used. 9. Minors, pregnant women or anyone that does not have full dexterity of hands and legs should not use this product. -
Page 4: Warnings
Warnings Please pay attention to the following items for your safety: Make sure to check the set up and stability of the brakes, saddle, Disassembling and refitting the bicycle may bring hidden safety hazards frame, handlebar, wheels , etc. before riding to make sure all is in to your electric bike, therefore, causing risk. -
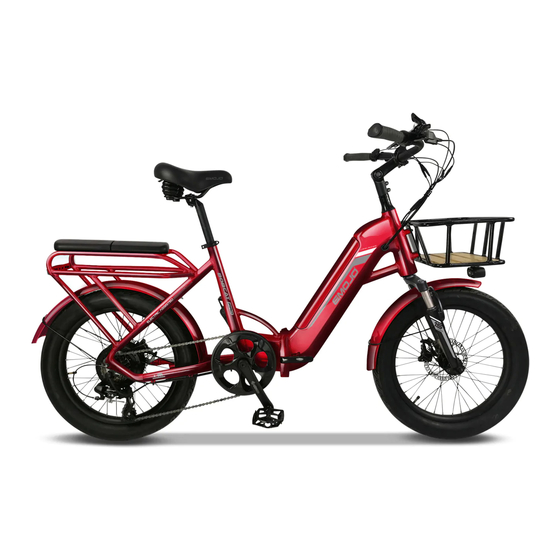
Page 5: Explanatory Diagram Of The Overall Ebike Configuration
Explanatory diagram of the overall ebike configuration Handlebar angle andjadjustment mechanism QQuick connectors Seat Front cargo basket. 30Lbs. payload Seat post Seat post quick release Passenger lever seat Battery Tail light Front lights Folding hinge Front fender Rear fender Front Rear disc suspension brake... -
Page 6: Schematic Diagram Of The Electric Bicycle
Schematic diagram of the electric bicycle... -
Page 7: Main Technical Parameters
Main technical parameters Item Index 58Lbs Total bicycle weight in lbs. 300Lbs Max. load (including cyclist, passenger and cargo Travel Mileage on a single Charge Miles w/PAS Summer: 65miles Winter:60 miles Power Consumption on a single Charge ( P(kilowatt) <0<0.6 .6 Power Consumption per Kilometer (kilowatt( <<1.22 TType... -
Page 8: Throttle Control
Mechanical gears This EMOJO electric bike is equipped with 7 mechanical gears in addition to the pedal assist levels. The first gear is for easier and uphill pedaling, the last gear is for maximum speed on leveled ground or downhills. Change gears only when pedaling. The rear wheel contains seven chain sprockets. -
Page 9: Correct Operation Stages
Correct operation stages Warning: ! "For your safety, please practice in a closed track the first time you ride your ebike". After mastering the controls of an electric bicycle, you may ride on regular roads and follow the traffic rules consciously. Do not let inexperienced people ride the electric bicycle, do not disassemble and refit the electric bicycle. -
Page 10: Pedal Assist Mode Control
Pedal Assist Mode Control Please read the following steps and images to help you understand how to read and operate all the functions. ◆ Display Interface After switching on the ebike system, the display shows current speed and total distance except, battery indicator and assistance level ◆... - Page 11 Pedal Assist Mode LCD Screen Display functions 1-Power On/Off The LCD meter monitors pedal assist, speed, odometer, trip Press the M button to power on the display. To power off display and power distance, riding time, and battery energy level. To tum the meter supply to the bicycle press and hold for 3 seconds on, make sure the battery is fully inserted into the bike.
-
Page 12: Error Codes
Error codes In the event of a system malfunction the screen will display an error code. You can troubleshoot the problem by identifying the code from the following chart. Error Code Definition Normal system, no error Reserved, no function Brake sensor error PAS sensor failure 6 km/h capped top speed Real time cruising... -
Page 13: Charging The Battery
Charging the battery 1. Always charge the battery fully for the first time. When the battery level is low (20% or less), plug it to charge it, use only the original charger provided with the battery. Slide open protective hatch to access the charging port on the left side 2. - Page 14 Attention: I. Make sure the charger is the original charger. 2. All charging plugs must be inserted tightly. 3. The average charging time of the whole battery pack is 5 hours, please operate in strict accordance with above instructions and keep charger away from children.
-
Page 15: Seat Adjustment
Seat adjustment Adjust the seat to the proper height. a)Release the clamp lever b) Lift or push the seat pole to the desired height c) Close the clamp lever tightly to lock the seat into position. Please note that when adjusting the height of the seat post, it has to keep the inserting depth above the safety line, if you rise the post beyond the safety line it may fall off while riding, no matter how tight it is. -
Page 16: Disc Brakes
Figure 1 Disc brakes WARNING: • Disc brake rotors become hot during use. Do not touch or come in contact with the disc rotor shortly after use. • Wet weather will require a longer distance to stop. Brake Your electric bike is equipped with disc brakes for maximum earlier and avoid sudden stops when riding in wet reliability. -
Page 17: Tire Pressure And Brake Adjusment
4. Pedal Installation and Adjustment: Take out pedals from the accessory box, install one of the pedals (pedals are marked with the letters "L" and "R" to indicate the side they belong to). When installing the pedals, insert the wrench stuck on the flat end of pedal axial head, and twist into the crank in clockwise direction. 5. -
Page 18: Chain Adjustmen And Hall Sensor
7. Adjustment of Power Assisting Hall Sensor A: Turn the bike upside down, have it rest on the floor. I: The distance between the sensor and the disk shall be 3-5 millimeters Installing the sensor on the side of chain ring, when forwarding the chain ring, the power assistance is effective. -
Page 19: Maintenance Table
Check the charger and power. Check whether the battery connection is in good condition and is stable. Check whether the charger plugs board fails. Check for any blown fuses Battery Not Charging in the battery case or any disconnected wiring. Note: if you experience problems contact your retailer, dealer or the manufacturer. -
Page 20: Power Shut Off Troubleshooting
1-Check the motor quick connector on the right side by the tail of the frame. Fig. 1 Fig. 1 If the battery is not depleted and the quick connector cable is all in place, contact your shop or EMOJO tech support: info@emojobike.com. Register your ebike To activate your warranty please register your ebike online. -
Page 21: Folding Mechanism
FoFolding mechanism Your BOBCAT PRO ebike has a folding mechanism that allows it to be folded in half to save space for transport or storage. 2-With your thumb, slide out the release button 1-On the right hand side, locate the... - Page 22 Front suspension adjustment Your EMOJO BOBCAT PRO comes equipped with a lockable and preload-adjustable suspension. 1-There are 2 knobs on the front suspension fork, one on each side. Each knob can help you adjust the front suspension settings of your ebike:...
-
Page 23: Front Suspension And Handlebar Adjustment 20 Faq
4-5 hours if completely discharged. braking conditions so that it isn't working against the brakes. What are the running costs for an EMOJO electric bike? How far will the bike take me? A. You will have no worries about rising fuel prices at the pumps. All our electrically A. -
Page 24: Storage And Disposal
Storage and disposal Please follow these steps to prolong the life of your EMOJO bike 1-Always keep your electric bike protected from the rain, snow, hail, etc. Always store it indoors or in a closed garage. 2-Do not leave your electric bike exposed under the direct sunlight for long periods or time 3-If rain or snow catches you suddenly while riding your electric bike will be ok but you must find shelter away from the elements, the battery, display and motor are not designed to perform under heavy rain or snow. -
Page 25: Contact Us
At EMOJO we are commited to the consumers and the experience first, put a smile on the face of each of EMOJO rider and revive childhood memories when riding a bike meant freedom regardless of your age or gender, life doesn’t stop and neither should you, that’s why we say: “RIDE LIFE”...
Need help?
Do you have a question about the BOBCAT PRO and is the answer not in the manual?
Questions and answers
where is serial number? how do I access?