Table of Contents
Advertisement
Advertisement
Table of Contents

Subscribe to Our Youtube Channel
Related Manuals for EMOJO STREETROD


Summary of Contents for EMOJO STREETROD
- Page 1 OWNER’S MANUAL...
-
Page 2: Table Of Contents
Contents Instructions Warnings Explanatory drawing of the overall bicycle configuration Schematic diagram Main technical parameters Throttle control Operation stages P.A.S. Control and display Error codes User-adjustable settings Charging methods and steps Battery mounting and removal Front wheel installation Lights Brakes 16,17 Pedals and tire pressure Chain... -
Page 3: Instructions
Instructions Please read the manual carefully before using the electric trike. 2. Make sure all parts are locked tightly, such as the frame joint, driver hand pipe, seat post and pedal, etc. before using. Do not use this bicycle before carefully reading the instructions and knowing about the performance of the electric bicycle. Do not lend the electric bicycle to anyone who does not know how to operate it. -
Page 4: Warnings
Warnings Please pay a)en+on to the following items for your safety: Disassembling and refitting the bicycle may bring hidden safety Make sure to check the set up and stability of the brakes, saddle, hazards to your electric bike, therefore, causing risk. frame, handlebar, wheels, etc. Before riding to make sure all is in proper working condition. -
Page 5: Explanatory Drawing Of The Overall Bicycle Configuration
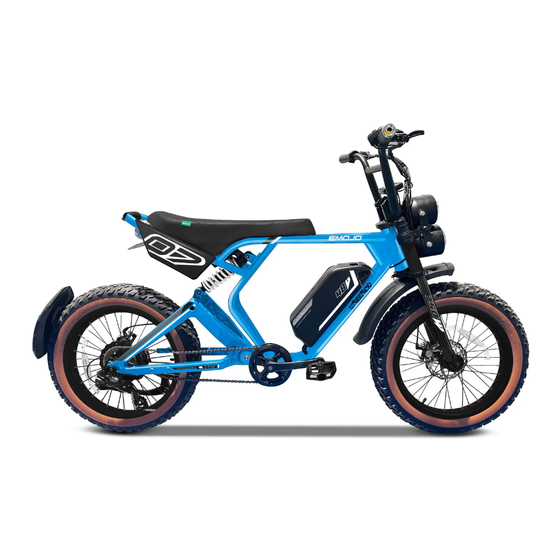
Explanatory drawing of the overall bicycle configuration Seat Number plate Tail lights Front headlights Rear shock Front fender Rear disc brake Front disc Electric Front sprocket Battery brake motor Motor quick connector Rear sprocket... -
Page 6: Schematic Diagram
Schematic diagram... -
Page 7: Main Technical Parameters
Main technical parameters Total bicycle weight in lbs. 58 Lbs. Max. load including cyclist, and any cargo 300 Lbs. Travel mileage on a single charge. Miles w/ P.A.S. Winter: 60 miles, Summer: 65 miles Power consumption on a single charge (Kw) <0.6 Power consumption per kilometer <1.2... -
Page 8: Throttle Control
Throttle control Your electric bike is equipped with a power and throttle control on the right hand side. To power on your bike first make sure to turn on your bike by pressing and holding the M button on the left side. (Fig A) You control the throttle by twisting the right grip with your wrist (Fig. -
Page 9: Operation Stages
Operation stages Warning: "For your safety, please practice in a closed track the first time you ride your ebike". After mastering the controls of an electric bicycle, you may ride on regular roads and follow the traffic rules consciously. Do not let inexperienced people ride the electric bicycle, do not disassemble and refit the electric bicycle. -
Page 10: P.a.s. Control And Display
P.A.S. Control and display Display Interface After switching on the e-bike system, the display shows current speed and total distance except, battery indicator and assistance level ◆ To change the indicated information, press the MODE button to show in turn as follows: Current Speed (Km/h) →... - Page 11 P.A.S. Control and display The LCD meter monitors pedal assist, speed, odometer, trip distance, riding time, and battery energy level. To tum the meter on, make sure the battery is fully inserted into the bike. Press the power button (M button) on the two button selector located near the left grip on the handlebars to tum the meter on.
-
Page 12: Error Codes
Error codes In the event of a system malfunction the screen will display an error code. You can troubleshoot the problem by identifying the code from the following chart. Error code Definition No error. Normal system No function, reserved for other settings Brake sensor error P.A.S. -
Page 13: User-Adjustable Settings
User-adjustable settings The display allows for a series of adjustments on the settings, however some are reserved exclusively for the use of a certified technician of the manufacturer. For those others within reach of the end user please follow the below list of settings. To enter the program mode, press and hold the UP and DOWN arrows for a few seconds. -
Page 14: Charging Methods And Steps
Charging methods and steps 1. Always charge the battery fully for the first time. When the battery level is low (20% or less), plug it to charge it, use only the original charger provided with the battery. 2. Insert the charging pin of the charger into the battery charging plug; pay attention to the direction of the pin, do not insert any other foreign objects or dismantle the battery case. -
Page 15: Battery Mounting And Removal
Battery mounting and removal Your e-bike may come with the battery installed and pre charged. You will seldom need to remove the battery, but shall you need to remove it for replacement or to perform a deeper cleaning on your e-bike you can easily remove it: Park the electric bicycle, turn the key clockwise while holding it in that posi7on (Fig. A), with the other hand, push sliding up the ba=ery free (Fig. B) hold the ba=ery with both hands and gently pull it out. -
Page 16: Front Wheel Installation
Read the instructions carefully to identify and understand the components of the electric bicycle such as pedal, seat post etc. And the name of relevant spare parts. When specialized servicing of bike is required, please go to an authorized EMOJO repair shop or store or another trusted bike professional. 1. Assembly of the font wheel unit: Identify the nuts and the lock washers (Fig A) necessary for the front axle assembly. ... -
Page 17: Lights
Lights Your e-bike comes equipped with front and rear lights that work with the main battery, no additional batteries or charging is required for the lights. The front lights have Day Running Lamps (DRLs) that are on all times as soon as you turn on your e-bike, this is a feature of passive safety which makes you more visible to cars and pedestrians even during the daylight. -
Page 18: Brakes
Brakes Your electric bike is equipped with disc brakes for maximum reliability. Applying hand pressure to the brake levers will engage the brake pads Fig. 1 against the brake rotor, creating friction and slowing down the wheel. The more hand pressure applied to the brake lever, the faster the bike will come to a stop. - Page 19 Brakes WARNING: Disc brake rotors become hot during use. Do not touch or come in contact with the disc rotor shortly after use. Wet weather will require a longer distance to stop. Brake earlier and avoid sudden stops when riding in wet conditions. New Brakes Bed-in Procedure New brakes will require a "bed-in"...
-
Page 20: Pedals And Tire Pressure
Pedals and tire pressure Pedal Installation and Adjustment: Take out pedals from the accessory box, install one of the pedals (pedals are marked with the letters "L" and "R" to indicate the side they belong to). When installing the pedals, insert the wrench stuck on the flat end of pedal axial head, and twist into the crank in clockwise direction. -
Page 21: Chain
Chain The Adjustment of Chain Tension The over relaxation of the check and adjust regularly. The chain would cause chain failing thus threatening safety or damaging the motor. It is suggested to adjustment requirements: in case of single constant speed, when fixed gear, press the chain with hand, the range of the tension is within 10mm from horizontal line. -
Page 22: Common Faults And Maintenance
Common faults and maintenance Check the battery power, if battery is low, it is possible that Power on, there is no indicator on meter: the power will fail, or some blown fuses of the controller are Push thumb throttle, the motor does not work: burned out. -
Page 23: Troubleshooting
Troubleshooting If your electric bicycle experiences a sudden power shut off while in use, this can be related to several reasons but the problem has an easy fix. Problem The LCD starts to blink repeatedly followed by a power shut off. (Make sure the ba=ery is not depleted) 1-Check the motor quick connector on the right side by the tail of the frame. Fig. 1 If the ba=ery is not depleted and the quick connector cable is all in place, contact your EMOJO authorized dealer or the manufacturer’s tech support by email at support@emojobike.com... -
Page 24: Faq's
A. Depends on the state of discharge but around 4-5 hours if completely discharged. Q. What are the running costs for an EMOJO electric bike? A. You will have no worries about rising fuel prices at the pumps. All our electrically powered vehicles use household electricity. - Page 25 FAQ’s Q. What happens when I use the brakes under powered assistance? A. All our bikes are equipped with brake levers that have a built- in safety switch that automatically cuts off the motor B. power under normal braking conditions. This not only ensures a safe un-powered stopping feature, but also protects the motor under braking conditions so that it isn't working against the brakes.
-
Page 26: Storage And Disposal
Storage and disposal Please follow these steps to prolong the life of your EMOJO bike 1-Always keep your electric e-bike protected from the rain, snow, hail, etc. Always store it indoors or in a closed garage. 2-Do not leave your electric bike exposed under the direct sunlight for long periods or time 3-If rain or snow catches you suddenly while riding your e-bike will be ok but you must find shelter away from the elements,... -
Page 27: Contact Us
Contact us At EMOJO we are committed to the consumers and the experience first, put a smile on the face of each of EMOJO rider and revive childhood memories when riding a bike meant freedom regardless of your age or gender, life doesn’t stop and neither should you, that’s why we say: “RIDE LIFE”...
Need help?
Do you have a question about the STREETROD and is the answer not in the manual?
Questions and answers
If battery run completely down because I left key on, how long does it take to charge
It takes around 4–5 hours to fully charge the EMOJO STREETROD battery if it is completely discharged.
This answer is automatically generated