
Subscribe to Our Youtube Channel
Related Manuals for Marcy ME-702


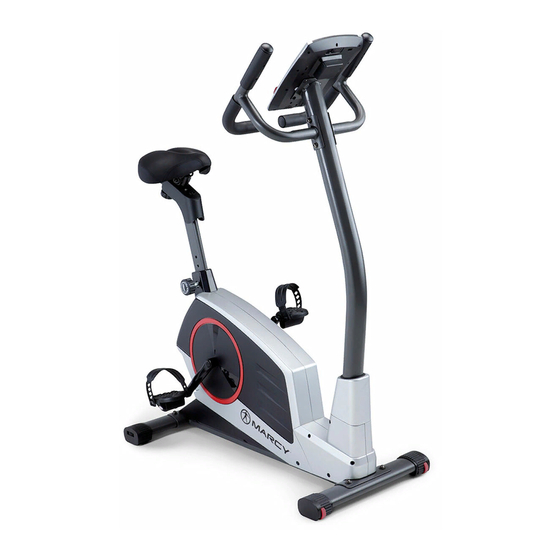
Summary of Contents for Marcy ME-702
- Page 1 REGENERATING MAGNETIC UPRIGHT BIKE ME-702 Distributed By: Pure-Tec Limited www.puretecfitness.com www.puretecfitness.com...
- Page 2 HARDWARE PARTS LIST Description Drawing Q’ty Quick release knob Allen screw M8 x 2" Curved washer Φ8Φ22 Allen screw M8 x ⅝" Lock washer Box wrench Allen key L6 Above described parts are all the parts you need to assemble this machine. Before you start to assemble, please check the hardware packing to make sure they are included.
- Page 3 STEP 1 Attach the front stabiliser (#2) with Allen screw (#15), lock washer (#19), and curved washer (#16) to the main frame (#1). Attach the rear stabiliser (#3) with Allen screw (#15), lock washer (#19) and curved washer (#16) to the main frame (#1).
- Page 4 STEP 2 Pull up the ring (#32) and the cover for the front post (#38) and connect the middle computer wire (#33) to lower computer wire (#34). Tighten the front post (#4) with curved washer (#16) and Allen screw (#18). www.puretecfitness.com...
- Page 5 STEP 3 Connect the middle computer wire (#33) and hand pulse wire middle (#20) to the console (#6) and attach the console to the front post (#4) with screws (#27). The screws are pre-assembled on the computer. Attach handle bars (#5 and #21) to the front post (#4) with curved washer (#16) and Allen screw (#18). www.puretecfitness.com...
- Page 6 STEP 4 Secure the seat post cover (#12) to the seat post (#7) with self-tapping screw (#40). Insert the seat pad (#8) to the front of the seat post and secure the bolt from two sides. Put the seat post (7) into the cover for seat post (#17). Insert the seat post (#7) into main frame (#1), line up the holes and secure the seat in position with the quick release knob (#11).
- Page 7 STEP 5 Attach the left and right pedal (#9 and #10) to the left and right crank (#48 and #49). Note: the pedals are marked with "R" and "L". The right pedal (R) should be threaded on clockwise and the left pedal (L) should be threaded on counter-clockwise. www.puretecfitness.com...
Need help?
Do you have a question about the ME-702 and is the answer not in the manual?
Questions and answers