Table of Contents
Advertisement
Quick Links
Advertisement
Table of Contents

Subscribe to Our Youtube Channel
Related Manuals for CDA VC820


Summary of Contents for CDA VC820
- Page 1 VC820 Fully automatic coffee machine Use and maintenance...
-
Page 2: Table Of Contents
Contents Safety instructions The appliance is not intended for use by persons (including children) with reduced physical, sensory or mental capabilities, or Safety instructions 25 Setting the switch-off time lack of experience and knowledge, unless they have been given supervision or instruction concerning use of the appliance by a Important information 26 Carrying out the descaling programme... -
Page 3: Safety Instructions
Other types of use are not permitted and may prove dangerous. make coffee safely aside (the measure for coffee may be placed The CDA Group Ltd. will not be held liable for any damage caused in the special holder) by incorrect use of the appliance. -
Page 4: Important Information
Please enter the details on the appliance rating plate below for reference, to assist CDA Customer Care in the event of a fault resources. As a reminder of the need to dispose of household... -
Page 5: Legend For Fig. 1
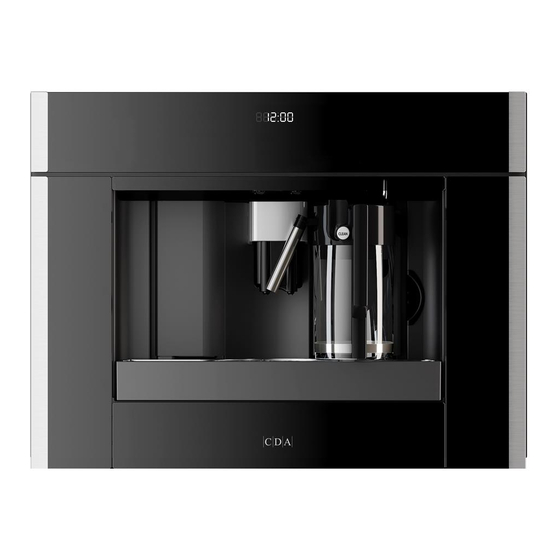
Legend for Fig. 1 Fig. 1 Note: Throughout this manual, references in brackets refer to the legend in this section. Main switch On/Stand-by button Handles Nozzle Water tank (removable) Cup tray Drip tray grill (removable) Service door Height adjustable coffee dispenser Control panel Coffee bean holder cover Ground coffee chute cover... -
Page 6: Control Panel
Control panel First use Note: Throughout this manual, references in brackets refer to The first time you switch on the appliance with the legend in this section. the main switch (see ‘A’ on page 8) and every time that it is plugged in, the appliance executes a ‘SELF-DIAGNOSIS’... -
Page 7: Use
6. Place a cup under the hot water spout (if the hot water spout is not inserted the display will show ‘INSERT WATER SPOUT’). The Preparing coffee (using coffee beans) appliance displays ‘HOT WATER PRESS OK’. Press the OK key This appliance is preset to make coffee and after a few seconds a little hot water will come out of the with a normal taste. -
Page 8: Emptying The Waste Coffee Container
Emptying the waste coffee container Important! Notes Always completely extract the drip tray to avoid it falling when To turn the appliance off, press the ‘On/stand by button’ (A1 on removing the waste coffee container. Empty the container and page 8 or Fig. 3). Before turning off the appliance performs an clean thoroughly, ensuring all residues deposited on the bottom automatic rinse cycle. -
Page 9: Changing The Quantity Of Coffee
Changing the quantity of coffee Adjusting the coffee mill The appliance is preset at the factory to automatically deliver If the coffee is dispensed too the following quantities of coffee: quickly or too slowly (in drips), you can change the grind level. •... -
Page 10: Preparing Espresso Using Ground Coffee
Preparing espresso using ground coffee Preparing hot water Hot water can be used to warm up cups and to make hot drinks such as tea or packet soups. 1. Press the coffee strength touch key (6) 1. Put the hot water nozzle in place (Fig. 14) and select ‘PRE-GROUND’... -
Page 11: Making Cappuccino
Making cappuccino This appliance is set by default to automatically deliver a and after a few seconds, frothed milk Fig. 18 standard cappuccino. flows out of the milk spout into the cup below (delivery stops automatically) 1. Select the taste of coffee you want to 9. -
Page 12: Changing The Quantity Of Milk And Coffee For Cappuccino
Changing the quantity of milk and coffee for Tips for coffee making cappuccino • 3 minutes after you made your last coffee, you can preheat This appliance is set by default to automatically deliver a the brewing unit by using the menu setting “RINSING (see standard cappuccino. -
Page 13: Setting The Language
Setting the language Setting the coffee temperature You can choose between three temperature levels. The coffee You can choose between several languages. A different temperature levels are defined as follows: language can be selected as follows: • TEMPERATURE LOW 1. Press the touch key ‘MENU’ and press the scroll touch •... -
Page 14: Carrying Out The Descaling Programme
Carrying out the descaling programme 6. Press the touch key ‘OK’ (9). The display shows ‘DESCALING’. When the display shows “PLEASE DESCALE!”, the appliance must The descaling liquid runs out of the hot water nozzle. The des- be descaled. caling programme automatically goes through a series of rinses 1. -
Page 15: Rinsing
Rinsing Resetting the appliance to factory settings If 2/3 minutes have passed, since you last made coffee, you should This function resets previously changed values to the factory set- first rinse the system to preheat the brewing unit. Select the rins- tings. -
Page 16: Setting Auto-Start Time
Setting auto-start time Buzzer This function programmes the time the appliance will switch on This activates or deactivates the buzzer emitted by the machine automatically. each time a key is pressed or an accessory is inserted/removed. The buzzer is active by default. 1. -
Page 17: Cleaning The Coffee Machine
Cleaning the coffee machine • Clean the waste coffee container thoroughly. Important! When extracting the drip tray, the waste coffee contain- er must always be emptied. Before performing any cleaning operations, the machine must be turned off by pressing the main switch (A) and Cleaning the drip tray (F) unplugged from the mains power supply. - Page 18 Cleaning the spouts Cleaning the inside of the coffee maker • Check regularly (about once a week) that the inside of the 1. Clean the nozzles periodically using a sponge (Fig. 25) appliance is not dirty. If necessary, remove coffee deposits with 2.
- Page 19 Do not use washing up liquid to clean the brewing unit. Notes It would remove the lubricant applied to the inside of the • piston. If the brewing unit is not put in place correctly, the service door cannot be closed 5.
- Page 20 Cleaning the milk container (N) 5. Check that the intake tube and spout are not clogged with milk residue Always clean the tubes inside the milk container when you prepare 6. Replace the frothed milk regulator, milk spout and intake tube milk.
-
Page 21: Display Messages
Display messages MESSAGE MEANING INSTRUCTION MESSAGE MEANING INSTRUCTION The water tank is empty or Fill the water tank and Coffee machine is encrusted The descaling program must not properly in place. insert it according to the with limescale. be carried out as soon as PLEASE DESCALE! instructions. - Page 22 “Cleaning the brewing unit”). when the machine is IMPORTANT: The brewing contact CDA Customer Care (See the reverse of this manual for switched off. unit can only be taken out The brewing unit cannot be details.)
-
Page 23: Installation
Installation Installation • After removing the packaging, make sure the product is Please check the minimum measurements necessary to the correct complete and undamaged. If in doubt, do not use the appliance installation of the appliance. The coffee machine must be installed and contact a qualified professional in a column unit, which must in turn be fixed to the wall. - Page 24 Installation Fix the power cable with the clip as shown in Fig. 42 Position the rails on the sides of the cabinet as shown in Fig. 40 Fix with the screws, then extend the rails fully. The power cable must be long enough to allow the appliance to If the coffee maker is installed over a warming drawer, use the be extracted from the cabinet to fill the coffee bean container.
-
Page 25: Electrical Connection
Electrical connection If Your Appliance Comes Fitted With a Plug: As the colours of the wires in the mains lead may not correspond with the coloured markings identifying the terminals The plug will incorporate a 13 Amp fuse. If it does not fit your in your plug, proceed as follows: socket, the plug should be cut off from the mains lead, and an appropriate plug fitted, as below. - Page 26 Notes Notes 50 | Instruction Manual Instruction Manual | 51...
- Page 27 The CDA Group Harby Road Langar Nottinghamshire NG13 9HY Sales Department Phone: 01949 862010 Email: sales@cda.eu CDA Customer Care Phone: 01949 862012 Email: customer.care@cda.eu ©2021 CDA Group Ltd...
Need help?
Do you have a question about the VC820 and is the answer not in the manual?
Questions and answers