Table of Contents
Advertisement
Quick Links
How To Install
Use a steel tape measure to insure accuracy. Take a moment to plan your installation: consider
positioning of under-treatments, clearance for decorative rings, clips & finials etc.; and anything that
might be unique to your installation. Follow any specific instructions that came with your hardware.
1 1/4" Metal Decorative Rod Installation
Draperies
If you do not already have your drapery rods installed, make sure to install them at exactly the
same height that you measured the length of your drapes from.
Follow the instructions below on how to install your drapery rods
Place your draperies on the rod and arrange them the way that you would like them to hang
Step 1. Tools Required
Tape measure, drill, drill bits (3/32" for wall studs, 1/4" for wall anchors), screw driver, pencil, step stool
or ladder, spirit level, hammer (to tap in anchor, if necessary).
Step 2. Installation
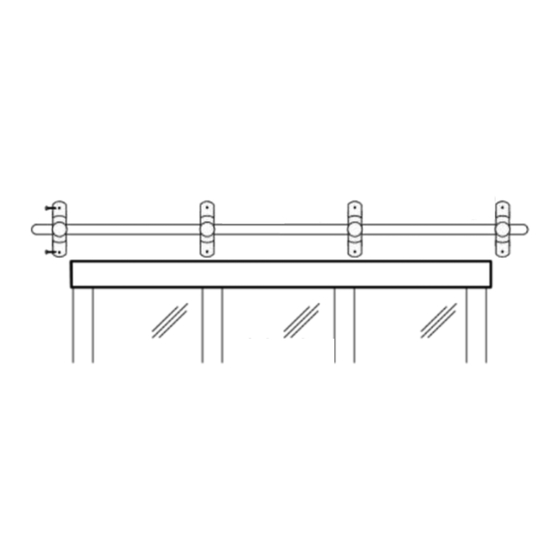
1. Carefully measure the curtain length, and then position the mounting brackets as desired.
Center Supports must be used for larger rod sets, and should be positioned evenly between the
outer brackets (see drawings).
Advertisement
Table of Contents

Subscribe to Our Youtube Channel
Related Manuals for SelectBlinds Classic Grommet Custom Made Drapes


Summary of Contents for SelectBlinds Classic Grommet Custom Made Drapes
- Page 1 How To Install Use a steel tape measure to insure accuracy. Take a moment to plan your installation: consider positioning of under-treatments, clearance for decorative rings, clips & finials etc.; and anything that might be unique to your installation. Follow any specific instructions that came with your hardware. 1 1/4"...
- Page 2 2. Mark screw locations using a pencil. It is recommended that the screws be driven directly into a wall stud. However, if this is not possible or practical, drywall anchors have been provided. Drill starter holes for the screws or screws & anchors. 3.
Need help?
Do you have a question about the Classic Grommet Custom Made Drapes and is the answer not in the manual?
Questions and answers