Table of Contents
Advertisement
User
Manual Book
Wall Chimney Hood
Piazza Series
CX 9150, CX 6150
CX 7110 L
Forli Series
CX 9753, CX 9701 L, CX 9777
CX 9754, CX 7754
Modica Series
CX 7712 L
Imola
CX 9313 L, CX 7310 L
CX 9313 S, CX 7313 S
Ferrara Series
CX 9301, CX 6301
Diva Series
CX 9330, CX 6330
Faenza Series
CX 9356
Cessena
CX 9177, CX 9157, CX 9156
Advertisement
Table of Contents

Related Manuals for Modena Piazza Series


Summary of Contents for Modena Piazza Series
- Page 1 User Manual Book Wall Chimney Hood Piazza Series Ferrara Series CX 9150, CX 6150 CX 9301, CX 6301 CX 7110 L Forli Series Diva Series CX 9753, CX 9701 L, CX 9777 CX 9330, CX 6330 CX 9754, CX 7754...
-
Page 2: Table Of Contents
Changing the Light Bulb Part 6: Problem & Solution Part 7: Precaution Part 8: Specification This guide book explains everything you need to know about your new product. Please contact our Customer Care should you need further assistance through www.modena.com... -
Page 3: Part 1: Safety Warnings
Before connecting the unit to a power source, make sure the power cord is in good shape. If there is damage to the power cord, the replacement must be performed by qualified personnel or contact the MODENA Service Center for replacement process. -
Page 4: Part 2: Name Of Parts
PART 2: NAME OF PARTS CX 9313 S, CX 9313 L, CX 7313 S, CX 7313 L, CX 9330, CX 6330, CX 9301, CX 6301 Control Panel Cassette Aluminum Filter Cassette Aluminum Filter Handle Lamp Main Chimney Upper Connector Chimney Circulation Hole CX 9150, CX 6150, CX 7110 L, CX 9156... - Page 5 CX 9753 CX 9356...
- Page 6 CX 9701 L CX 7712 Circulation Hole Upper Chimney Main Chimney Control Panel Aluminum Filter Carbon filter...
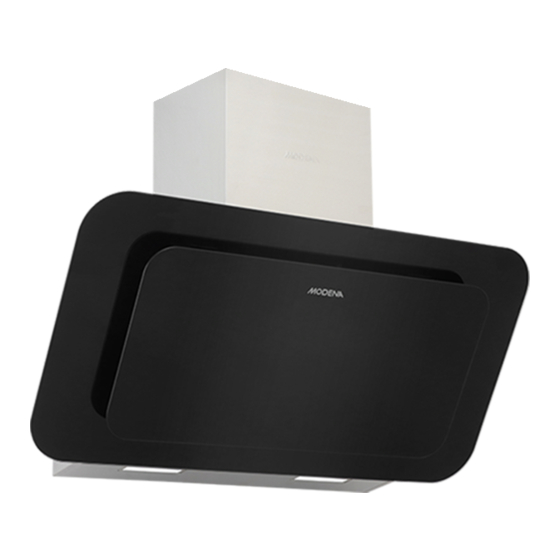
- Page 7 CX 9777 • The image is a general overview and is not necessarily the same as the product you receive. • Features and other attributes are depending on the type of products CX 9157/ CX 9177 CX 9754 & CX 7754...
-
Page 8: Part 3: Installation
• The image is a general overview and is not necessarily the same as the product you receive. • Features and other attributes are depending on the type of products PART 3: INSTALLATION Preparations of installation: The exhaust hood is equipment which vacuums the smoke and odor produced in cooking process. -
Page 9: Installing The Hood On Wall
• Check the strength of wall on which the hood is to be installed. Make sure the wall can sustain the weight / load of the hood. • The hood should be installed precisely over the stove at a vertical distance of 65 - 75 cm from the stove surface. - Page 10 Creating Holes on the Wall and Methods for Installing Bracket Model A (cm) B (cm) C (cm) CX 9753 37.5 CX 9330 34.5 20.5 CX 6330 34.5 20.5 CX 9150 34.5 20.5 CX 6150 34.5 20.5 CX 7712 L...
-
Page 11: Installing The Hood Body
NOTES • Height / distance are 65 – 75 cm, except for CX 9753 type where the height / distance is 35 – 40 cm. • For CX 7712 L, the height H is 34 – 45 cm • For CX 9754 / CX 7754 the height is 34 – 45 cm •... -
Page 12: Working Method
I and II with the screws that already provided. Working Method MODENA exhaust hood has 2 principle of work: Ducting system: In this mode, the hood operates by sucking the smoke / odor in the cooking process and then releasing it out of the vent through the exhaust system. -
Page 13: Installation (Ducting System)
Installation (Ducting System) Observe the warning in the instruction sheet concerning the operation of the appliance when air is discharged from the room When the range hood and appliance supplied with energy other than electricity are simultaneously in operation, the negative pressure in the room must be not exceed 4 Pa (4 ×... -
Page 14: Installation (Recirculating System)
• Fix the one-way-valve to the air outlet of the exhaust hood. Then, attached the exhaust pipe into the one-way-valve as shown below. Installation (Re-circulating System): • If you do not have an outlet to the outside, exhaust pipe is not required and the installation is similar to the one show in section “Installation (Ducting/Exhaust System)”. -
Page 15: Chimney Installation
NOTE • Make sure the filter is securely locked. Otherwise, it would loosen and cause dangerous. • When activated carbon filter attached, the suction power will be lower. • Carbon filters are installed at the rear of the grill and had to be replaced after three months. - Page 16 • Drill 2 × 8 mm holes to accommodate the plate II. Screw and tighten the plate II into the wall with two screws provided. Assembly the chimney into the unit and fix it with two screws For Tower Model •...
- Page 17 • Sliding the chimney to adjust the chimney height. When the height you required is reached, then fix two pieces of 4x8 mm screws onto the hole fixing with plate I as showed in below pictures • Drill 2 x 8 mm holes to accommodate the plate II. Screw and tighten the plate II into the wall with two screws provided.
- Page 18 • Insert the expansion tubes to fix the bracket onto the wall. • Install the flow exit to the hood and follow by connecting the flexible exhaust duct to the flow exit. • Strengthened the connection between the flow exit and the flexible exhaust duct with screws.
-
Page 19: Part 4: How To Use
PART 4: HOW TO USE NOTES: Adjust the motor speed of the exhaust hood according to the thickness of smoke / steam generated in the cooking process. Push Button OFF / To switch off the Hood Activate Motor at Low Speed Activate Motor at Medium Speed Activate Motor at High Speed To Turn On/Off the Light... -
Page 20: Touch Button Type
Touch Button To Set the Usage Time To Turn On/Off the Light To Adjust the Speed Level (Low-Medium-High) To Turn On/Off the Hood If the button is pressed, the unit will work in which the motor speed depending on the last setting Clock Setting The default setting for the time when it was first turned on is 12:00 PM. -
Page 21: Touch Control
3. Press the button one more time to finish the Clock’s Setting Setting the Timer The Timer can be set when the motor or lamp is on. Timer duration is set in three periods: 5 minutes/ 15 minutes / 30 minutes/ Cancel. 1. -
Page 22: Lcd Display
LCD Display 1. Fan symbol will be active when the fan is working 2. Time display 3. Timer 4. Light 5. Fan speed 6. Alarm symbol 7. Active buzzer carbon replacement symbol Operating Instructions • Confirm that when the hood is installed, plug in the power cord, and the hood sends out a “drip”... - Page 23 automatically switches to strong gear, and the ring of the ring turns off a section, if it is to be reopened again to the whole circle. • All the display lights up for 1 second and then goes out. The buzzer sends out a “bite”...
- Page 24 from left to right above the icon once, the hood will stop working immediately. At the same time, the light will be turned off. • Illumination: Touch the icon to turn on the light and touch one more time to turn off the light.
-
Page 25: Part 5: Maintenance
PART 5: MAINTENANCE MODENA exhaust hood specifically designed for a long term use so that it does not require complicated maintenance. However, there are some things that are recommended to take care of your exhaust hood so that the quality is maintained. -
Page 26: Cleaning The Cabiner
Cleaning the Cabinet To clean the surface of exhaust hood cabinet from sticky oil particles, use a cloth / sponge and soap water and then dry it out. The cabinet should be cleaned after each cooking session. Cleaning the Filter Smoke / steam from cooking and oil particles generated by the cooking process will immediately absorbed by the filter and therefore the filter should be cleaned regularly... -
Page 27: Changing The Light Bulb
Dirty carbon filter Replace the carbon filter with a new one. • Motor coil is broken • Motor fan is not Contact MODENA Call Center functioning • The vent hood is installed too • close to the stove. Safety thermal regulator Motor stops •... -
Page 28: Part 8: Specification
• Perform a routine service on your stove every 3 (three) months, because if there are problems / problems with your exhaust hood, it can be immediately identified and repaired. Contact MODENA Service Center PART 8: SPECIFICATION MODEL CX 9753... - Page 29 MODEL CX 9150 CX 6150 CX 7110 L Cabinet’s Material Stainless Stainless Metal Front panel’s color Stainless Stainless Black Number of Motor(s) 1 Turbo 1 Turbo 1 Turbo Lamps 2 LED 2 LED 2 LED Exhaust speeds Ionizer (Germinator) Cassette Aluminum+ Cassette Aluminum+ Cassette Aluminum Filter’s type...
- Page 30 MODEL CX 9777 CX 9177 CX 9157 Stainless Steel + Stainless Steel + Stainless Steel + Tempered Cabinet’s Material Tempered Glass Tempered Glass Glass Cabinet’s Color Stainless Stainless Stainless Front panel’s color Black Black Black Motor’s Type DC Motor DC Motor DC Motor Lamps Touch Control + Gesture...
- Page 31 MODEL CX 9701 L CX 9754 CX 7754 Metal +Tempered Metal +Tempered Metal +Tempered Cabinet’s Material glass glass glass Cabinet’s Color Black Black Black Front panel’s color Black Black Black Number of Motor(s) 1 Turbo Lamps Touch Control + Gesture Touch Control + Gesture Control Push Button...
- Page 32 11/20...
Need help?
Do you have a question about the Piazza Series and is the answer not in the manual?
Questions and answers