Advertisement
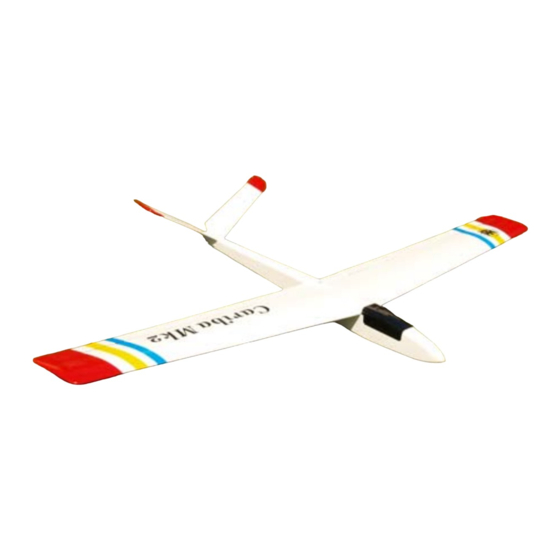
63in Span Sports Aerobatic Slope Soarer for 4-6 Channel RC Equipment.
Designed by: Stan Yeo
Introduction
The Cariba is a follow-on from the Carrera in that it
shares the same wing. We have always liked 'V' tail
models since our days of flying 100S models and
over the years have designed and built several.
Whilst they can have a tendency to 'spin' in tight
slow turns if tailplane area is a bit tight we have
found them more efficient than cross tail models
with the same fuselage. Construction of the Cariba
features a ply sided fuselage with a fully sheeted
built-up wing containing a servo in each wing
allowing the ailerons to be used as Flapperons thus
enhancing the aerobatic performance of the model.
Most kit parts are either Laser cut or routed for
greater accuracy. The Cariba is a delightful model
to build and an even more delightful model to fly.
Radio Equipment Required
The recommended radio equipment required for
the Cariba is two metal geared servos i.e. Hitec
HS82MG or the Ripmax New Power XL16HM or
XL17HMB plus two standard size servos, a Square
AA receiver battery and a 4/6 channel receiver.
For Flapperons a 6ch Computerised transmitter
6ch receiver is required.
Tools / Materials Required
The tools required to build the Cariba are a
modelling knife with spare blades, a One Metre
Straight Edge, a miniature David Plane, 180 grade
Wet & Dry sanding block and soldering iron. The
glues used to build the model are white PVA wood
glue, some thin Superglue (please observe safety
precautions) and a small quantity of two part epoxy.
We recommend using a heat shrink polyester film
for covering such as Oracover/Profilm or the
thinner more economic version Easycoat.
Please Note for ALL wood joints use PVA wood
glue unless otherwise stated
Building the Fuselage
1. Lightly sand the fuselage sides, top and bottom
with 180 grade wet and dry to remove any
'release' agent. Remove dust with a small
brush or vacuum cleaner.
2. Align the fuselage sides with the Wingseat and
mark out the position of formers F2 & F3 on the
Cariba Mk2
Produced by: Phoenix Model Products
inside of the fuselage sides ensuring there is a
left and right side. Aligning with the Wingseat is
to offset any variation in plan length due to
changes in moisture content in the plan paper.
3. Cut slots for Ruddervator cable exits as indicated
on plan (bottom of fuselage).
4. Using PVA (wood glue), glue spruce nose and
wingseat strips to fuselage sides ensuring there
is left and right side! Note Wingseat spruce strip
extends
5. Glue Tailplane triangular seat in place taking
care both sides are symmetrical. Check the seat
forms a 120 degree angle!!
6. Glue strip longeron super structure to the
fuselage sides.
7. Lightly sand edges of fuselage sides to prepare
gluing surface to receive top and bottom
sheeting.
8. Cover plan with polythene.
9. Position fuselage over plan and glue F1 & F2 in
position. Join fuselage at the rear. Take great
care to ensure the fuselage is both straight and
square!
10. When glue has set remove fuselage from plan
and fit F1 again checking fuselage alignment.
11. Fit Ruddervator control rods. Anchor to fuselage
side every 100-120mm as per Elevator control
rod. Before fixing control cables check control
cable inners are not binding and move freely.
12. Tie cables together where they crossover at the
rear. Seal knot with glue.
13. Fit Fuselage bottoms front and back.
14. Mark line of fuselage on underside of Hatch then
fit 10mm top nose sheet.
15. Sand the front of F1 flat and fit Noseblock.
16. Fit balsa strips to underside of Hatch. Align them
1mm outside the lines previously drawn to allow
for sanding.
17. Angle rear face of hatch to match front face of
F2. Centrally position ply end face and Superglue
in position.
18. Cut Hatch to length and slope end at front of
hatch to match abutting face. Allow enough
space between the front of the hatch for the two
ply end faces plus enough to 'jam' a third ply
plate (supplied) to hold the hatch in position
whilst the 'front end' is sanded to shape. This gap
is to allow for the thickness of the covering
material and easy removal of the hatch in use.
back
beyond
F2.
Advertisement
Table of Contents

Related Manuals for Phoenix Model Cariba Mk2


Summary of Contents for Phoenix Model Cariba Mk2
- Page 1 Cariba Mk2 63in Span Sports Aerobatic Slope Soarer for 4-6 Channel RC Equipment. Designed by: Stan Yeo Produced by: Phoenix Model Products Introduction inside of the fuselage sides ensuring there is a left and right side. Aligning with the Wingseat is to offset any variation in plan length due to changes in moisture content in the plan paper.
- Page 2 19. After sanding front of fuselage to shape 38. Bolt wing in position and fit front and rear wing remove hatch and centrally mark position of fairings. 3mm hatch retaining dowel. 39. Shape Tailplane and Ruddervators. 20. Drill hole in hatch for retaining dowel and 40.
- Page 3 one side of the plane. It helps control thickness potential weight penalty that it may incur and of cut. puncture / tear resistance / repairability. 2. Give the complete model a final sanding with 320 grade Wet & dry. DO NOT use a sanding block on wing sheeting.
Need help?
Do you have a question about the Cariba Mk2 and is the answer not in the manual?
Questions and answers