Table of Contents
Advertisement
Quick Links
INSTALLATION INSTRUCTIONS
VOLT
®
VOLT
®
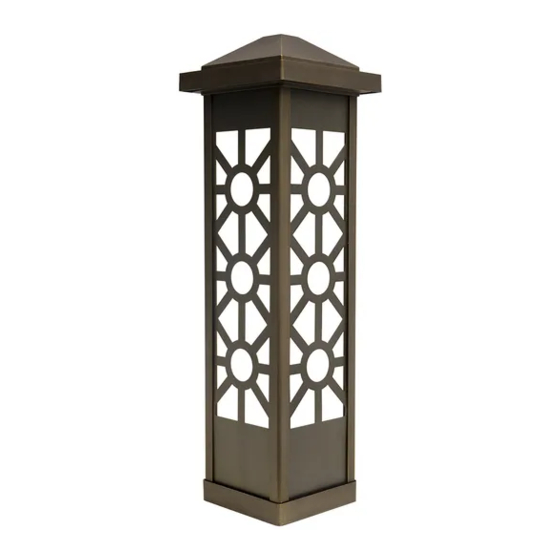
VPL-1019-26-4-BBZ
Help Hotline:
1-813-978-3700 • Mon-Fri 8am-8pm • Sat-Sun 10am - 6pm (EST)
Specifications and product details subject to change without notice.
© Copyright 2021, VOLT
customersupport@voltlighting.com • 813.978.3700
Low Voltage Landscape Lighting
Customizable Bollard Light
Lighting, Lutz FL USA 33549 • All rights reserved.
®
- 1 -
Advertisement
Table of Contents

Related Manuals for Volt VPL-1019-26-4-BBZ


Summary of Contents for Volt VPL-1019-26-4-BBZ
- Page 1 VPL-1019-26-4-BBZ Help Hotline: 1-813-978-3700 • Mon-Fri 8am-8pm • Sat-Sun 10am - 6pm (EST) Specifications and product details subject to change without notice. © Copyright 2021, VOLT Lighting, Lutz FL USA 33549 • All rights reserved. ® customersupport@voltlighting.com • 813.978.3700 - 1 -...
- Page 2 INSTALLATION INSTRUCTIONS VOLT Customizable Bollard Light ® VPL-1019-26-4-BBZ Important: Please Read Before Installation This fixture is intended for installation in accordance with local codes and the National Electric Code (NEC). Failure to adhere to these codes and instructions may result in serious injury, property damage and void the warranty.
- Page 3 Package Contents A. (1) Fixture Body C. (2) Threaded Couplers B. (2) Bi-Pin Brass Puck Lights Parts Required A. (4) Side Panels B. Mounting Accessory Product Dimensions 8”x8” 3” 25.87” 6.38”x6.38” w w w . v o l t l i g h t i n g . c o m - 3 -...
- Page 4 INSTALLATION INSTRUCTIONS VOLT Customizable Bollard Light ® VPL-1019-26-4-BBZ Remove Top Cover Remove Push Top Cover Rotate Fixture Top Cover Push the top cover down and rotate it clockwise to remove it from the fixture. w w w . v o l t l i g h t i n g . c o m...
- Page 5 Install Side Panels OPTIONAL SIDE PANELS Side Panel Slot Fixture Insert the side panels of your choice into the slots on the fixture body. customersupport@voltlighting.com • 813.978.3700 - 5 -...
- Page 6 INSTALLATION INSTRUCTIONS VOLT Customizable Bollard Light ® VPL-1019-26-4-BBZ Install Top Cover Align the bolts on the top cover Push to the holes on top of the fixture. Rotate Insert the bolts into the holes and push down. Then rotate the top...
- Page 7 Install Fixture Determine the desired location for the fixture. Insert the stakes into the ground until flange of stakes Fixture are flush to grade. NOTE: If the ground is hard and the stakes are difficult to install, make a crosscut in the ground using a flat Ground shovel.
- Page 8 INSTALLATION INSTRUCTIONS VOLT Customizable Bollard Light ® VPL-1019-26-4-BBZ Replace Bi-Pin Bi-pin Cover Screw Puck Light Cover Socket Base Socket Base Socket 1. Remove the cover off the bottom and top of the fixture. 2. Using a screwdriver, remove the two screws from the socket base.
Need help?
Do you have a question about the VPL-1019-26-4-BBZ and is the answer not in the manual?
Questions and answers