Table of Contents
Advertisement
Quick Links
Advertisement
Table of Contents

Related Manuals for Symantec Shelf NetBackup 5220


Summary of Contents for Symantec Shelf NetBackup 5220
- Page 1 NetBackup 5220 and Symantec Storage Shelf™ Safety Guide Release 2.0...
- Page 2 Corporation or its affiliates in the U.S. and other countries. Other names may be trademarks of their respective owners. This Symantec product may contain third party software for which Symantec is required to provide attribution to the third party (“Third Party Programs”). Some of the Third Party Programs are available under open source or free software licenses.
- Page 3 The Technical Support group also creates content for our online Knowledge Base. The Technical Support group works collaboratively with the other functional areas within Symantec to answer your questions in a timely fashion. For example, the Technical Support group works with Product Engineering and Symantec Security Response to provide alerting services and virus definition updates.
- Page 4 Troubleshooting that was performed before contacting Symantec Recent software configuration changes and network changes Licensing and registration If your Symantec product requires registration or a license key, access our technical support Web page at the following URL: www.symantec.com/business/support/ Customer service Customer service information is available at the following URL: www.symantec.com/business/support/...
- Page 5 Europe, Middle-East, and Africa semea@symantec.com North America and Latin America supportsolutions@symantec.com...
-
Page 6: Table Of Contents
Chapter 4 NetBackup 5220 and Symantec Storage Shelf description30 Features ..........................31 Hot-swappable and non-hot-swappable components ..........34 NetBackup 5220 components ..................35 NetBackup 5220 front view ..................39 NetBackup 5220 rear panel ..................40 NetBackup 5220 and Symantec Storage Shelf rack mounting ......42... - Page 7 NetBackup 5220 and Symantec Storage Shelf chassis covers ......43 Chapter 5 Chapter 5 Alarms ................44 System-induced power-off of the NetBackup 5220 ............44 Chapter 6 Chapter 6 NetBackup 5220 hardware removal and replacement ... 48 Before you begin ........................48 Tools and supplies ......................
- Page 8 Removing the NetBackup 5220 chassis cover ..................50 Chassis with cover removed ........................51 Tables NetBackup 5220 and Symantec Storage Shelf documentation set ..........10 NetBackup 5220 rear panel ports ......................41 NIC port LED indications ........................42 Alarm information ............................ 45 NetBackup 5220 power supply input voltages ...................
-
Page 9: Chapter 1 About This Guide
About this guide Introducing this guide This document provides detailed safety instructions related to the NetBackup 5220 and Symantec Storage Shelf. Safety information provides guidelines to protect personnel and equipment from injury or damage. Product version The following table lists the product version related to this document. -
Page 10: Product Documentation
The NetBackup 5200 Series documentation has comprehensive software information. Features in the 5200 series documents may not be exactly the same as those in the NetBackup 5220 and Symantec Storage Shelf but these documents provide details, background information and usage scenarios. - Page 11 Chapter 1 About this guide Product documentation NetBackup 5200 Series Command Reference Guide The NetBackup 5200 Series Command Reference Guide contains detailed information about the NetBackup appliance commands that you can run from the NetBackup appliance shell menu. Each command contains a brief description of the primary function of the command, a synopsis, and descriptions of each of the options listed in the synopsis.
-
Page 12: Chapter 2 Installation/Assembly Safety Instructions
Chapter 2 Installation/Assembly Safety Instructions English The power supply in this product contains no user-serviceable parts. There may be more than one supply in this product. Refer servicing to qualified personnel only. Do not attempt to modify or use the supplied AC power cord if it is not the exact type required. - Page 13 5. Provide some electrostatic discharge (ESD) protection by wearing an antistatic wrist strap attached to chassis ground of the system-any unpainted metal surface-when handling components. 6. Do not operate the system with the chassis covers removed. After you have completed the six SAFETY steps above, you can remove the system covers: 1.
-
Page 14: Deutsch
Provided with a properly grounded wall outlet. Provided with sufficient space to access the power supply cord(s). Deutsch Benutzer können am Netzgerät dieses Produkts keine Reparaturen vornehmen. Das Produkt enthält möglicherweise mehrere Netzgeräte. Wartungsarbeiten müssen von qualifizierten Technikern ausgeführt werden. Versuchen Sie nicht, das mitgelieferte Netzkabel zu ändern oder zu verwenden, wenn es sich nicht genau um den erforderlichen Typhandelt. - Page 15 3. Ziehen Sie den Stromanschlußstecker Ihres Systems aus der Steckdose. 4. Auf der Rückseite des Systems beschriften und ziehen Sie alle Anschlußkabel von den I/O Anschlüssen oder Ports ab. 5. Tragen Sie ein geerdetes Antistatik Gelenkband, um elektrostatische Ladungen (ESD) über blanke Metallstellen bei der Handhabung der Komponenten zu vermeiden.
-
Page 16: Français
in Regionen, in denen elektrische Stürme auftreten, mit einem Überspannungsschutzgerät verbunden sein; während eines elektrischen Sturms sollte keine Verbindung der Telekommunikationsleitungen mit dem Modem bestehen; mit einer geerdeten Wechselstromsteckdose ausgerüstet sein; über ausreichend Platz verfügen, um Zugang zu den Netzkabeln zu gewährleisten, da der Stromanschluß... - Page 17 Une fois TOUTES les étapes précédentes accomplies, vous pouvez retirer les panneaux du système. Procédez comme suit: 1. Si un cadenas a été installé sur à l'arrière du système, déverrouillez-le et retirez-le. 2. Retirez toutes les vis des panneaux et mettez-les dans un endroit sûr. 3.
-
Page 18: Español
Español El usuario debe abstenerse de manipular los componentes de la fuente de alimentación de este producto, cuya reparación debe dejarse exclusivamente en manos de personal técnico especializado. Puede que este producto disponga de más de una fuente de alimentación No intente modificar ni usar el cable de alimentación de corriente alterna, si no corresponde exactamente con el tipo requerido. - Page 19 Para obtener un enfriamiento y un flujo de aire adecuados, reinstale siempre las tapas del chasis antes de poner en marcha el sistema. Si pone en funcionamiento el sistema sin las tapas bien colocadas puede dañar los componentes del sistema. Para instalar las tapas: 1.
-
Page 20: Italiano
Italiano Rivolgersi ad un tecnico specializzato per la riparazione dei componenti dell'alimentazione di questo prodotto. È possibile che il prodotto disponga di più fonti di alimentazione. Non modificare o utilizzare il cavo di alimentazione in c.a. fornito dal produttore, se non corrisponde esattamente al tipo richiesto. - Page 21 2. Controllare che i cavi, dei supporti aggiuntivi ed altri componenti siano stati installati appropriatamente. 3. Attaccare le coperture al telaio con le viti tolte in precedenza e avvitarle strettamente. 4. Inserire e chiudere a chiave il lucchetto sul retro del sistema per impedire l'accesso non autorizzato al sistema.
-
Page 22: Chapter 3 Detailed Safety Information
Chapter 3 Detailed Safety Information Product safety information This document applies to boards, the chassis and installed peripherals. To reduce the risk of bodily injury, electrical shock, fire, and equipment damage, read this document and observe all warnings and precautions in this guide before installing or maintaining your devices. -
Page 23: Applications
Indicates the presence of a hazard that may cause minor personal injury or property damage if the CAUTION is ignored. Indicates the presence of a hazard that may result in serious personnel injury if the WARNING is ignored. Indicates potential hazard if indicated information is ignored. Indicates shock hazards that result in serious injury or death if safety instructions are not followed. -
Page 24: Power And Electrical Warnings
Power and electrical warnings The power button, indicated by the stand-by power marking, DOES NOT completely turn off the system AC power, 5V standby power is active whenever the system is plugged in. To remove power from system, you must unplug the AC power cord from the wall outlet. -
Page 25: System Access Warnings
The power supply cords must be plugged into sockets or outlets provided with a suitable earth ground. Power cord usage criteria You must use a power cord set that meets the following criteria: Rating: In the U.S. and Canada, cords must be UL (Underwriters Laboratories, Inc.) Listed/CSA (Canadian Standards Organization) Certified type SJT, 18-3 AWG (American Wire Gauge). -
Page 26: Rack Mount Guidelines
Do not access the inside of the power supply. There are no serviceable parts in the power supply. Return to manufacturer for servicing. Power down the server and disconnect all power cords before adding or replacing any non hot-plug component. ... -
Page 27: Electrostatic Discharge (Esd)
The rack must include ventilation sufficient to exhaust a maximum of 2550 BTUs (British Thermal Units) per hour for the NetBackup 5220 and 1270 BTUs per hour for Symantec Storage Shelf. The NetBackup 5220 is designed for an AC line voltage source with up to 20 ... -
Page 29: Cooling And Airflow
Cooling and airflow Carefully route cables as directed to minimize airflow blockage and cooling problems. For proper cooling and airflow, operate the system only with the chassis covers installed. Operating the system without the chassis cover in place can damage components due to unacceptable heat build-up. -
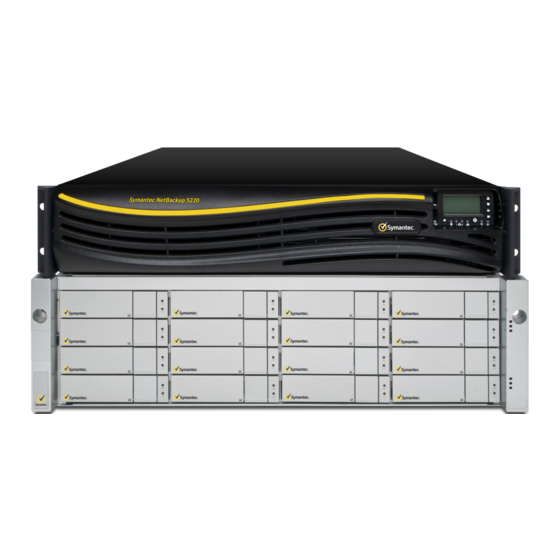
Page 30: Netbackup 5220 Chassis (Top, External View)
Chapter 4 NetBackup 5220 and Symantec Storage Shelf description This chapter describes the basic physical features of the NetBackup 5220 and Symantec Storage Shelf, NetBackup 5220 chassis (top, external view) -
Page 31: Features
Chapter 4 NetBackup 5220 and Symantec Storage Shelf description Italiano Features Dimensions 3.44 inches (87.30 mm) high 16.93 inches (430 mm) wide 27.75 inches (704.8 mm) deep 65 pounds (29.5 kg) - maximum chassis weight Server Board ... - Page 32 One USB 2x5 pin header, which supports two USB 2.0 ports One low-profile USB 2x5 pin header to support low-profile USB solid state drives One DH-10 serial Port B header Six Serial ATA II connectors Two I/O module connectors ...
- Page 33 Chapter 4 NetBackup 5220 and Symantec Storage Shelf description Italiano Slimline bay – not operational for the NetBackup 5220. PCI Riser Assemby Control Panel LEDs and status messages, control panel NIC1 Activity NIC2 Activity Power / Sleep System Status ...
-
Page 34: Hot-Swappable And Non-Hot-Swappable Components
Other components are not hot-swappable; they require powering down of the entire system and devices. Refer to the NetBackup 5220 and Symantec Storage Shelf Hardware Troubleshooting Guide for detailed lists of hot-swappable and non-hot-swappable components. -
Page 35: Netbackup 5220 Components
Chapter 4 NetBackup 5220 and Symantec Storage Shelf description Italiano NetBackup 5220 components This section helps you identify the components of your device. You can also use the reference information provided on the inside of the chassis cover. NetBackup 5220 components... - Page 36 Letter Description System Fan Assembly Bridge Board Control Panel Slimline Optical Drive Bay (not operational with the NetBackup 5220 at this time) Drive Tray – two preinstalled, not hot swappagble 2.5” hard drives Disk Carriers (qty 8, labeled 0 through 7 from left to right)
-
Page 37: Netbackup 5220 Mainboard Components
Chapter 4 NetBackup 5220 and Symantec Storage Shelf description Italiano NetBackup 5220 mainboard components... - Page 38 Letter Component 280-pin Adaptive POST Code Diagnostic LEDs RMM3 Header Processor 1 Back Panel I/O Ports System Identification LED System Status LED Memory 1 Fan Header CPU 1 Fan Header Processor 1 DIMM slots (qty 6) Processor 2 DIMM slots (qty 6) Processor 2 CPU 2 Fan Header Memory 2 Fan Header...
-
Page 39: Netbackup 5220 Front View
Chapter 4 NetBackup 5220 and Symantec Storage Shelf description Italiano Letter Component SGPIO header I/O module mezzanine connector 2 I/O module mezzanine connector 1 Serial port B header NetBackup 5220 front view The NetBackup 5220 provides locations and hardware for installing 2.5-inch hard drives, a tape drive, CD-ROM drive, or DVD-ROM drive. -
Page 40: Netbackup 5220 Rear Panel
The red LED is lit when drive faults occur. Drives can consume up to 17 watts of power each. Drives must be specified to run at a maximum ambient temperature of 45°C. Bezels The optional front bezel is made of molded plastic and provide a snap-on design that allows for maximum airflow through the server system. -
Page 41: Netbackup 5220 Rear Panel Ports
Chapter 4 NetBackup 5220 and Symantec Storage Shelf description Italiano Letter Description Remote Management Module NIC (optional) NIC 1 Ethernet port NIC 2 Ethernet port USB 6 USB 5 DB-9 Serial B Connector Video RJ-45 Serial A Connector Rear panel ports... -
Page 42: Netbackup 5220 And Symantec Storage Shelf Rack Mounting
Each left and right mounting rail for the Symantec Storage Shelf is shipped as a unit. The front and back of each rail slide apart a few inches to allow for precise fitting into the rack cabinet. -
Page 43: Netbackup 5220 And Symantec Storage Shelf Chassis Covers
Then, unplug all peripheral devices and the AC power cable(s). The Symantec Storage Shelf chassis should not be opened. The only front panel components that can be removed and replaced are the disk drive modules. On the rear... -
Page 44: Chapter 5 Alarms
Chapter 5 Alarms Do not power-on the NetBackup 5220 if power supply issues are not resolved. Damage to the device may result. System-induced power-off of the NetBackup 5220 Definition: The terms “protection or protected” refer to a power supply that has shut down or locked up in order to protect itself and other components connected to the device. -
Page 45: Alarm Information
Fan failure If alarms in the monitoring systems indicate fan problems or high temperatures at the air intake vent, make sure room air cooling is adequate. Temperature abnormality Several problems may lead to high (great than 35C) temperatures of the device. Thoroughly check all aspects of the rack environment. - Page 46 Be sure that all devices are correctly shut down and all programs on any devices are not running. If you disconnect devices while programs are running, data loss may occur. In order to maintain adequate thermal levels, you MUST install DIMMs and DIMM blanks in the appropriate DIMM slots.
-
Page 48: Chapter 6 Netbackup 5220 Hardware Removal And Replacement
Chapter 6 NetBackup 5220 hardware removal and replacement This chapter provides safety details regarding removal, installation and replacement of the NetBackup device, chassis, and components. Before you begin Before working with your NetBackup 5220, read and understand the safety information in this manual. Note: When you service the device, you must first power down the device through the OS. -
Page 49: Netbackup 5220 Guide Rails And Rack
1 bezel (optional) 1.5m (4.9 ft) Power cords (qty 2) PCI-E add-in cards NetBackup 5220 guide rails and rack Before installing the devices in the rack cabinet, determine the installation positions of the guide rails according to the installation planning of the devices. One fully-loaded device weighs up to 33 kg.(73 lbs). -
Page 50: Removing The Netbackup 5220 Chassis Cover
Be sure that both devices are off and all programs on both devices are not running. If you connect these devices while programs are running, data loss may occur. Disconnect the main AC power cord and peripheral cables/cords from the rear of the NetBackup 5220. -
Page 51: Re-Installing The Netbackup 5220 Chassis Cover
Chassis with cover removed You can refer to the information on the inside of the cover regarding components within the chassis. Re-installing the NetBackup 5220 chassis cover Replace the chassis cover at the top rear of the NetBackup 5220 enclosure. Slide the cover from the rear of the device towards the front. - Page 52 Be sure that all devices are correctly shut down and all programs on any devices are not running. If you disconnect devices while programs are running, data loss may occur. Do not move or damage any cables or other connectors located near the air ducts.
- Page 53 Properly power down your NetBackup 5220, any running programs and peripherals before accessing the chassis and any baffles. Always operate your device with the baffles in place, to ensure proper airflow.
-
Page 54: Chapter 7 Symantec Storage Shelf Hardware Removal And Replacement
This chapter provides information regarding the removal, installation, and replacement of the Symantec Storage Shelf device, components, and peripherals. Before you begin Before working with your NetBackup 5220, read and understand the safety information in this manual. -
Page 55: Unpacking The Symantec Storage Shelf
Symantec Storage Shelf guide rails and rack Each left and right mounting rail for the Symantec Storage Shelf is shipped as a unit. The front and back of each rail slide apart a few inches to allow for precise fitting into the rack cabinet. -
Page 56: Symantec Storage Shelf Cover/Chassis
Symantec Storage Shelf cover/chassis Symantec Storage Shelf cover/chassis The Symantec Storage Shelf chassis should not be opened. The only front panel components that can be removed and replaced are the disk drive modules. On the rear panel, the two I/O modules and two power supply modules can be hot-swapped. -
Page 57: Appendix A: Technical References
Appendix A: Technical References Appendix A: Technical References 750W single power supply input voltages The power supply must operate within all specified limits over the input voltage range. NetBackup 5220 power supply input voltages Parameter Rated Startup Power-off Max input Max rate input AC current... -
Page 58: System Environmental Specifications
Appendix A: Technical References System Environmental Specifications System Environmental Specifications The following table defines the system level operating and non-operating environmental limits. System Environmental Specifications Parameter State Details Temperature Non-operating -40°Fto 70°F Operating 10°C to 35°C with the maximum rate of change not to exceed 10°C per hour Humidity Non-operating... -
Page 59: Appendix B: Regulatory And Certification Information
Appendix B: Regulatory and Certification Information WARNING: To ensure regulatory compliance, you must adhere to the assembly instructions in this guide to ensure and maintain compliance with existing product certifications and approvals. Use only the described, regulated components specified in this guide. Use of other products/components will void the UL listing and other regulatory approvals of the product and will most likely result in noncompliance with product regulations in the region(s) in which the product is sold. -
Page 60: Product Regulatory Compliance
Appendix B: Regulatory and Certification Information Product Regulatory Compliance The NetBackup 5220 product, when correctly integrated per this guide, complies with the following safety and electromagnetic compatibility (EMC) regulations. Intended Application - This product was evaluated as Information Technology Equipment (ITE), which may be installed in offices, schools, computer rooms, and similar commercial type locations. -
Page 61: Product Emc Compliance - Class A Compliance
Appendix B: Regulatory and Certification Information Product EMC Compliance - Class A Compliance FCC /ICES-003 - Emissions (USA/Canada) Verification CISPR 22 - Emissions (International) EN55022 - Emissions (Europe) EN55024 - Immunity (Europe) EN61000-3-2 - Harmonics (Europe) ... -
Page 62: Certifications / Registrations / Declarations
Appendix B: Regulatory and Certification Information Certifications / Registrations / Declarations NRTL Certification (US/Canada) CE Declaration of Conformity (CENELEC Europe) FCC/ICES-003 Class A Attestation (USA/Canada) VCCI Certification (Japan) C-Tick Declaration of Conformity (Australia) MED Declaration of Conformity (New Zealand) BSMI Certification (Taiwan) ... -
Page 63: Electromagnetic Compatibility Notices
Appendix B: Regulatory and Certification Information Electromagnetic Compatibility Notices FCC Verification Statement (USA) This device complies with Part 15 of the FCC Rules. Operation is subject to the following two conditions: (1) this device may not cause harmful interference, and (2) this device must accept any interference received, including interference that may cause undesired operation. -
Page 64: Ices-003 (Canada)
Appendix B: Regulatory and Certification Information ICES-003 (Canada) Cet appareil numérique respecte les limites bruits radioélectriques applicables aux appareils numériques de Classe A prescrites dans la norme sur le matériel brouilleur: "Apparelis Numériques", NMB-003 édictee par le Ministre Canadian des Communications.
Need help?
Do you have a question about the Shelf NetBackup 5220 and is the answer not in the manual?
Questions and answers