Table of Contents
Advertisement
Quick Links
T E C H N I C A L D O C U M E N TAT I O N
I N S TA L L AT I O N I N S T R U C T I O N S
DIE ENERGIEFAMILIE
A E R O I L M 2-7
A E R O I L M 4 - 1 3
A d d i t i o n a l M o d e l :
H G L
wi t h N AV I GATO R 2.0 C o n t ro l
Modulation air-water-heat pumps
for Indoor Installation
HEAT PUMPS FROM AUSTRIA
www.idm-energie.at
Advertisement
Table of Contents

Related Manuals for iDM AERO ILM 2-7


Summary of Contents for iDM AERO ILM 2-7
- Page 1 A d d i t i o n a l M o d e l : H G L wi t h N AV I GATO R 2.0 C o n t ro l Modulation air-water-heat pumps for Indoor Installation HEAT PUMPS FROM AUSTRIA www.idm-energie.at...
-
Page 2: Table Of Contents
1.16. Intended use 1.17. Scope of delivery 1.18. Accessories 2. T ECHNICAL DATA 2.1. Dimensions of AERO ILM 2-7 and AERO ILM 4-13 2.2. Technical data 3. D IMENSIONING 3.1. Heating performance diagrams AERO ILM 2-7, according EN14511 3.2. Heating performance diagrams AERO ILM 4-13, according EN14511 3.3. - Page 3 8.2. Errors 9. A PPENDIX 9.1. AERO ILM 2-7 - Performance data heating - detailed 9.2. AERO ILM 2-7 - Performance data cooling - detailed 9.3. AERO ILM 4-13 - Performance data heating - detailed 9.4. AERO ILM 4-13 - Performance data cooling - detailed 9.5.
-
Page 4: General Description
fi xtures as described in the following assembly instructions are used to transport the heat pump manually. The transport fi xtures must not be used for transporting the components with a crane or similar hoisting equipment. (C) IDM ENERGIESYSTEME GMBH Installation instructions AERO ILM... -
Page 5: Service And Maintenance
This safeguarded against theft by appropriate on-site eff ect is common occuring in nature. This covering measures. must be removed by the heat pump operator during this weather periods. (C) IDM ENERGIESYSTEME GMBH Installation instructions AERO ILM... -
Page 6: Information On Environmental Protection
DIN, EN, DVGW, VDI and VDE. - Provisions of the local public utilities. The lower the maximum fl ow temperature is, the higher the coeffi cient of perfor- mance (COP) of the heat pump will be. (C) IDM ENERGIESYSTEME GMBH Installation instructions AERO ILM... -
Page 7: Scope Of Delivery
1.17. Scope of delivery - Heat pump aggregate with modulating scroll cap- sule compressor (AERO ILM 4-13) or rolling piston compressor (AERO ILM 2-7) - Inverter with patented CIC-technology - Copper-welded stainless steel plate heat exchanger as condenser... -
Page 8: Technical Data
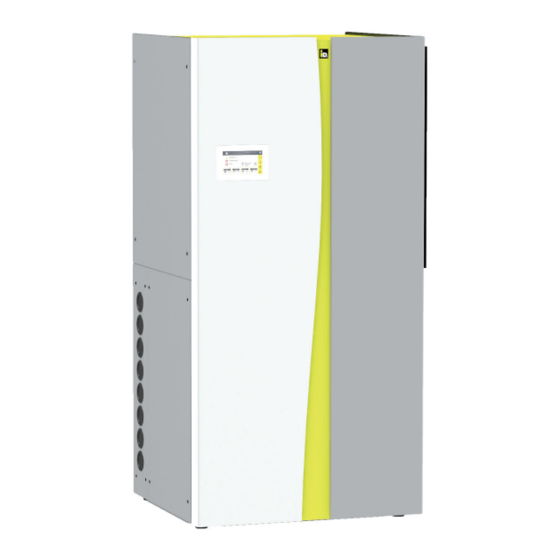
2. General description 2. Technical data Technical data 2.1. Dimensions of AERO ILM 2-7 and AERO ILM 4-13 View from the Front view right (outlet) Tear view Top view (inlet) (C) IDM ENERGIESYSTEME GMBH Installation instructions AERO ILM... -
Page 9: Technical Data
Noise-reduced operation (air inlet) dB(A) Noise-reduced operation (air outlet) dB(A) Indoor - nominal/maximum dB(A) 44/49 4253 The sound pressure level can be calculated with the iDM-sound calculation tool Dimensions HxWxD 1850/910/830 1850/910/830 Tilt hight 2028 2028 Weight Sound data with weather shield-grilles, without air hose and without air duct. If the fan speed will be raised, the sound power level raises too. Measurement uncertainty ± 1,5 dB(A) With the HGL Model, the specifi... - Page 10 2. General description Technical data Heatpump type unit AERO ILM 2-7 AERO ILM 4-13 Maximum heatpump flow temperature ⁵ °C Nominal flow rate heating water (A7°C/W35°C, ΔT=5 K) m³/h 1.42 Flow rate heating water (A7°C/W55°C, ΔT=8 K) m³/h 0.42 0.77 Integrated loading pump Yonos Para 7.0...
-
Page 11: Dimensioning
Off -period factor: The standard outside temperature is additionally re- quired. This is determined by the geographical loca- tion and can be found on the iDM homepage and ob- tained from various institutions. Heating energy required: (domestic water requirements + heating output requirements) x off -period factor = 13.2 kW... -
Page 12: Heating Performance Diagrams Aero Ilm 2-7, According En14511
3. General description Dimensioning 3.1. Heating performance diagrams AERO ILM 2-7, according EN14511 Heat output with fl ow temperatures of 35 °C NOMINAL outside temperature [° C] Heat output with fl ow temperatures of 45 °C NOMINAL outside temperature [° C]... - Page 13 Dimensioning Heat output with fl ow temperatures of 55 °C NOMINAL outside temperature [° C] Heat output with fl ow temperatures of 60 °C NOMINAL outside temperature [° C] (C) IDM ENERGIESYSTEME GMBH Installation instructions AERO ILM...
-
Page 14: Heating Performance Diagrams Aero Ilm 4-13, According En14511
3.2. Heating performance diagrams AERO ILM 4-13, according EN14511 Heat output with fl ow temperatures of 35 °C NOMINAL outside temperature [° C] Heat output with fl ow temperatures of 45 °C NOMINAL outside temperature [° C] (C) IDM ENERGIESYSTEME GMBH Installation instructions AERO ILM... - Page 15 Dimensioning Heat output with fl ow temperatures of 55 °C NOMINAL outside temperature [° C] Heat output with fl ow temperatures of 60 °C NENN outside temperature [° C] (C) IDM ENERGIESYSTEME GMBH Installation instructions AERO ILM...
-
Page 16: Limitations Of Use
The heating of liquids other than heating water is not permitted (see heating water quality). Heat pumps are naturally subject to pressure or temperature-dependent operating limits (see diagram below). Operation outside these limits is not permitted. AERO ILM 2-7 - heating [°C] R410A [°C]... - Page 17 Dimensioning AERO ILM 2-7 - cooling [°C] R410A 10 15 20 25 30 35 40 45 50 [°C] outdoor temperature AERO ILM 4-13 - cooling [°C] R410A 10 15 20 25 30 35 40 45 50 [°C] outdoor temperature The minimum heat pump fl ow temperature is the lowest temperature that the heat pump can produce (depending on the heat source temperature), and at this value it is then switched off...
-
Page 18: Connections And Cable Ducts
Heat pump return Heat pump return (fl ex. connection hose) (fl ex. connection hose) Main current Main current Sensor and control lines Sensor and control lines height-adjustable feet (50 mm) height-adjustable feet (50 mm) (C) IDM Energiesysteme GmbH Installation instructions AERO ILM... -
Page 19: Cable And Piping Ducts
1 ... heat pump fl ow 1 ... heat pump fl ow 2 ... heat pump retur 2 ... heat pump retur 3 ... HGL-fl ow 3 ... fl ow domestic hot water heater (backside of HGL-condenser) (C) IDM Energiesysteme GmbH Installation instructions AERO ILM... -
Page 20: Installation
In coastal installation, a minimum dis- tance of 5 km from the coast must be observed. If this safety distance is not observed, there could occur increased corrosion. These cases are excluded from the guarantee. (C) IDM Energiesysteme GmbH Installation instructions AERO ILM... -
Page 21: Air Duct
(C) IDM Energiesysteme GmbH Installation instructions AERO ILM... - Page 22 = directionality correction [-] = distance from noise source to receiver location [m] The following fi gures show the diff erent installation situations of heat pumps and the corresponding di- rectivity correction. (C) IDM Energiesysteme GmbH Installation instructions AERO ILM...
- Page 23 The rating level Lr shall be obtained by summing the walls as sound refl ections lead to increased sound calculated immission level and the applied correc- pressure levels accordingly. tions of the specifi c periods. (C) IDM Energiesysteme GmbH Installation instructions AERO ILM...
-
Page 24: Decoupling Of Buildings
fl oor screed and impact sound insulation should be omitted around the heat pump (as shown in the illustration). 1. concrete floor 2. impact sound insulation 3. floor screed 4. cut 5. Sound reduction mat (C) IDM Energiesysteme GmbH Installation instructions AERO ILM... -
Page 25: Installation Location
- Heat pumps must not be installed in rooms with condensate. For this purpose a drain- high EMC load! age must be provided. - Air intakes and outlets have to be safeguarded against theft by appropriate on-site measures. (C) IDM Energiesysteme GmbH Installation instructions AERO ILM... -
Page 26: Corner Installation
To facilitate accessibility the outlet opening on the right-hand side should be given preference! When using a light shaft this must be at least as wide as the wall opening. The depth must be at least 400 mm. (C) IDM Energiesysteme GmbH Installation instructions AERO ILM... - Page 27 (incl. outlet panel) 192502 ... Protective grating outlet air or 192532 ... Mesh grille outlet (12 mm) 192502/192532 193801 Only move the heat pump with mounted Avoid intensive pressure against the panels! wall! (C) IDM Energiesysteme GmbH Installation instructions AERO ILM...
- Page 28 The remaining cellular rubber strips have to be affi xed and be fl ush with the cellular rubber on the inner side! The metal frame is thus surrounded completely with insulating material and cold bridge free! (C) IDM Energiesysteme GmbH Installation instructions AERO ILM...
- Page 29 4 screws which are included in the delivery any fl oor unevenness, this can be corrected using the contents. adjustable machine feet. The screws on the panel have to be carefully tightened manually. (C) IDM Energiesysteme GmbH Installation instructions AERO ILM...
-
Page 30: Installation With A Straight Air Duct
When air is conducted via a light shade, it must be at least the same width as the wall opening. The depth must be at least 400 mm. (C) IDM Energiesysteme GmbH Installation instructions AERO ILM... - Page 31 1.500 mm 1.650 mm The dimensions specifi ed are clear dimensions. The wall opening must be enlarged around the wall insulation! The minimum width of the wall insulation must be 50 mm. (C) IDM Energiesysteme GmbH Installation instructions AERO ILM...
- Page 32 As shown in the picture below, the fl ange connection (duct wall connection) lies in front of the wall. At the other end of the duct wall connection is also a fl ange, which ensures the stability of the wall socket. (C) IDM Energiesysteme GmbH Installation instructions AERO ILM...
-
Page 33: Installation With 90 ° Air Duct
When air is conducted via a light shade, it must be at least the same width as the wall opening. Heating and electrical connections can also be made on both sides. (C) IDM Energiesysteme GmbH Installation instructions AERO ILM... - Page 34 The air duct can be cut to length as required, the length B is the length of the air duct plus 166 The dimensions specifi ed are clear dimensions. The wall opening must be enlarged around the wall insulation! The minimum width of the wall insulation must be 50 mm. (C) IDM Energiesysteme GmbH Installation instructions AERO ILM...
- Page 35 Thus, the blown air sinks and moves down to the lowest point. This is especially important when installing with rising or falling terrain. The air ducts are supplied including mounting material (screws, washers, nuts)! (C) IDM Energiesysteme GmbH Installation instructions AERO ILM...
-
Page 36: Installation Of Fl Exible Air Hose - Air Outlet Sideways
The air connections can be connected to the left or right side of the heat pump. In consequence this means that heating connections and electrical connections can be either on the left-hand side or on the right-hand side. (C) IDM Energiesysteme GmbH Installation instructions AERO ILM... - Page 37 5 m, the outlet panel, a wall mounting panel and 2 pieces hose clamps for assembly of the hose to the outlet panel and to the wall mounting panel. (min. bend radius is 600 mm) (C) IDM Energiesysteme GmbH Installation instructions AERO ILM...
- Page 38 The minimum width of the wall insulation must be 50 mm. When using a light shaft this must be at least as wide as the wall opening. The depth must be at least 400 mm. (C) IDM Energiesysteme GmbH Installation instructions AERO ILM...
- Page 39 fl ange are provided for that purpose! Flexible hose: The hose can be cut to length as desired! In connect- ing the hose with the two fl anges the hose insulation is telescoped at the two ends. (C) IDM Energiesysteme GmbH Installation instructions AERO ILM...
-
Page 40: Installation Of Fl Exible Air Hose - Air Outlet To The Top
The air hose is supplied in 3 diff erent lengths (2 m, 3 m und 5 m) and can be cut to length as needed! When using a light shaft this must be at least as wide as the wall opening. The depth must be at least 400 mm. (C) IDM Energiesysteme GmbH Installation instructions AERO ILM... - Page 41 5 m, the outlet panel, a wall mounting panel and 2 pieces hose clamps for assembly of the hose to the outlet panel and to the wall mounting panel and the cover panel sideways for free cutting. (min. bend radius is 600 mm) (C) IDM Energiesysteme GmbH Installation instructions AERO ILM...
- Page 42 Increase the Wall opening according the insulation. The dimensions specifi ed are clear dimensions. The wall opening must be enlarged around the wall insulation! The minimum width of the wall insulation must be 50 mm. (C) IDM Energiesysteme GmbH Installation instructions AERO ILM...
- Page 43 When replacing the panel, ensure that the insulation of the cover is cleanly closed at all times. If this is not the case, condensation can occur on the heat pump cover and also on the remaining panel. (C) IDM Energiesysteme GmbH Installation instructions AERO ILM...
-
Page 44: Modifi Cation From The Right-Hand To Left-Hand Outlet Side
The fl exible connection hoses. the condensation run- off hose, the safety valve hose and the cabling have to be installed as shown in the diagram below. (C) IDM Energiesysteme GmbH Installation instructions AERO ILM... -
Page 45: Transport Provisions
After the heat pump is placed in the place of instal- lation, the wiring is put back in the holder and the panels can be closed again. (C) IDM Energiesysteme GmbH Installation instructions AERO ILM... -
Page 46: Eating Connections
fi xtures or improper have to be installed on sit pump operation can cause damage! Incorrect fl ow rates due to incorrect pip- ing, incorrect fi ttings or improper pump operation can cause damage!. (C) IDM Energiesysteme GmbH Installation instructions AERO ILM... -
Page 47: Aero Ilm With Unregulatet Direct Heating Circuit And Hygienik Without Separating Plate
Heating connections 6.3. AERO ILM with unregulatet direct heating circuit and Hygienik without separating plate (C) IDM Energiesysteme GmbH Installation instructions AERO ILM... -
Page 48: Aero Ilm With Unregulated Direct Heating Circuit And Aqa
6. General description Heating connections 6.4. AERO ILM with unregulated direct heating circuit and AQA (C) IDM Energiesysteme GmbH Installation instructions AERO ILM... -
Page 49: Aero Ilm With Hygienic With Separating Plate And Mixer Circuits
Heating connections 6.5. AERO ILM with Hygienic with separating plate and mixer circuits (C) IDM Energiesysteme GmbH Installation instructions AERO ILM... -
Page 50: Aero Ilm With Cooling Buffer And Hygienic With Layer Separate Plate
6. General description Heating connections 6.6. AERO ILM with cooling buffer and hygienic with layer separate plate (C) IDM Energiesysteme GmbH Installation instructions AERO ILM... -
Page 51: Aero Ilm Hgl With Termo 100 And Hygienik Without Separating Plate And Cooling Circuit
Heating connections 6.7. AERO ILM HGL with TERMO 100 and Hygienik without separating plate and cooling circuit (C) IDM Energiesysteme GmbH Installation instructions AERO ILM... -
Page 52: Aero Ilm Hgl With Hygienic With Separating Plate And Mixer Circuits
6. General description Heating connections 6.8. AERO ILM HGL with Hygienic with separating plate and mixer circuits (C) IDM Energiesysteme GmbH Installation instructions AERO ILM... -
Page 53: Aero Ilm Hgl With Hygenik With Separating Plate And Cockle Stove
Heating connections 6.9. AERO ILM HGL with Hygenik with separating plate and cockle stove (C) IDM Energiesysteme GmbH Installation instructions AERO ILM... -
Page 54: Aero Ilm Hgl With Cooling And Hgl Usage In One Step
6. General description Heating connections 6.10. AERO ILM HGL with cooling and HGL usage in one step (C) IDM Energiesysteme GmbH Installation instructions AERO ILM... -
Page 55: Additional Hydraulic Connection For Heat Recovery
If installing heat recovery in cooling mode, nection and a high effi ciency charging pump. there have to be set an additional piping for the HGL- return. HGL-return for heat recovery (C) IDM Energiesysteme GmbH Installation instructions AERO ILM... -
Page 56: Electrical Connection
For electrical details see the wiring diagram. Primary current electric immersion heater AERO ILM 4-13 3x400V/50Hz - 5G1,5 mm² AERO ILM 2-7 1x230V/50HZ - 3G6,0 mm² or 3x400V/50Hz - 5G1,5 mm² Primary current compressor AERO ILM 4-13 3x400V/50Hz - 5G4,0 mm²... -
Page 57: Feedthrough For Wiring
The sensor cables which have to be installed on site, have to be feed through the grommet on the right side. (C) IDM Energiesysteme GmbH Installation instruction AERO ILM... -
Page 58: Connection Diagram For The Electric Components
113 114 115 116 117 118 119 120 121 122 123 Extension module external / Cascade participant - SH EEV2 X4 EEV1 X2 RS232 X36 LAN X33 132 131 130 Touchdisplay Extension module internal (C) IDM Energiesysteme GmbH Installation instruction AERO ILM... -
Page 59: Confi Guration Of Sensors
The safety shutdown system confi guration) of the charge pump operates in this case directly via the heat pump. The sensor lines must be laid separately from the feed lines. (see EMC problems) (C) IDM Energiesysteme GmbH Installation instruction AERO ILM... -
Page 60: Connecting External Specifi Cations 0-10 V
Together with the lines of the energy supply companies, of transmission equipment and other communication facilities §electromagnetic pollution” that is invisible for us is created. (C) IDM Energiesysteme GmbH Installation instruction AERO ILM... -
Page 61: Start-Up
An annual inspection and maintenance of the system 8.1. Information regarding the start-up by customer service is recommended, in particular Before starting up the IDM heat pump ensure water with regard to protecting the guarantee claims. tightness on the heating side, rinse the heat pump thoroughly, fi... -
Page 62: Appendix
9. 9. 9. Start-up 9. General description Genera Genera 9. Appendix 9.1. AERO ILM 2-7 - Performance data heating - detailed Outdoor temperature [°C] Flow temperature at 35 °C Heating power [kW] 10,65 10,52 10,38 9,90 8,91 6,56 6,19 5,61... -
Page 63: Aero Ilm 2-7 - Performance Data Cooling - Detailed
Appendix 9.2. AERO ILM 2-7 - Performance data cooling - detailed Outdoor temperature [°C] Flow temperature at 18 °C Cooling capacity [kW] 7,32 8,04 8,72 9,37 Power consumption [kW] 3,36 3,12 2,85 2,47 2,18 2,58 3,06 3,79 Cooling capacity [kW]... -
Page 64: Aero Ilm 4-13 - Performance Data Heating - Detailed
2,68 2,70 3,25 2,99 2,84 2,71 2,54 2,21 Heating power [kW] 4,80 4,74 4,19 3,94 3,57 3,15 Power consumption [kW] 1,29 1,26 1,28 1,27 1,26 1,28 3,73 3,76 3,28 3,11 2,83 2,47 (C) IDM Energiesysteme GmbH Installation instructions AERO ILM... -
Page 65: Aero Ilm 4-13 - Performance Data Cooling - Detailed
1,77 1,70 2,25 3,03 3,65 4,15 4,49 4,69 Cooling capacity [kW] 4,12 4,56 4,83 4,90 4,79 4,50 Power consumption [kW] 1,74 1,49 1,33 1,20 1,09 0,98 2,36 3,06 3,64 4,09 4,41 4,57 (C) IDM Energiesysteme GmbH Installation instructions AERO ILM... -
Page 66: Aero Ilm - Product Data Sheet
9. General description Appendix 9.5. AERO ILM - Product data sheet (C) IDM Energiesysteme GmbH Installation instructions AERO ILM... -
Page 67: Declaration Of Conformity
Appendix 9.6. Declaration of conformity (C) IDM Energiesysteme GmbH Installation instructions AERO ILM... - Page 68 Akademy: PRACTICAL KNOWLEDGE FOR SALES AND TECHNOLOGY The comprehensive range of seminars for specialists at the IDM POWER FAMILY is available to you any time on our websitE. We look forward to receiving your registration. YOUR iDM PARTNER: DIE ENERGIEFAMILIE...
Need help?
Do you have a question about the AERO ILM 2-7 and is the answer not in the manual?
Questions and answers