
Related Manuals for ESAB Heliarc 283i


Summary of Contents for ESAB Heliarc 283i
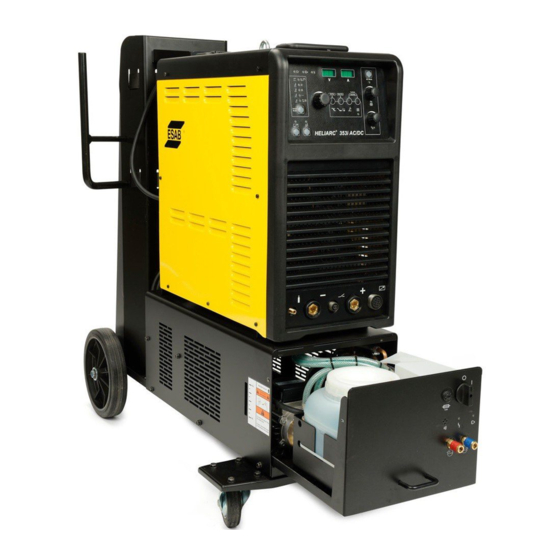
- Page 1 Heliarc 283i, Heliarc 353i Service manual 0464 523 010 GB 20160329 Valid for: 283i = S2733450468, 353i = S2733450508...
-
Page 2: Table Of Contents
What is ESD?...................... 20 Calibration procedure..................20 Test EN 60974-4 ....................24 AT COMPLETION ....................26 After repair, inspection and test ...............26 Visual inspection....................26 Functional test....................27 Rights reserved to alter specifications without notice. 0464 523 010 © ESAB AB 2016... -
Page 3: Read This First
The manual is valid for: Heliarc® AC/DC 283i, Heliarc® AC/DC 353i NOTE! The unit is tested by ESAB in a general set-up. The responsibility for safety and function, of the specific set-up, lies with the integrator. The Heliarc 283i and Heliarc 353i are designed and tested in accordance with international and European standards IEC/EN 60974-1 and IEC/EN 60974-10. -
Page 4: Introduction
Component positions Item Denomination Note Power switch Auxiliary transformer T AUX1 Fuse board FUB2 Primary inverter PCB10 Secondary inverter PCB11 Secondary inductance AC/DC Converter PCB2 Remote control filter board PCB4 0464 523 010 - 4 - © ESAB AB 2016... - Page 5 Fuse board FUB1 Primary inverter PCB1 Secondary inverter PCB9 Logic board PCB7 AC drive board PCB8 HF board spark gap PCB5 HF transformer PCB3 Torch trigger filter board PCB6 Gas valve 0464 523 010 - 5 - © ESAB AB 2016...
- Page 6 Mode TIG 4 stroke LED 0.4-2 Hz AC) Pulse mode LED Mode TIG 2 stroke LED Pre-gas (0.1-2.5 sec) Post-gas Mode Stick LED (0.1-30 sec) button Base current button (10-90%) Front connections 0464 523 010 - 6 - © ESAB AB 2016...
- Page 7 +5 V DC output remote control Chassis common Cooling unit connection PIN Description Power supply common Power supply Power supply 115/230 V AC Power supply 400 V AC Chassis common 0464 523 010 - 7 - © ESAB AB 2016...
- Page 8 INTRODUCTION Diagram 0464 523 010 - 8 - © ESAB AB 2016...
-
Page 9: Fault Finding
Torx driver bits (20, 25) • Hex sockets bits (6,7) • Adjustable spanner • A set of shaft spanners (6, 7, 10, 13, 24) • Nut driver and a set of bits 0464 523 010 - 9 - © ESAB AB 2016... -
Page 10: Visual Inspection
One of the motor fans is not working Symptom The power source is working but one of the motor fans is not working and the duty cycle is shorter than normal. 0464 523 010 - 10 - © ESAB AB 2016... -
Page 11: No Leds Lit On The Front Panel
Make sure that the power source is not working above the maximum capacity. • Make sure that the welding conditions and parameters are correct, compare with the data on the rating plate. 0464 523 010 - 11 - © ESAB AB 2016... -
Page 12: Fault Indication "Cc" When Torch Trigger Is Pushed
Select "Stick mode" on the control panel. Is the error message "CC" still present on the display? Yes: Go to step 3. No: Replace PCB2. NOTE! Always replace PCB8 before you replace PCB2. 0464 523 010 - 12 - © ESAB AB 2016... -
Page 13: Not Possible To Adjust Current With The Encoder
The power source is turned on and all the LEDs are ok. There is open circuit voltage (OCV) but it is not possible to adjust the current with the encoder knob. 0464 523 010 - 13 - © ESAB AB 2016... - Page 14 GND = circuit common reference Is the problem solved? Yes: Go to chapter "At completion". No: Go to step 2. 2. Turn off the power source and wait for five minutes. 0464 523 010 - 14 - © ESAB AB 2016...
-
Page 15: Power Source In Tig Mode Does Not Strike
No: Go to step 7. 7. Is the fuse F1 at the rear of the power source damaged or blown? Yes: Replace the fuse F1. Value = 100 mA T. No: Replace PCB7. 0464 523 010 - 15 - © ESAB AB 2016... -
Page 16: The Solenoid Valve Does Not Work
To do fault finding without power supply, follow the instructions below. 1. Turn off the power source and wait for five minutes. 2. Remove the cover of the power source. 3. Loosen and remove PCB9 and then PCB1. 0464 523 010 - 16 - © ESAB AB 2016... -
Page 17: Fault Finding With Power Supply
8. Check PCB11 in the same way as PCB9. 9. Check the AC converter PCB2. Measure the diodes, 400 mV DC. Fault finding with power supply To do fault finding with power supply, follow the instructions below. 0464 523 010 - 17 - © ESAB AB 2016... - Page 18 3. Turn off the power source and wait for five minutes. 4. Check the spark gap on PCB5 with a feeler gauge. The gap shall be 0.5 - 0.6 mm. 0464 523 010 - 18 - © ESAB AB 2016...
-
Page 19: Fault Finding Indications
Turn off the power source completely. • Make sure that the torch trigger is not pushed. • Check if the torch trigger is damaged. • Turn on the power source again. 0464 523 010 - 19 - © ESAB AB 2016... -
Page 20: Service Instructions
Parts with high voltage are not accessible during normal operation. If the cover is opened for maintence or other reason, parts connected mains such as connection terminal may be exposed. 0464 523 010 - 20 - © ESAB AB 2016... - Page 21 6. Measure the voltage on the welding outlets, it should be 68 V DC. 7. If the voltage is not correct, adjust it with the trimmer potentiometer TRM2 on PCB7. 8. Turn off the power source and wait for five minutes. 0464 523 010 - 21 - © ESAB AB 2016...
- Page 22 Adjust the HS and AF value with the encoder knob. 15. Turn off the power source. 16. Push and hold the "Set Prg" and "Store Prg" buttons and at the same time turn on the power source. 0464 523 010 - 22 - © ESAB AB 2016...
- Page 23 22. Calibrate the voltage display on the power source by pushing the HF button. 23. Make sure that the digital instrument and the voltage display on the source shows the same value. Do this check with different ampere values. 0464 523 010 - 23 - © ESAB AB 2016...
-
Page 24: Test En 60974-4
1 750 ohm, the capacitor will be 130 nF. NOTE! For all class II equipment, use the PE-terminal of earthed supply circuit network. Primary leakage current The primary leakage current in the external protective conductor shall not exceed: 0464 523 010 - 24 - © ESAB AB 2016... - Page 25 The circuit given in the illustration below is used to obtain reproducible results. A, B Test terminals Rated supply voltage 1 500 Ω 10 000 Ω 500 Ω Conventional load voltage 0.22 µF 0.022 µF 0464 523 010 - 25 - © ESAB AB 2016...
-
Page 26: At Completion
0464 523 010 - 26 - © ESAB AB 2016... -
Page 27: Functional Test
4. Turn on the power source and check that the power source ON led is lit on the front panel. 5. Check the function of the power source by welding a workpiece. 0464 523 010 - 27 - © ESAB AB 2016... - Page 28 ESAB subsidiaries and representative offices Europe NORWAY North and South America SOUTH KOREA AS ESAB ESAB SeAH Corporation AUSTRIA Larvik ARGENTINA Kyungnam ESAB Ges.m.b.H Tel: +47 33 12 10 00 CONARCO Tel: +82 55 269 8170 Vienna-Liesing Fax: +47 33 11 52 03...
Need help?
Do you have a question about the Heliarc 283i and is the answer not in the manual?
Questions and answers
Healark 283i. Оторваны все 7 проводов. Необходимо восстановить. У вас есть схема расписки пинов.