
Related Manuals for ESAB OrigoArc 200


Summary of Contents for ESAB OrigoArc 200
-
Page 1: Service Manual
OrigoArc 200 Service manual 0740 800 163 040830 Valid for serial no. 402- -xxx- -xxxx... -
Page 2: Table Of Contents
............OrigoArc 200 . -
Page 3: Read This First
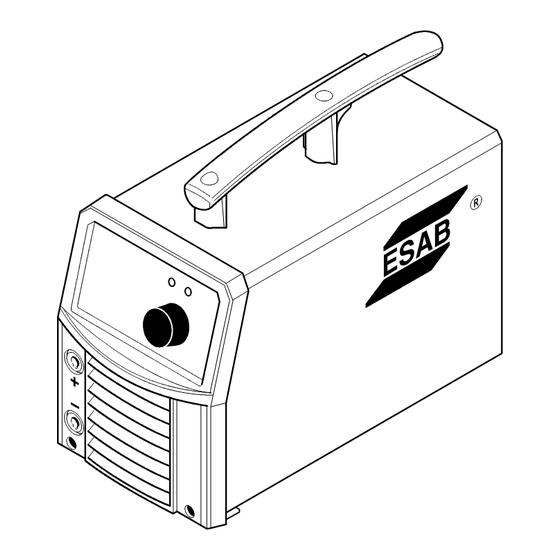
INTRODUCTION The OrigoArc 200 is a welding current power source intended for use with coated electrodes (MMA welding). The power module of the power source is a single forward converter, operating at a switching frequency of 65 kHz. -
Page 4: Technical Data
TECHNICAL DATA Mains voltage 230 V ±10% 1µ 50/60 Hz Fuse (delayed- -action) 25 A Primary current I 43 A Primary current I 28 A Voltage/current range (DC) 8 A / 20 V -- 180 A / 27 V Maximum permissible load at 25% duty cycle 180 A / 27 V 35% duty cycle... -
Page 5: Component Description
WARNING ! STATIC ELECTRICITY can damage circuit boards and electronic components. Observe precautions for handling electrostatic- - sensitive devices. Use proper static- -proof bags and boxes. Component description MMC module. LED, lights when the mains switch is on. LED, lights when the thermal switches 15ST1 and / or 15ST2 are open due to overtemperature. -
Page 6: Origoarc 200
OrigoArc 200 Edition 040830 - - 6 - - ch25bd1... - Page 7 Edition 040830 - - 7 - - ch25bd1...
-
Page 8: Description Of Operation
DESCRIPTION OF OPERATION This description of operation describes the function of circuit boards and other components in the power source. It is divided into sections, numbered to correspond to the circuit board numbers and divisions into function blocks. AP1 Power supply board The power supply board generates internal supply voltages for the machine. -
Page 9: 2Ap1 Component Positions
2AP1 Component positions WARNING! Dangerous voltage - - mains voltage. AP2 Interference suppressor board This circuit board filters the mains voltage and reduces mains--borne interference to/from the power source. Power board 15AP1 rectifies the mains voltage. WARNING! Dangerous voltage - - mains voltage. Circuit diagram of the interference suppressor board (EMC mains filter) Edition 040830 - - 9 - -... -
Page 10: 15Ap1 Power Board
AP1 Power board WARNING! Dangerous voltage - - mains voltage. Never make any measurements on this board when the machine is connected to the mains supply. The power module is a single forward converter, operating at a switching frequency of 65 kHz. -
Page 11: Supply To 2Ap1
Supply to 2AP1 The board supplies power supply board 2AP1 with 325 V DC (pins F1 and F3, connector 15XS1). Gate driver stages Transformer TR1 is a gate driver transformer for galvanic isolation of the drive circuits from controller board 20AP1. Fuses S10 and S20 protect the gate driver circuit if the IGBT transistors fail. -
Page 12: 15Ap1 Component Positions
15AP1 Component positions Pin positions of the semiconductor module Edition 040830 - - 12 - - ct27bd_15... -
Page 13: 15Ap2 Secondary Board
15AP2 Secondary board The secondary board is fitted on the main transformer 15TM1, diode module 15D1 and inductor 15L1. Diode module 15D1 comprises two diodes, rectifier and freewheel diode. During the time interval between two voltage pulses from transformer 15TM1, the freewheel diode maintain the welding current from inductor 15L1. -
Page 14: 20Ap1 Control Board
AP1 Control board The control board monitors and controls the various functions of the power source. If the board is faulty, it must be replaced. After replacing the board, soft--start the machine. See the instructions on page 18. 20AP1:1 Power supply Voltage regulator VR1 produces an output voltage of +20 ¦1.0 V. -
Page 15: 20Ap1:4 Temperature Monitoring
The pulse width modulator determines the frequency and pulse duration of the switch transistors’ control pulses. IC3 controls the pulse frequency, the pulse time and inhibition of pulses. The pulse frequency is 65 kHz +/--1 kHz, with a maximum pulse width of 42 -- 44 % of the cycle width. -
Page 16: 20Ap1:6 Arc Voltage Monitoring
20AP1:6 Arc voltage monitoring The open--circuit voltage controller senses the voltage at the welding current terminals and limits it to a level between 60 and 71 V. This function is inactive during welding, i.e. when the shunt voltage is higher than 2.1 mV. When the OrigoArc is in welding mode, the maximum output voltage is 110 V. -
Page 17: Service Instructions
The soft--starting tool SST 1 is made for the CaddyArc, CaddyTig, OrigoTig and OrigoArc. It can be ordered from ESAB, ordering no. 0459 534 880. The tool includes: Soft starting rectifier, cable set, voltage test board, gate pulse load and shunt voltage resistor for the OrigoArc. -
Page 18: Soft Starting
Soft starting We recommend soft starting of the machine after replacing control circuit board 20AP1, power supply board 2AP1 and circuit boards or components in the power module. Soft starting supplies the power module with a low voltage in order to avoid injury to persons or damage to components. - Page 19 Disconnect connector 15XS3 (supply to the fan) from terminal E of circuit board 2AP1. Connect the 24 V DC input of the SST 1 to terminal E of circuit board 2AP1. Connect the 24 V DC output of the SST 1 to terminals N1:1 and N2:1 of power board 15AP1.
-
Page 20: Checking Rectifier And Freewheel Diodes
Checking rectifier and freewheel diodes Disconnect the machine from the mains. Dismantle the housing of the machine. Use a Torx key no. T25 to unscrew and remove five screws from circuit board 15AP2. The screws are marked on the picture below, Bend out the circuit board so that it has no contact with the connections of the diode module. -
Page 21: Checking The Gate Pulses
Checking the gate pulses When checking the gate pulses, the machine can either be in soft--start mode or in normal operation mode. Special equipment To measure the gate pulses, you need a gate pulse load and a shunt voltage resistor. This is included in soft--starting tool SST 1, which is described on page 17. -
Page 22: Checking The Semiconductor Module
Checking the semiconductor module Rectifier diodes and thyristor IGBT transistors and freewheel diodes Measuring points for the semiconductor module Disconnect the machine from the mains and follow the instructions below. Measurements 2 -- 5: Use a multimeter in diode test position to measure the diodes. Measure with the positive and negative of the multimeter connected as shown in the picture above. -
Page 23: Mounting Components On The Heat Sink
Mounting components on the heat sink Thermal paste Apply thermal conducting paste to the components before fitting them to the heat sink. Start by cleaning the heat sink, and then apply a very thin, even layer of thermal paste to the contact surfaces of the components. -
Page 24: Instructions
This chapter is an extract from the instructions for the OrigoArc 200. SAFETY Users of ESAB welding equipment have the ultimate responsibility for ensuring that anyone who works on or near the equipment observes all the relevant safety precautions. Safety precautions must meet the requirements that apply to this type of welding equipment. -
Page 25: Installation
INSTALLATION The installation must be executed by a professional. WARNING! This product is intended for industrial use. In a domestic environment this product may cause radio interference. It is the user’s responsibility to take adequate precautions. Placing Place the welding power source so that its cooling air inlets and outlets are not obstructed. Rating plate The rating plate is located on the underside of the power source. -
Page 26: Operation
Welding cable connection (+) Welding The OrigoArc 200 gives direct current, and you can weld most metals to alloy and non--alloy steel, stainless steel and cast iron. The OrigoArc 200 allows you to weld most coated electrodes from ∅ 1.6 to ∅ 4.0 mm. -
Page 27: Notes
NOTES - - 27 - - notes... - Page 28 ESAB subsidiaries and representative offices Europe NORWAY Asia/Pacific Representative offices AS ESAB AUSTRIA BULGARIA CHINA Larvik ESAB Ges.m.b.H ESAB Representative Office Shanghai ESAB A/P Tel: +47 33 12 10 00 Vienna- -Liesing Sofia Shanghai Fax: +47 33 11 52 03...
Need help?
Do you have a question about the OrigoArc 200 and is the answer not in the manual?
Questions and answers