
Related Manuals for ESAB Heliarc 283i AC/DC


Summary of Contents for ESAB Heliarc 283i AC/DC
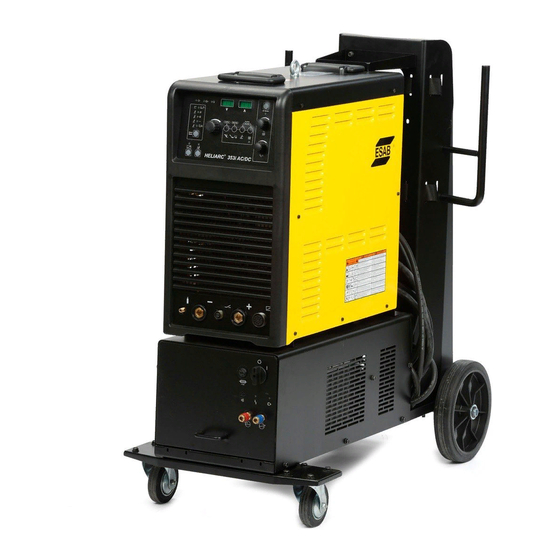
- Page 1 Heliarc 283i AC/DC Heliarc 353i AC/DC Heliarc cooling unit Instruction manual 0463 369 001 GB 20131114 Valid for: 283i = S2733450468 353i = S2733450508 Cooling unit = S2733450427...
-
Page 3: Table Of Contents
Starting up the cooling unit ................27 MAINTENANCE ....................29 Overview ......................29 Power source...................... 29 Welding torch ..................... 29 Cooling unit ......................29 Fill up the cooling unit with coolant ..............30 FAULT TRACING....................31 0463 369 001 © ESAB AB 2013... - Page 4 TABLE OF CONTENTS ORDERING SPARE PARTS ................33 DIAGRAM ........................34 WELDING TABLES ....................36 ORDERING NUMBERS .....................38 ACCESSORIES ......................39 Rights reserved to alter specifications without notice. 0463 369 001 © ESAB AB 2013...
-
Page 5: Safety
1 SAFETY SAFETY Users of ESAB equipment have the ultimate responsibility for ensuring that anyone who works on or near the equipment observes all the relevant safety precautions. Safety precautions must meet the requirements that apply to this type of equipment. The following recommendations should be observed in addition to the standard regulations that apply to the workplace. - Page 6 Read and understand the instruction manual before installing or operating. PROTECT YOURSELF AND OTHERS! WARNING! Do not use the power source for thawing frozen pipes. CAUTION! Read and understand the instruction manual before installing or operating. 0463 369 001 - 6 - © ESAB AB 2013...
- Page 7 There may be potential difficulties in ensuring electromagnetic compatibility of class A equipment in those locations, due to conducted as well as radiated disturbances. 0463 369 001 - 7 - © ESAB AB 2013...
-
Page 8: Introduction
The Heliarc cooling unit is used with the Heliarc 283i and 353i AC/DC. It distributes 2 litres/min, with the torch connected, with a power of 60 W. A trolley is an option available for the power sources. ESAB's accessories for the product can be found in the "ACCESSORIES" chapter of this manual. Equipment The power sources comes with: •... -
Page 9: Technical Data
Equipment marked IP21 is intended for indoor use. Heliarc cooling unit Mains voltage 400 V ±10%, 1~, 50/60 Hz Maximum power supply current 0.75 A 0463 369 001 - 9 - © ESAB AB 2013... - Page 10 3 TECHNICAL DATA Heliarc cooling unit l/min 0.5 kW Cooling power 60 W Coolant "ESAB's ready mixed coolant, see the "ACCESSORIES" chapter. Coolant quantity 5 l (delivered with approx. 2.5 l) Pressure max 0.35 MPa Maximum water flow 2.0 l/min Operating temperature -10°...
-
Page 11: Installation
Position the welding power source such that its cooling air inlets and outlets are not obstructed. Make sure that no deposits or dust goes into the power source. Prevent impacts, rubbing and exposure to dripping water, excessive heat sources or any unusual situations. 0463 369 001 - 11 - © ESAB AB 2013... -
Page 12: Mains Supply
ILME 4-way plug with a three phase plug. Connect the supply wires to only two of the contacts (black-brown) of the plug and the earth led (yellow/green) to the earth contact. 0463 369 001 - 12 - © ESAB AB 2013... - Page 13 Connect the water delivery pipe of the torch to water output coupling on the cooling unit. Connect the water return pipe of the torch to the water input coupling on the cooling unit. 0463 369 001 - 13 - © ESAB AB 2013...
-
Page 14: Operation
EARTH CLAMP Positive Type Connection Description EARTH CLAMP Negative POSSIBLE REMOTE ELECTRODE Positive NOTE! Connection D, 2 pin cannon, can be used for either analogue foot control or torch. 0463 369 001 - 14 - © ESAB AB 2013... - Page 15 Remote control +5 V DC output remote control +5 V DC output remote control Chassis common 2 pin connector 2 Pin PIN Description connector Torch switch Torch switch Torch trigger 0463 369 001 - 15 - © ESAB AB 2013...
- Page 16 Encoder knob for current setting and other settings HF LED HF button Select mode button Remote control button Remote button LED Mode TIG dual schedule LED Mode TIG spot LED Mode TIG 4 stroke LED 0463 369 001 - 16 - © ESAB AB 2013...
-
Page 17: Quick Set Up
4. Press the select mode button (1) for a few seconds unit "HS" is shown in the V display. 5. Press the select mode button (1) again, "AF" is shown on the V display. 6. Set the value for the arc force with the encoder knob (2). 0463 369 001 - 17 - © ESAB AB 2013... -
Page 18: Tig (Gtaw) Two Stroke Mode With Remote Switch
1. Press the select mode button (1) repeatedly until the TIG two stroke LED is lit. 2. Keep the slope up/down button (3) pressed and adjust the slope up/down time with the encoder knob (2) to the minimum time. 5.3.5 TIG (GTAW) four stroke mode 0463 369 001 - 18 - © ESAB AB 2013... -
Page 19: Tig (Gtaw) Spot Mode
2. Adjust the spot time, shown in A display, with the AC frequency button (2). 3. Adjust the balance (10 to 90%) with the AC balance button (3). 4. Press the AC mode button (1) for 3 seconds to turn off the AC mode. 0463 369 001 - 19 - © ESAB AB 2013... -
Page 20: Pulse Mode - Peak/Background
3. In "DUT" mode adjust the duty (30 to 65% peak width) with encoder knob (2). More duty = more heat. 4. Press the pulse mode button (1) for 3 seconds to turn off the pulse mode. 0463 369 001 - 20 - © ESAB AB 2013... -
Page 21: Store And Recall Programs
3. To store, press the base current button (3) for 3 seconds. The unit beeps 4 times when the program is stored. 4. To recall, press the slope up/slop down button (4) for 3 seconds. The unit display flashes when the program is recalled. 0463 369 001 - 21 - © ESAB AB 2013... -
Page 22: General Functions
5. Press the remote control button (1) for 3 seconds to turn off the remote current. Sub menu power source Hot start TIG AC NOTE! Hot start TIG AC is only active in TIG below 130 A. 0463 369 001 - 22 - © ESAB AB 2013... -
Page 23: Main Functions Power Source
H = Torch trigger ON/OFF TIG dual schedule The TIG dual schedule function allows the operator to use 2 current level switching from the main and base current by quickly pressing the trigger torch. 0463 369 001 - 23 - © ESAB AB 2013... - Page 24 Case A: Maximum cleaning, minimum penetration, Tungsten electrode wear out. Case B: Maximum penetration, minimum cleaning, limited Tungsten electrode wear out. The best compromise is normally with a balance of 80% and 80 Hz of frequency. 0463 369 001 - 24 - © ESAB AB 2013...
-
Page 25: Tig Welding Information
The electrode used is of the same type described for welding steel, it is prepared as described above. To prevent possible oxidation in the welded area, weld materials containing phosphor, silicon and deoxidizing components are used. 0463 369 001 - 25 - © ESAB AB 2013... -
Page 26: Power Source Overheated
Hot water return, red tube on the torch ILME 4-way connector 4 Pin PIN Description connector Power supply common Power supply Power supply 115/230 V AC Power supply 400 V AC Chassis common 0463 369 001 - 26 - © ESAB AB 2013... -
Page 27: Starting Up The Cooling Unit
To solve the problem do the following actions: 1. Make sure that there is coolant in the cooling unit and at the maximum level. 2. Disconnect the torch hose from the hot-water return (red hose). 0463 369 001 - 27 - © ESAB AB 2013... - Page 28 5. Keep blowing until the water flushes continuously into the bucket from the torch hose and the pump sounds normal. 6. Turn off the cooling unit and connect the torch hose to the hot water return. 7. Turn on the cooling unit. 0463 369 001 - 28 - © ESAB AB 2013...
-
Page 29: Maintenance
3. Clean the inside of the cooling unit with compressed air, not higher than 3 bar. 4. Check that all the electrical connections are tightened. 5. Check that all the hydraulic connections are tightened. 6. Replace damaged or worn parts. 0463 369 001 - 29 - © ESAB AB 2013... -
Page 30: Fill Up The Cooling Unit With Coolant
4. Carefully pull out the cooling unit (2), enough to access the coolant tank. 5. Fill up the cooling unit with coolant to the maximum level. 6. Carefully push back the cooling unit and fasten it with the safety bolt (1). 0463 369 001 - 30 - © ESAB AB 2013... -
Page 31: Fault Tracing
Check that the voltage on the voltage selection label on the rear of the power source is equal to the nominal mains voltage. • Restart the power source with the main switch 0463 369 001 - 31 - © ESAB AB 2013... - Page 32 Make sure that the pipe connections are correctly installed. • Check the pump capacity. Loud noise • Stop the cooling unit immediately, top up with coolant and make sure that there are no leaks. 0463 369 001 - 32 - © ESAB AB 2013...
-
Page 33: 0463 369 001 © Esab Ab 2013
Spare parts may be ordered through your nearest ESAB dealer, see the last page of this document. 0463 369 001 - 33 - ©... -
Page 34: Diagram
DIAGRAM DIAGRAM Heliarc 283i AC/DC, Heliarc 353i AC/DC 0463 369 001 - 34 - © ESAB AB 2013... - Page 35 DIAGRAM Heliarc cooling unit 0463 369 001 - 35 - © ESAB AB 2013...
-
Page 36: Welding Tables
WELDING TABLES WELDING TABLES Welding table steel 0463 369 001 - 36 - © ESAB AB 2013... - Page 37 WELDING TABLES Welding table aluminium 0463 369 001 - 37 - © ESAB AB 2013...
-
Page 38: Ordering Numbers
0700 300 703 Cooling unit Heliarc cooling unit 0464 524 010 Spare parts list Heliarc 283i AC/DC, 400 V 353i AC/DC 0464 524 020 Spare parts list Heliarc cooling unit 0463 369 001 - 38 - © ESAB AB 2013... -
Page 39: Accessories
Cooling liquid GLIDEX-35deg, 5 l 0349 312 925 Cooling liquid GLIDEX-35 deg, 10 l 0700 006 888 Electrode holder with 3 m cable 0558 101 702 Trolley 0558 004 234 FC5C foot control 0463 369 001 - 39 - © ESAB AB 2013... - Page 40 TXH 251w, 8 m, wheel remote, 2.8 kg 0700 300 660 TXH 401w, 8m, wheel remote, 4.56 kg 0700 300 663 TXH 251w, 8 m, flex wheel remote, 2.82 kg 0463 369 001 - 40 - © ESAB AB 2013...
- Page 41 ACCESSORIES 0463 369 001 - 41 - © ESAB AB 2013...
- Page 42 ESAB subsidiaries and representative offices Europe NORWAY North and South America SOUTH KOREA AS ESAB ESAB SeAH Corporation AUSTRIA Larvik ARGENTINA Kyungnam ESAB Ges.m.b.H Tel: +47 33 12 10 00 CONARCO Tel: +82 55 269 8170 Vienna-Liesing Fax: +47 33 11 52 03...
Need help?
Do you have a question about the Heliarc 283i AC/DC and is the answer not in the manual?
Questions and answers