
Related Manuals for Viessmann Vitotrol 350-C


Summary of Contents for Viessmann Vitotrol 350-C
- Page 1 Viesmann Installation and service instructions for contractors Vitotrol 350-C Remote control unit and cascade controller For applicability, see the last page VITOTROL 350-C Please keep safe. 5778769 GB 6/2018...
- Page 2 Prior to commencing work, touch earthed lidate our warranty. objects such as heating or water pipes, to dis- For replacements, use only original spare parts charge static loads. supplied or approved by Viessmann.
- Page 3 Safety instructions Safety instructions (cont.) Safety instructions for operating the system If you smell flue gas Danger Leaking or blocked flue systems, or an inade- Danger quate supply of combustion air can cause life Flue gas can lead to life threatening poisoning. threatening poisoning from carbon monoxide in ■...
-
Page 4: Table Of Contents
Product information ................2. Preparing for installation ........................ 3. Installation sequence Installing the Vitotrol 350-C ..............Electrical connection of the Vitotrol 350-C ..........Connection diagram for Vitoligno 200-S, 300-C, 300-H ..... ■ Connection diagram for Vitoligno 250-S ..........10 ■... -
Page 5: Information Disposal Of Packaging
Please dispose of packaging waste in line with statu- DE: Use the disposal system organised by tory regulations. Viessmann. AT: Use the ARA statutory disposal system (Altstoff Recycling Austria AG, licence number 5766). CH: Packaging waste is disposed of by the HVAC contractor. -
Page 6: Product Information
The appliance can also be operated safely by inappropriate. untrained persons. Any usage beyond this must be approved by the man- ufacturer in each individual case. Product information The Vitotrol 350-C can be used in connection with the following boilers: ■ Vitoligno 200-S ■ Vitoligno 250-S Note Use with the Vitoligno 250-S requires a connection adaptor, see page 10. -
Page 7: Preparing For Installation
Preparing for installation Preparing for installation Installation location Please note The Vitotrol 350-C can be damaged by ingress of moisture or water. Install the Vitotrol 350-C exclusively in dry rooms. Avoid installation outdoors or in humid rooms. Fig. 1 ■... -
Page 8: Installation Sequence Installing The Vitotrol 350-C
Prior to commencing any work, touch earthed objects such as heating or water pipes to dis- charge static loads. Fig. 2 Electrical connection of the Vitotrol 350-C CAN BUS cable Note ■ LiCY 2 x 2 x 0.34 mm², screened Cable lengths in excess of 300 m or routing the BUS Max. -
Page 9: Connection Diagram For Vitoligno 200-S, 300-C, 300-H
USB connection Screen Connection for solid fuel boiler or controller module Ethernet connection Danger Make the electrical connection to the Vitotrol 350-C; for Parasitic voltages can result in life-threatening this, observe the associated connection diagram as electrocution. indicated in the table. -
Page 10: Connection Diagram For Vitoligno 250-S
Fig. 5 Connection, D-SUB9 connection adaptor for Vitoligno 250-S Connection, Vitotrol 350-C Connection diagram for controller modules Connection variant: Vitotrol 350-C as heating circuit controller without boiler Fig. 6 Connection, Vitotrol 350-C Connection, controller modules A maximum of 5 controller modules with a maxi-... - Page 11 Installation sequence Electrical connection of the Vitotrol 350-C (cont.) Connection variant: In series on the boiler Fig. 7 Connection, Vitotrol 350-C Connection, Vitoligno 200-S, 300-C, 300-H Connection, controller modules A maximum of 5 controller modules with a maxi- mum of 4 regulated circuits each is possible...
-
Page 12: Installing The Programming Unit
Installation sequence Installing the programming unit Fig. 9 1. Lightly push the display onto the enclosure. 2. Insert the cover from below between display and casing. Removing the programming unit Fig. 10 1. Press lightly onto the centre of the cover and pull 2. -
Page 13: Commissioning Commissioning Sequence
Commissioning Commissioning sequence After the power supply is switched on, the user is gui- Information ded through an automatic commissioning sequence. Not every element in the footer is available when first commissioning the unit. Setting the language Shortly after switching the power on, the display shows 1. -
Page 14: System Version With Controller Module
Continue with instructions from chapter "Configuring controller modules (if installed)", see page 14 Configuring controller modules (if installed) Up to 5 controller modules can be connected to one Vitotrol 350-C. Fig. 15 Tap on the field for the required regulated circuit. Fig. 14 Tap on the field for the required controller module. -
Page 15: Configuring The Default Display
A field with a highlighted frame is already enabled. 1. If the boiler is not recognised: Check the connec- tion and routing of the CAN BUS. 2. If the Vitotrol 350-C is used without a boiler: Select "No wood boiler connected". 3. Press "OK" to confirm... -
Page 16: Default Display Of The Programming Unit
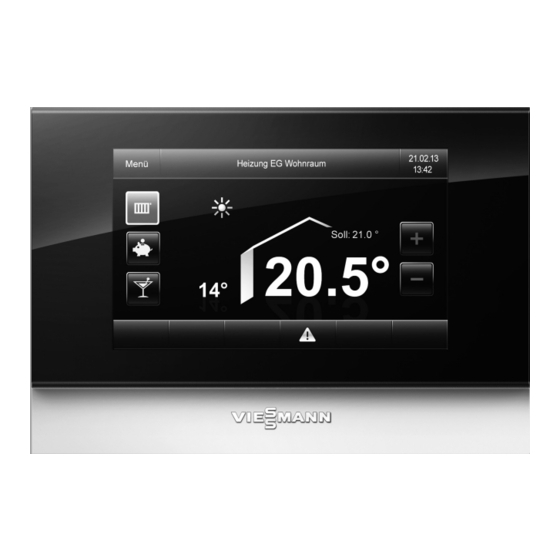
Commissioning Configuring the default display (cont.) Fig. 21 Fig. 22 The display shows an overview of the regulated cir- The boiler, cascade or one of the regulated circuits cuits registered to the wood boiler. must be selected as the default display. Press "OK"... - Page 17 Commissioning Default display of the programming unit (cont.) Example: Cascade default display Fig. 24 Calls up the menu Calls up the cascade menu Boiler flow temperature Date and time Header Boiler status display Boiler default output 0 - 100 % Boiler output indication Boiler number Fig.
-
Page 18: Codes Coding Levels
2. "Settings" Note Password "1234" is set as default for the 3. "Extended settings" Vitotrol 350-C. To change the password, see page 20. 4. Tap on field "ABC" or "123" to change to the required keyboard. 6. "OK" to confirm. -
Page 19: General Settings
Codes Overview "Extended settings" (cont.) General settings Codes These parameters are described in the installa- tion and service instructions of the respective boiler. The following settings can be programmed: Parameter Description "Time constant, outside temp Time constant for calculating the adjusted outside temperature adj"... -
Page 20: Changing The Password
The password has been changed. "Password has been changed" appears briefly on the display. Fig. 30 Enter the new password. Note The default password for the Vitotrol 350-C is "1234". Default settings The default settings for the individual regulated circuits can be loaded. - Page 21 Codes Overview "Extended settings" (cont.) Designation Factory Min. Max. Information setting "Frost protection Heating circuit pump ON: temp" Outside temperature below the set frost protection tempera- ■ ture Heating circuit pump OFF: Outside temperature above the set frost protection tempera- ■...
- Page 22 Codes Overview "Extended settings" (cont.) Designation Factory Min. Max. Information setting "Mixer eco func- 0: Without mixer economy function tion" 1: With mixer economy function (extended heating circuit pump logic): Heating circuit pump also "OFF": The mixer has been closing for longer than 20 min. Heating circuit pump "ON": Mixer changes to control function ■...
- Page 23 Codes Overview "Extended settings" (cont.) Parameter ad- Heating circuit pump "OFF" Heating circuit pump "ON" dress "B5": Summer eco function enabled Summer economy function passive < RT - 1 K > actual actual - 1 K < RT - 2 K >...
- Page 24 Codes Overview "Extended settings" (cont.) Designation Factory Min. Max. Information setting "DHW priority" Without DHW priority Mixer closed, pump stays in control mode. Pump OFF and mixer close Reduced mode (heating circuit is forced into reduced mode). Note Frost protection and party mode have priority over DHW priority, i.e.
-
Page 25: Dhw
Codes Overview "Extended settings" (cont.) Temperature profile 3, code "3" Days Fig. 33 Temperature profile 4, code "4" Days Fig. 34 Temperature profile 5, code "5" Days Fig. 35 Temperature profile 6, code "6" Days Fig. 36 Codes These parameters are described in the installa- tion and service instructions of the respective boiler. -
Page 26: Local Heating Network Supply
Codes Overview "Extended settings" (cont.) Designation Factory Min. Max. Information setting "DHW differential" Differential temperature is calculated automatically. 1 to 20: Differential temperature in °C "Start hysteresis" Cylinder heating start point: Set value - 2.5 K 1 to 30: Start point from 1 to 30 K below set value "DHW return tem- Available if the control unit version is set to "Flow control". -
Page 27: Cascade Settings
Codes Overview "Extended settings" (cont.) Cascade settings Designation Unit Factory Min. Max. Information setting "Number of boilers" The number of solid fuel boilers managed by the cascade controller. "Number of additional Optionally, an external heat source can be boilers" managed by the cascade controller. "Start delay, start point min. -
Page 28: Settings For Cascade Charging
Codes Overview "Extended settings" (cont.) Designation Unit Factory Min. Max. Information setting "Hours run tolerance" If two boilers have equal priority and one of them is "warm" and still within the tolerance, this boiler is used next. "Hours run offset" The hours run offset can be synchronised or reset. -
Page 29: Boiler Changeover Unit
Codes Overview "Extended settings" (cont.) Boiler changeover unit Charging scheme 1 Fig. 37 Pellet silo Changeover unit (4 x) Designation Unit Factory set- Information ting "Changeover unit no. boiler" Number of boilers for filling "Boiler min. fill level" If the minimum fill level is reached, filling starts. "Vacuum module pre-flushing sec. -
Page 30: Boiler Changeover Unit And Discharge Screw Conveyor
Codes Overview "Extended settings" (cont.) Boiler changeover unit and discharge screw conveyor Charging scheme 2 Fig. 38 Discharge screw conveyor Changeover unit (4 x) Designation Unit Factory set- Information ting "Changeover unit no. boiler" Number of boilers for filling "Boiler min. fill level" If the minimum fill level is reached, filling starts. -
Page 31: Boiler Changeover Unit And External Charging
Codes Overview "Extended settings" (cont.) Boiler changeover unit and external charging Charging scheme 3 Fig. 39 External charging Changeover unit (4 x) Designation Unit Factory set- Information ting "Changeover unit no. boiler" Number of boilers for filling "Boiler min. fill level" If the minimum fill level is reached, filling starts. -
Page 32: Boiler Changeover Unit And Changeover Unit Wands
Codes Overview "Extended settings" (cont.) Boiler changeover unit and changeover unit wands Charging scheme 4 Fig. 40 Suction wands Changeover unit (8 x) Changeover unit (4 x) Designation Unit Factory set- Information ting "Changeover unit no. boiler" Number of boilers for filling "Boiler min. -
Page 33: Boiler Screw Conveyors And Silo Discharge Screw Conveyor
Codes Overview "Extended settings" (cont.) Boiler screw conveyors and silo discharge screw conveyor Charging scheme 5 Fig. 41 Discharge screw conveyor (screw conveyor 11) Transfer unit Screw conveyors (boiler screw conveyors) Designation Unit Factory set- Information ting "Delay, silo empty" min. -
Page 34: Boiler Screw Conveyors And Intermediate Screw Conveyor And Silo With Discharge Screw Conveyor
Codes Overview "Extended settings" (cont.) Boiler screw conveyors and intermediate screw conveyor and silo with discharge screw con- veyor Charging scheme 6 Fig. 42 Discharge screw conveyor (screw conveyor 12) Intermediate screw conveyor (screw conveyor 11) Transfer unit Screw conveyors (boiler screw conveyors) Designation Unit Factory set-... -
Page 35: Boiler Screw Conveyor And 2 Silos With Discharge Screw Conveyors
Codes Overview "Extended settings" (cont.) Boiler screw conveyor and 2 silos with discharge screw conveyors Charging scheme 7 Fig. 43 Discharge screw conveyors (screw conveyor 11, screw conveyor 12) Transfer unit Screw conveyors (boiler screw conveyors) Designation Unit Factory set- Information ting "Delay, silo empty"... -
Page 36: Boiler Screw Conveyors And Ah Silo Discharge (Screw And Agitator)
Codes Overview "Extended settings" (cont.) Boiler screw conveyors and AH silo discharge (screw and agitator) Charging scheme 8 Fig. 44 AH horizontal discharge (screw conveyor 11 and agitator) Transfer unit Screw conveyors (boiler screw conveyors) Designation Unit Factory set- Information ting "Delay, silo empty"... -
Page 37: Diagnosis Actuator Test
Diagnosis Actuator test See page 19 or "Calling up extended settings" from page 18... -
Page 38: Fault Rectification Calling Up The Fault Display
Fault rectification Calling up the fault display To indicate a fault, symbol is shown in red in the dis- For an explanation of the fault code, see chapter "Fault play footer. codes". Some faults are displayed as plain text. To call up the cause of the fault, tap on For further details regarding the cause of the fault, see the boiler operating instructions. - Page 39 Fault rectification Fault codes (cont.) Displayed fault System characteristics Cause Measures code Fault, outside temperature Short circuit, outside temperature sensor, short circuit sensor Fault, buffer temperature Short circuit, top buffer tempera- sensor 1, short circuit ture sensor Fault, buffer temperature Short circuit, buffer temperature sensor 2, short circuit sensor 2...
- Page 40 Fault rectification Fault codes (cont.) Displayed fault System characteristics Cause Measures code Short circuit, DHW return Check DHW return temperature temperature sensor sensor. Fault, heating flow tem- perature sensor, lead break Lead break, flow tempera- Check flow temperature sensor, ture sensor, assembly 1 assembly 1.
- Page 41 Fault rectification Fault codes (cont.) Displayed fault System characteristics Cause Measures code Fault, feed screw convey- Check feed screw conveyor. Ac- or reversal tuator test, feed screw conveyor. Fault, maintenance cover, Check maintenance cover position. feed Check limit switch. Fault, maintenance cover, Check maintenance cover position.
- Page 42 Fault rectification Fault codes (cont.) Displayed fault System characteristics Cause Measures code 0165 Short circuit, flow temper- Check flow temperature sensor, lo- ature sensor, local heating cal heating network supply, regula- network supply, regulated ted circuit 1. circuit 1 0166 Short circuit, return tem- Check return temperature sensor, perature sensor, local...
- Page 43 Fault rectification Fault codes (cont.) Displayed fault System characteristics Cause Measures code Fault, solar DHW cylinder, Check temperature sensor, solar bottom, short circuit DHW cylinder, bottom. Fault, solar DHW cylinder, Check temperature sensor, solar bottom, lead break DHW cylinder, bottom. Fault, boiler O2 level not Check Lambda probe.
- Page 44 Fault rectification Fault codes (cont.) Displayed fault System characteristics Cause Measures code Fault, buffer temperature Check buffer temperature sensor sensor 4, lead break Fault, buffer temperature Check buffer temperature sensor sensor 5, lead break Device is not compatible Update boiler software. with boiler version Central fault, boiler 2 Check fault message(s) for boiler...
-
Page 45: Acknowledging Fault Messages
Fault rectification Acknowledging fault messages "Ack" Note The fault message is accepted into the "History" ■ An alarm for issuing fault messages (for example a menu. buzzer) is switched off. ■ If an acknowledged fault is not remedied, the fault message will be redisplayed the following day at 07:00 h. -
Page 46: Specification
Specification Specification Power supply 24 VDC/0.4 A Power consumption 9.6 W Protection class Protection level to EN 60529 IP 30 Permissible ambient temperature During storage: -25 °C to 60 °C ■ During operation: 0 °C to 40 °C ■ Setting range for set room temperature 10 °C to 34 °C... -
Page 47: Appendix Final Decommissioning And Disposal
Appendix Final decommissioning and disposal Viessmann products can be recycled. Components and substances from the system are not part of ordi- nary household waste. For decommissioning the system, isolate the system from the power supply and allow components to cool down where appropriate. -
Page 48: Keyword Index
– Heating circuit............16 – Programming unit............16 – Setting..............15 Default settings............20 Applicability Serial No.: 7571139 Viessmann Werke GmbH & Co. KG Viessmann Limited D-35107 Allendorf Hortonwood 30, Telford Telephone: +49 6452 70-0 Shropshire, TF1 7YP, GB Fax: +49 6452 70-2780 Telephone: +44 1952 675000 www.viessmann.com...
Need help?
Do you have a question about the Vitotrol 350-C and is the answer not in the manual?
Questions and answers