Viessmann VITOTROL 300 RF Installation And Service Instructions Manual
Hide thumbs
Also See for VITOTROL 300 RF:
- Operating instructions manual (56 pages) ,
- Installation and service instructions for contractors (32 pages)

Related Manuals for Viessmann VITOTROL 300 RF


Summary of Contents for Viessmann VITOTROL 300 RF
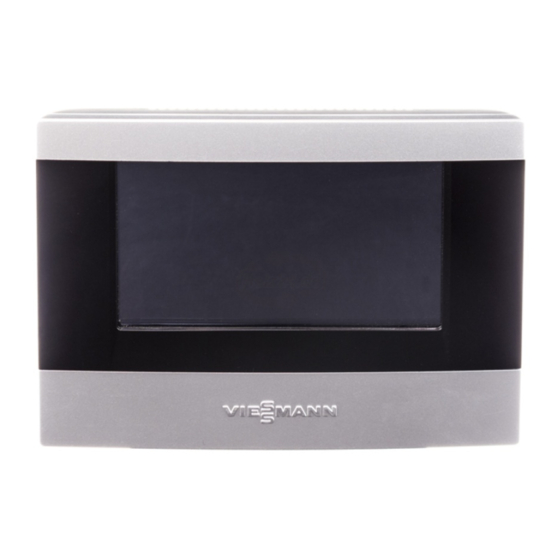
- Page 1 VIESMANN Installation and service instructions for contractors Vitotrol 300 RF Wireless remote control for one, two or three heating circuits For applicability, see the last page VITOTROL 300 RF Please keep safe. 5614 625 GB 4/2012...
-
Page 2: Safety Instructions
Safety instructions Safety instructions Please follow these safety instructions closely to prevent accidents and mate- rial losses. Safety instructions explained ■ all current safety regulations as defined by DIN, EN, DVGW, TRGI, Danger TRF, VDE and all locally applicable This symbol warns against the standards, risk of injury. - Page 3 ■ When using gas as fuel, also close the For replacements, use only orig- main gas shut-off valve and safeguard inal spare parts from Viessmann against unauthorised reopening. or those which are approved by ■ Isolate the system from the power sup- Viessmann.
-
Page 4: Table Of Contents
Changing the configuration of the heating circuits after commissioning....21 Terminating configuration..................22 Troubleshooting Fault display......................23 Specification....................... 24 Parts list Vitotrol 300 RF with table-top dock..............25 Vitotrol 300 RF with wall mounting bracket............26 Declaration of Conformity................. 28... -
Page 5: Preparing For Installation
Vitotrol 300 RF with integral wireless Up to three heating circuits can be oper- transmitter for operation with the wire- ated with one Vitotrol 300 RF; alterna- less base station (accessory for tively one Vitotrol 300 RF can be Vitotronic boiler and heating circuit con-... - Page 6 Wireless connection Select the installation site of the Prior to the final fitting, commission the Vitotrol 300 RF so that the radio signals Vitotrol 300 RF and check the transmis- are beamed as vertically as possible sion and reception quality at the intended through walls and floors to the wireless installation site.
-
Page 7: Installation Of The Wall Mounting Bracket
Preparing for installation Installation of the wall mounting bracket... - Page 8 Preparing for installation Installation of the wall mounting bracket (cont.) 230 V~ 230 V/50 Hz GNYE...
- Page 9 Preparing for installation Installation of the wall mounting bracket (cont.) 230 V~ 230 V~...
- Page 10 Preparing for installation Installation of the wall mounting bracket (cont.)
- Page 11 Preparing for installation Installation of the wall mounting bracket (cont.)
- Page 12 Preparing for installation Installation of the wall mounting bracket (cont.)
- Page 13 Preparing for installation Installation of the wall mounting bracket (cont.)
-
Page 14: Commissioning And Adjustment
■ The control unit to which the wireless base station is connected must be switched on. ■ Position the Vitotrol 300 RF for com- missioning close to the wireless base station Vitotronic 200 RF. ■ Rechargeable batteries supply power to the Vitotrol 300 RF. - Page 15 Commissioning and adjustment Commissioning the Vitotrol 300 RF (cont.) Commissioning in connection with the wireless base station 1. Connect Vitotrol 300 RF to power supply. The commissioning assistant starts automatically.
- Page 16 ■ Operation with wireless repeater: for 8 s. The green LED on the wireless base station flashes quickly. 4. On the Vitotrol 300 RF, touch "OK". The Vitotrol 300 RF transmits a signal to log on to the wireless base sta- tion.
- Page 17 In this case, activate the RF connec- tion again (see step 3). 6. Select heating circuits that should be Heating circuit selection operated via the Vitotrol 300 RF, and Heating circuit 1 confirm with "OK". Initialisation bar is running (can take Heating circuit 2 ç...
- Page 18 "Activate wireless connection" appears. Activate wireless connection 1. Initiate linking at the wireless 3. On the Vitotrol 300 RF, touch "OK". base station or the heat source programming unit. The Vitotrol 300 RF transmits a signal 2. Log on to the Vitotrol by pressing to log on to the Vitotronic 200 RF.
-
Page 19: Checking The Field Strength Of The Radio Signal At The Installation Site
Commissioning and adjustment Commissioning the Vitotrol 300 RF (cont.) 5. Select heating circuits that should be Heating circuit selection operated via the Vitotrol 300 RF, and Heating circuit 1 confirm with "OK". Initialisation bar is running (can take Heating circuit 2 ç... -
Page 20: Establishing A Wireless Connection At A Later Date
Radio path between wireless base 5. "Field strength subscriber" station and Vitotrol 300 RF ■ "Wireless base station" Radio path between Field strength subscriber Vitotrol 300 RF and wireless base Remote control dBm>-79 station ■ "Outside temperature sensor" Wireless base station dBm>-82... -
Page 21: Changing The Configuration Of The Heating Circuits After Commissioning
With wireless base station, see page 16. With Vitotronic 200 RF, see page 18. Activate wireless connection 6. On the Vitotrol 300 RF, touch "OK". 1. Initiate linking at the wireless Initialisation bar is running (can take base station or the heat source programming unit. -
Page 22: Terminating Configuration
Commissioning and adjustment Changing the configuration of the heating… (cont.) 6. Select heating circuits that should be Heating circuit selection operated via the Vitotrol 300 RF, and Heating circuit 1 confirm with "OK". Heating circuit 2 ç Heating circuit 3 ç... -
Page 23: Troubleshooting
Troubleshooting Fault display Heating system fault Display: For troubleshooting, see the installation and service instruc- tions of the relevant control unit. Fault Wireless connection fault Display: Fault For troubleshooting, log components off and then back on again. If required, use wireless repeaters (accessories). -
Page 24: Specification
Specification Specification Power supply unit ■ With table-top dock 230 V~/5 V− ■ With wall mounting bracket 230 V~/4 V− Batteries NiMH AA HR6 Mignon 1.2 V–, 2100 mAh Battery life Approx. 500 heating cycles Operational duration with batteries Approx. 3 h Radio frequency 868.3 MHz Wireless protocol... -
Page 25: Parts List
Parts list Vitotrol 300 RF with table-top dock The following information is required: 0003 USB cable ■ Serial no. (see type plate) 0004 Plug-in power supply unit ■ Position number of the part (from this 0005 Installation and service instruc-... -
Page 26: Vitotrol 300 Rf With Wall Mounting Bracket
0002 0001 0005 0003 0006 0004 Vitotrol 300 RF with wall mounting bracket The following information is required: Standard parts are available from your ■ Serial no. (see type plate) local supplier. ■ Position number of the part (from this... - Page 27 Parts list Vitotrol 300 RF with wall mounting bracket (cont.) Parts 0005 Installation and service instruc- 0001 Programming unit tions 0002 Wall mounting bracket 0006 Operating instructions 0003 Power supply unit 0002 0001 0005 0006 0003...
-
Page 28: Declaration Of Conformity
Declaration of Conformity Declaration of Conformity We, Viessmann Werke GmbH & Co KG, D-35107 Allendorf, confirm as sole respon- sible body that the product Vitotrol 300 RF complies with the following standards: EN 301489-1 EN 300220 EN 301489-3 EN 60730...
Need help?
Do you have a question about the VITOTROL 300 RF and is the answer not in the manual?
Questions and answers