Advertisement
Quick Links
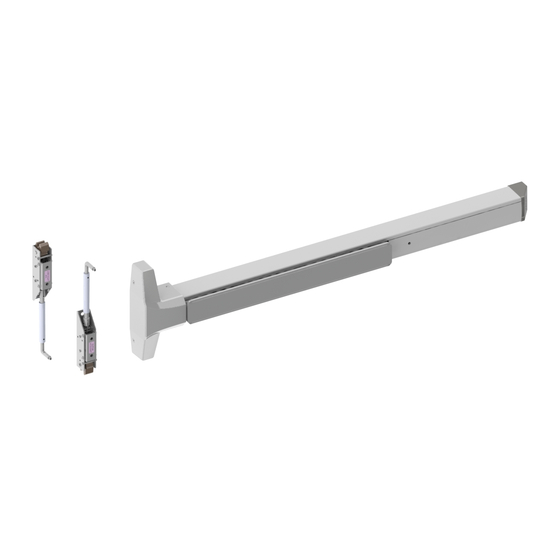
DEVICES COVERED IN THIS DOCUMENT:
4600C—NARROW STILE CONCEALED VERTICAL ROD EXIT DEVICE (CVR)
4600K—NARROW STILE CONCEALED VERTICAL ROD LESS BOTTOM ROD EXIT DEVICE (CLB)
TOOLS REQUIRED
Rev 3, Rev Date: 2/13/20
Hager Companies 139 Victor Street, St. Louis, MO 63104 (800) 325-9995 www.hagerco.com
4600 SERIES CONCEALED VERTICAL ROD EXIT DEVICE
INSTALLATION INSTRUCTIONS FOR ALUMINUM DOORS
DOOR
CONCEALED VERTICAL ROD
EXIT DEVICE
CHASSIS MOUNTING SCREWS
METAL SURFACE MOUNTING
For metal doors, tap drill with a
#7 bit. Tap 1/4"-20.
APPLICATION
CONCEALED VERTICAL ROD
EXIT DEVICE
THROUGH BOLTING
Drill 5/16" through from device
side. Drill 3/8" from pull side.
Check building codes to see if
your application requires the use
of sleeve nuts and bolts.
I-ED01933
DOOR
Page 1 of 10
Advertisement

Subscribe to Our Youtube Channel
Related Manuals for hager 4600 Series


Summary of Contents for hager 4600 Series
- Page 1 Drill 3/8” from pull side. Check building codes to see if your application requires the use of sleeve nuts and bolts. Rev 3, Rev Date: 2/13/20 Page 1 of 10 Hager Companies 139 Victor Street, St. Louis, MO 63104 (800) 325-9995 www.hagerco.com...
- Page 2 Holds chassis to door when Thru bolting Wood Screw, #12 x 1.25” Phillips Pan Head Holds chassis to door when surface mounting Page 2 of 10 Rev 3, Rev Date: 2/13/20 Hager Companies 139 Victor Street, St. Louis, MO 63104 (800) 325-9995 www.hagerco.com...
- Page 3 4600 CVR Bottom Strike Packaged Assembly (available as a replacement part) Contains 1 4600 CVR Bottom Strike and 2 #10-24 Phillips Flat Head Machine Screws used to fasten the strike to the threshold. Page 3 of 10 Rev 3, Rev Date: 2/13/20 Hager Companies 139 Victor Street, St. Louis, MO 63104 (800) 325-9995 www.hagerco.com...
- Page 4 1/8” Top Rod Assembly 1/8”ø Drill bit Guide Drilling Hole Figure 2-5 Guide Figure 2-7 Figure 2-4 Figure 2-1 Rev 3, Rev Date: 2/13/20 Page 4 of 10 Hager Companies 139 Victor Street, St. Louis, MO 63104 (800) 325-9995 www.hagerco.com...
- Page 5 Figure 4-1 Mounting Screws (#10- 24 x 3/8” Long, Flat Figure 4-3 Head) Figure 4-4 Figure 4-2 Rev 3, Rev Date: 2/13/20 Page 5 of 10 Hager Companies 139 Victor Street, St. Louis, MO 63104 (800) 325-9995 www.hagerco.com...
- Page 6 Make this adjustment for both the top and bottom rods. Door Closed Door Open Position Position 3-3/8” Center Line Figure 6-2 Figure 6-1 Figure 6-3 Page 6 of 10 Rev 3, Rev Date: 2/13/20 Hager Companies 139 Victor Street, St. Louis, MO 63104 (800) 325-9995 www.hagerco.com...
- Page 7 Holes on tabs of Sliding Block Assembly Rod Con- nector Tool Figure 8-1 Figure 8-2 Figure 8-6 Figure 8-5 Figure 8-4 Figure 8-3 Rev 3, Rev Date: 2/13/20 Page 7 of 10 Hager Companies 139 Victor Street, St. Louis, MO 63104 (800) 325-9995 www.hagerco.com...
-
Page 8: Test Operation
Retighten the adjustment locking screw. Door Open Door Closed Fine Adjustment Position Position Screw Adjustment Locking Screw Figure 11-1 Figure 11-2 Figure 11-3 Page 8 of 10 Rev 3, Rev Date: 2/13/20 Hager Companies 139 Victor Street, St. Louis, MO 63104 (800) 325-9995 www.hagerco.com... - Page 9 When the device is working properly, reinstall the head cover with supplied screws. Rev 3, Rev Date: 2/13/20 Page 9 of 10 Hager Companies 139 Victor Street, St. Louis, MO 63104 (800) 325-9995 www.hagerco.com...
- Page 10 Required hardware for cylinder dogging includes one (1) mortise cylinder, lengths 1-1/8”, 1-1/4” or 1-3/8” with a standard cam (0.723” [18mm] screw center to tip of cam): and one (1) Hager Cylinder Dogging kit (4925C) which includes one (1) 11/32” [8.7mm] solid cylinder collar and cashbox nut. (See Figure 12-2) Remove and discard the hex wrench extension.
Need help?
Do you have a question about the 4600 Series and is the answer not in the manual?
Questions and answers