Table of Contents
Advertisement
Quick Links
Regular Arm
Installation
See Page 2
Left Hand Door - LH
Right Hand Reverse - RHR
Parallel Arm
Installation
See Pages
Left Hand Door - LH
Right Hand Reverse - RHR
Top Jamb
Installation
See Page 5
Left Hand Door - LH
Right Hand Reverse - RHR
• These door closers should NOT be installed on the exposed side (weather side) of exterior doors.
TOOLS REQUIRED
COMPONENT PARTS
Backcheck VALVE
LATCH VALVE
CLOSER BODY
SWEEP VALVE
HAGER COMPANIES 139 Victor Street, St. Louis, MO 63104 • (800) 325-9995 • Fax (800) 782-0149
NOTE: For special applications, a separate door
and frame preparation template is packed with
these instructions. Use this instruction sheet for
installation sequence and closer adjustments only.
•
Dimensions are based on standard doors and
frames with 1/8" clearance, 5/8" stops, and
3 & 4
square edge doors.
•
Door and frame must be properly reinforced.
•
Non-Handed Door Closers.
NOTE: For Top Jamb
Application
A longer connecting
rod is required for
reveals greater
than 4" (102mm)
METAL
#7
1/4"- 20
POWER ADJUSTMENT SHAFT
PARALLEL
ARM BRACKET
An incorrectly installed or
improperly adjusted door closer
can cause property damage or
personal injury. These installation
instructions should be followed
to avoid the possibility of
misapplication or misadjustment.
Reveal
WOOD
3/16"
REGULAR ARM/TOP
JAMB SHOE
MAIN ARM
FOREARM
CONNECTING ROD
SCREW
CLOSER ARM
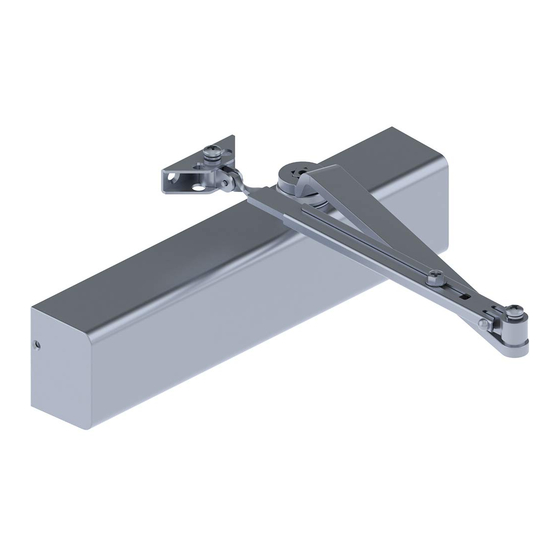
5200 Series Door Closer
Installation Instructions
Regular Arm
Installation
See Page 2
Right Hand Door - RH
Left Hand Reverse - LHR
Parallel Arm
Installation
See Pages
3 & 4
Right Hand Door - RH
Left Hand Reverse - LHR
Top Jamb
Installation
See Page 5
Right Hand Door - RH
Left Hand Reverse - LHR
Self Drilling Screws
Sleeve Nut and Bolt
Wood and Metal
Drill 9/32" thru from Closer Side
For wood, drill 3/16" hole
Machine Screws
Check building and fire codes to
see if your application requires
#7 Drill, 1/4"- 20 Tap
the use of sleeve nuts and bolts.
INSERT CUTOUTS
COVER INSERT
CLOSER COVER
Grade 1
Meets ANSI A156.4
3/8" Drill other Side
SCREW PACK
Advertisement
Table of Contents

Related Manuals for hager 5200 Series


Summary of Contents for hager 5200 Series
- Page 1 JAMB SHOE COVER INSERT MAIN ARM LATCH VALVE FOREARM CLOSER COVER CONNECTING ROD CLOSER BODY SCREW CLOSER ARM PARALLEL ARM BRACKET SWEEP VALVE SCREW PACK HAGER COMPANIES 139 Victor Street, St. Louis, MO 63104 • (800) 325-9995 • Fax (800) 782-0149...
- Page 2 Slide cover over closer body and secure Adjust by loosening hold-open nut, then open door to by tightening screws. desired position and tighten hold-open nut securely. HAGER COMPANIES 139 Victor Street, St. Louis, MO 63104 • (800) 325-9995 • Fax (800) 782-0149...
- Page 3 “R” (Right Hand Door) or “L” (Left Hand Door) lines up with the spindle flat. Secure main arm and spindle by tightening spindle bolt. HAGER COMPANIES 139 Victor Street, St. Louis, MO 63104 • (800) 325-9995 • Fax (800) 782-0149...
- Page 4 Adjust by loosening hold-open nut, then open door to Slide cover over closer body and desired position and tighten hold-open nut securely. secure by tightening screws. HAGER COMPANIES 139 Victor Street, St. Louis, MO 63104 • (800) 325-9995 • Fax (800) 782-0149...
- Page 5 Slide cover over closer body and secure by tightening screws. Adjust by loosening hold-open nut, then open door to desired position and tighten hold-open nut securely. HAGER COMPANIES 139 Victor Street, St. Louis, MO 63104 • (800) 325-9995 • Fax (800) 782-0149...
- Page 6 = clockwise Parallel Arm (5ccw) (5cw) (10cw) for this adjustment) ccw = counterclockwise ADJUSTMENT DIAGRAM ARM PLACEMENT IN SHOE 7-1/2% Stronger 7-1/2% Weaker HAGER COMPANIES 139 Victor Street, St. Louis, MO 63104 • (800) 325-9995 • Fax (800) 782-0149...
Need help?
Do you have a question about the 5200 Series and is the answer not in the manual?
Questions and answers