Advertisement
Quick Links
Advertisement

Related Manuals for Kidzone 060-ROT-04


Summary of Contents for Kidzone 060-ROT-04
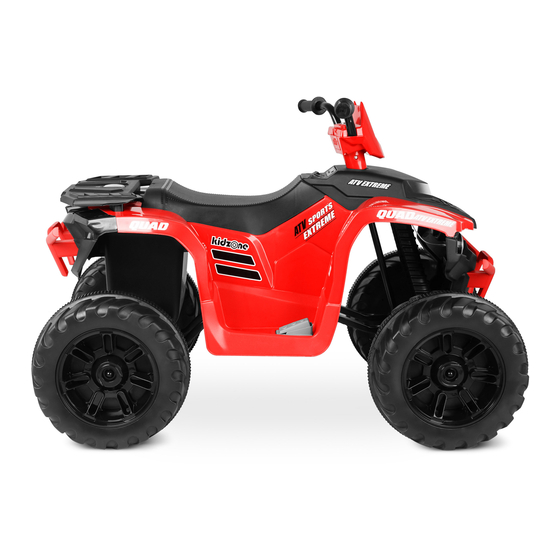
- Page 1 Ride On ATV Personalize License Plate (12V) Item umber : 060-ROT-04...
- Page 2 The following safety hazards may result in serious injury or death: Never leave a child unattended. Always sit in the seat when using this vehicle. Keep your hands,hair, and clothes away from moving parts. Always wear shoes when operating this vehicle, Only one rider is allowed on the vehicle at a time.
-
Page 3: Specification
Specification Item 060-ROT-04 Battery 12V7A otor 0- 00 1- , 000 6V/12V 3-7year old 37 – 96 month eighe 77IBS Dimension 42”(L)x25”(W)x29”(H) Speed High speed:3.1mph Low-speed:1.4mph Play Time 1-2hours/recharger time8-12hours 110-2 0 12 1000 Charger 8-12hours First Charging Time Charging time after first charge... - Page 4 77IBS 12mm 10 nut Washer Large gasket screw Rear wheel Chair Front wheel Charger Anti-collision Hub cap Headstock Gear box L/R beam Rear axle Steering rod Steering bracket...
- Page 5 The large gasket and steering rod are inserted into the body in turn.
- Page 6 Turn gasket and steering bracket into square pipe...
- Page 7 Lock Steering Bracket Gasket Nut Fixation...
- Page 8 Lock nut fixed with wrench...
- Page 9 Put the gasket, front wheel, gasket and nut into the front axle in turn. Fix the nut with the plate hand, and then fix the wheel cover on the wheel. Put the rear wheel, gasket and nut into the front axle in turn. Fix the nut with a wrench, and then fix the wheel cover on the wheel.
- Page 10 Head H is equipped with 2 AA batteries. Lock the battery cover screw and fix it. The head H is clamped into the steering rod, the screw nut is fixed, and the front and rear anti-collision beam G is clamped. Hand up, up and down steering rods when assembling the headstock Remove the motor wire from the pocket by hand.
- Page 11 Open the tank cover. Insert the charging terminal for charging. Step on the pedal. Back up. Loosen the pedal to slow down and stop. usic. orns Bluetooth function Foot switch High Speed. Low Speed Swit Forward. Stop. Back Power switch...
-
Page 12: Functional Description
Digital Electricity Display Functional description ODE: Switch between Bluetooth (Kidzone Ride-On) & Radio V- : 1.Short press to play to the previous song,2.Long press to decrease volume 1.Short press to play to the next song,2.Long press to increase volume 1.Short press to pause/playback,2.Radio mod e: ress 1 second to automatically search for stations. - Page 13 ●Charging socket is located on the back of the vehicle near the rear left wheel. Insert one end of the part O charger into the charging socket and plug the other end into a wall outlet. ●Charge the battery at least 18 hours before initial use. ●On average, you will need to charge the battery between 8 and 12 hours.
- Page 14 Reason solution Problem Fully charge the battery Low battery Stop use for several minutes and restart Electrical protection Completely press in switches Switch not in the correct position Vehicle does not move Battery connectors disconnected Plug in battery connectors Plug in battery connectors Battery connectors disconnected Battery does not recharge Charger not connected to socket...
Need help?
Do you have a question about the 060-ROT-04 and is the answer not in the manual?
Questions and answers