Advertisement
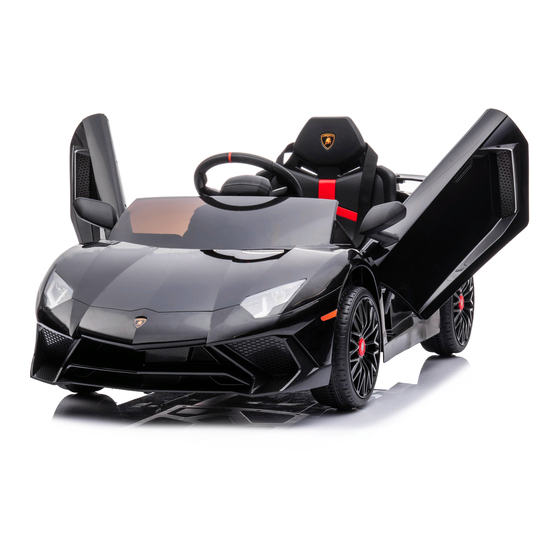
LICENSED LAMBORGHINI AVENTADOR SV RIDE ON (12V)
item number: 060-ROT-17L
Note: Product appearance and colors may vary from the photo.
This vehicle is packed with the battery disconnected.
Connect the battery before use.
This manual contains important safety, performance
and maintenance information. Read the manual before
allowing your child to ride your new electric ride-on toy.
Keep this manual properly for future reference.
Advertisement
Table of Contents

Subscribe to Our Youtube Channel
Summary of Contents for Kidzone 060-ROT-17L
- Page 1 LICENSED LAMBORGHINI AVENTADOR SV RIDE ON (12V) item number: 060-ROT-17L Note: Product appearance and colors may vary from the photo. This vehicle is packed with the battery disconnected. Connect the battery before use. This manual contains important safety, performance and maintenance information. Read the manual before allowing your child to ride your new electric ride-on toy.
-
Page 2: Safety Instruction
Safety Instruction When using electrical product, basic safety precaution should always be followed including the following WARNING: Read all Instruction before use operating this product • To Protect against electrical shock, do not immerse cord, charger, transformer, battery, or the product in water or other liquid. -
Page 3: Prevent Fire
WARNING: PREVENT FIRE Never modify the electrical system. Alterations could cause a re resulting in serious injury and could also ruin the electrical system. Use of the wrong type of battery or charger could cause a re or explosion resulting in serious injury. The battery must be handled by adults only. - Page 4 Parts and Feature A (Steering Wheel) C (Left Mirror) D (Right Mirror) E (Remote Control) F (Rear Wing) G (Wheel) H (Wheel Cover) I (Seat) L (Spanner) Q (Charger) R (Windshield) T (M4x12 Screw)
-
Page 5: Assembly Instruction
Assembly Instruction Estimated Assemble Time: 40 mins Tools Needed: Screw Driver(not included) Some parts are small and have sharp edges. Do not let children handle parts or the assembly. This product should be assemble by adult. Protect sleeve Protect Protect sleeve sleeve Remove Nuts (2) and Washer (1) from the front axle, and remove Nuts (4) and Washer (5) from the rear axle. - Page 6 Assembly Instruction Slide Wheel (G) to the front axle and replace Washer (1) and Nut (2), then snap on Wheel Cover (H). Slide Wheel (G) to the rear axle and replace Washer (5) and Nut (4), then snap on Wheel Cover (H).
- Page 7 Assembly Instruction Connect terminal (6) from the Steering Wheel (A) to the terminal (7) on the Steering Column (8). Insert the Steering Wheel into the Steering Column. Insert Left Side Mirror (C) and Right Side Mirror (D) to the side of the vehicle.
- Page 8 Assembly Instruction Assemble Windshield (R) to the vehicle body. Assemble Rear Wing (F) to the two slots on the vehicle body.
- Page 9 Assembly Instruction Hook Install the seat (I) to the car and aline the hooks on the back to the groove on the car body. Secure it in place with 2 M4X12 screws (T).
-
Page 10: User Instruction
User Instruction Horn Button Control Panel Engine Sound / MP3 player Foot Pedal Control the vehicle Control Panel Control the ON / OFF of the vehicle and the audio playing system. See detailed instruction on the Control Panel User instruction on page 10~11. Engine Sound Button Press the button to play the engine sound. - Page 11 Press the FM button to enter FM mode. 3. Mode Button Press Mode button to switch between USB, AUX, and Bluetooth(Kidzone Ride-on). 4. Forward Button Press the forward button, and step on the foot pedal to move the vehicle forward.
- Page 12 User Instruction (Control Panel) 9. Next / Increase Volume Button Press the button to play the next music track. Press and hold the button to increase the volume. 10. ON/OFF Button Press and hold the button to turn ON or OFF the vehicle. Short press the button to pause or play music track.
- Page 14 User Instruction (Charging) WARNING! The battery should only be charged by an adult. The battery is not replaceable. Charging the battery • The vehicle must be OFF when charging • Before the rst use, the battery should be charged for around 12 hours. Do not charge the battery for more than 20 hours to avoid overheating or damage to the charger or the battery.
-
Page 15: Care And Maintenance
Care and Maintenance • Check the product regularly and make sure there is no missing or loose parts. Re-tighten any loose parts if necessary. • Make sure there is no cracked or broken plastic parts. • Keep away the product from heat and humid area, cover it with trap when not in use. •... - Page 16 Troubleshooting...
- Page 17 Model: CST-1A FCC ID: 2ARLM-CST-1A This device complies with part 15 of the FCC Rules. Operation is subject to the following two conditions: (1)This device may not cause harmful interference, and (2)this device must accept any interference received, including interference that may cause undesired operation.
-
Page 18: Warranty Terms
2. Any product modifications by dealer, any circumstances. It is the retailer's responsibility consumer, or other parties not authorized by to contact KIDZONE with a claim. We will not KIDZONE will void this warranty. handle claims from consumers directly; all 3.


Need help?
Do you have a question about the 060-ROT-17L and is the answer not in the manual?
Questions and answers
How do I get another remote control