
Related Manuals for Badger Meter Primo Advanced BMAG-350-icpf


Summary of Contents for Badger Meter Primo Advanced BMAG-350-icpf
- Page 1 ® Badger Meter Europa GmbH ® Primo Advanced INSTRUCTION AND OPERATION MANUAL April 2007 MID_PrimoAdvanced_Bedienungsanleitung_0704_e.doc...
-
Page 2: Table Of Contents
Contents Page 1. Basic safety recommendations..................1 2. Description ......................... 2 3. Installation.......................... 3 3.1 General ......................... 3 3.1.1 Temperature ranges ..................3 3.1.2 Protection class....................3 3.1.3 Transportation ....................4 3.2 Mounting ........................4 3.2.1 Mounting position ....................4 3.2.2 Inlet and outlet distance .................. - Page 3 Contents 5.2.2 Outputs......................16 5.2.2.1 Analog output.................. 16 5.2.2.2 Pulse output ..................17 5.2.2.3 Frequency output ................18 5.2.2.4 Set point..................18 5.2.2.5 Preselection ..................19 5.2.2.6 Resetting the totalizers and the preselection meter......19 5.2.3 Measuring ....................... 20 5.2.3.1 Measuring units................
-
Page 4: Basic Safety Recommendations
Basic safety recommendations Page 1/37 1. Basic safety recommendations The electromagnetic flow meter is only suitable for the measurement of conductive fluids. The manufacturer is not liable for damages that result from improper or not in accordance with the requirements use. The meters are constructed according to state-of-the-art technology and tested operationally reliable. -
Page 5: Description
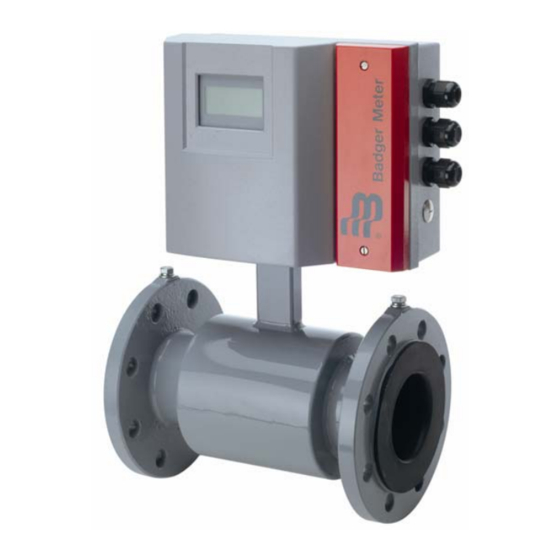
Description Page 2/37 2. Description The electromagnetic flow meters are ideally suited for flow measurement of all liquids with a minimum conductivity of 5 μS/cm (min. 20 µS/cm for demineralized water). These meters are very accurate and the flow measurement is independent of density, temperature and pressure of the medium. -
Page 6: Installation
Installation Page 3/37 3. Installation Warning: The below described installation notices must be followed in order to ensure the operativeness and the safe operation of the meter. 3.1 General 3.1.1 Temperature ranges Attention: In order to prevent damage to the meter, the maximum temperature ranges of the detector and amplifier have to be observed absolutely. -
Page 7: Transportation
Installation Page 4/37 3.1.3 Transportation Attention: All detectors larger than DN 150 are equipped with lifting eyes. For transportation or lifting of the meter you have to use them. Do not lift the meters at the amplifier or detector neck. Do not lift the detectors at the sheet casing with a fork lift truck, because the housing will be pushed in. -
Page 8: Mounting Location
Installation Page 5/37 3.2.3 Mounting location Attention: • The detector should not be installed on the suction side of a pump, otherwise there will be the danger of damage to the liner (especially PTFE liner) by depression. • Please be careful that the pipeline at the measuring point is always fully filled, otherwise no correct resp. -
Page 9: Size Reduction
Installation Page 6/37 3.2.4 Size reduction By using pipe adaption pieces according to DIN 28545 the detectors can be mounted in pipelines of larger sizes. The emerging pressure drop can be determined with the depicted nomogram (only for liquids with a similar viscosity like water). Notice: At very low flow rates the flow rate can be increased by reducing the size at the measuring point and therefore the measuring... -
Page 10: Remote Version
Installation Page 7/37 3.2.5 Remote version The remote version is absolutely necessary at the following conditions: Notice: Detector protection class IP 68 Medium temperature > 100 °C Strong vibrations Attention: Do not lay signal cables in the direct surrounding of power cables, electrical machines, etc. -
Page 11: Plastic- Or Lined Pipelines
Installation Page 8/37 3.2.7 Plastic- or lined pipelines When using non conductive pipelines of pipelines with non conductive liner, the equipotential bonding has to happen via an additionally installed grounding electrode or between the flanges mounted grounding rings. The grounding rings are mounted like a gasket between the flange and connected by a ground cable with the detector. -
Page 12: Electrical Disturbed Surrounding
Installation Page 9/37 3.2.9 Electrical disturbed surrounding In electrical disturbed surroundings or not grounded metallic pipelines, a grounding like described below is recommended in order to guarantee an uninfluenced measuring. 6 mm² Cu 4. Electrical connection Attention: Only flexible electrical wires can be used for the 3 x M20 cable insertions. Use separate line entrances for auxiliary power, signal- and in-/output wires. -
Page 13: Remote Version
Close the connection cover tightly again once the connection has been completed. 13 SHIELD Shield 13 12 COIL COIL 12 COIL 11 11 COIL Badger Meter JBOX - PRIMO REMOTE - REV1 Terminal box Description Wire colour Standard Stainless steel... -
Page 14: Specification Signal Cable
Page 11/37 4.2.1 Signal cable specification Notice: Use only the signal cables supplied by Badger Meter or corresponding cables with the following specifications. Observe the max. signal cable length between detector and amplifier (keep the distance as short as possible). -
Page 15: Terminal Connecting Plan Inputs And Outputs
Electrical connection Page 12/37 4.3 Terminal wiring plan of inputs and outputs Fuse Reset Jumper Auxiliary facility TP21 GND_I Display Reset Jumper for Coils detector approved version GND_S Electrodes Enter keys detector Simulator Hart HART modul 45 E1 connection 44 Shield 46 E2 44 Shield 40 EP... -
Page 16: Parameter Setting
Parameter setting Page 13/37 5. Parameter setting The parameter setting is done with the 3 keys (↑,→ and E). The meter has got 3 different levels: Test mode and normal settings The test functions, language setting as well as different calibrations (analog output and empty pipe detection) can be done in this mode. -
Page 17: Calibrating The Analog Output
Parameter setting Page 14/37 Value with negative sign means flow simulation opposite to the main flow direction. The respective relay is activated simultaneous to the chosen flow rate (see chart). T e s t S i g n a l o u t S i g n a l h i g h e r... -
Page 18: Parameter Setting Mode
Parameter setting Page 15/37 The pipe has to be filled with the media that will be measured at the flow control. When calling the menu point a value between 0 and 5000 mV will be measured and displayed. The value increases with decreasing conductivity, increasing cable length and size. -
Page 19: Password
Parameter setting Page 16/37 5.2.1.3 Password Notice: Please contact the manufacturer at loss of the password. The password consists of a number between 0 and 999. The value 0 is for „no password protection active“. If a value bigger than zero is entered, the password protection is activated. -
Page 20: Pulse Output
Parameter setting Page 17/37 5.2.2.2 Pulse output The pulse value defines how many pulses per volume unit are dispensed. These can be totalized and displayed as total flow volume. A setting of 0,001 up to 10.000 pulse/volume unit is possible. A max. output frequency of 10 kHz (10.000 pulses/sec) may not be exceeded. -
Page 21: Frequency Output
Parameter setting Page 18/37 5.2.2.3 Frequency output The frequency for the scaled terminal value can be set from 500 up to 5000 Hz. Notice: At bidirectional operation the flow direction is indicated via relay 1. Frequency output (passive) max. 30 V DC 250 mA max. -
Page 22: Preselection
Parameter setting Page 19/37 5.2.2.5 Preselection The menu point preselection is used for realisation of simple batches. The value for the preselection quantity can be set from 0,01 to 9999,99 volume units in steps of 0,01 volume units. The preselection quantity is counted down to 0 from the programmed value and the reaching of the preselected quantity is indicated via the relay 2. -
Page 23: Measuring
Parameter setting Page 20/37 5.2.3 Measuring 5.2.3.1 Measuring units 10 flow measuring units can be chosen. The flow values are automatically converted in the chosen unit. Liter/hour l/min Liter/minute Liter/second m³/h Cubic meter/hour m³/min Cubic meter/minute m³/s Cubic meter/second US gallon/minute MGPD US million gallon/day LbPM... -
Page 24: Full Scale
Parameter setting Page 21/37 5.2.3.3 Full scale The full scale can be chosen in a range of 0,1 up to 12 m/s. A flow is assigned to the power output as well as the frequency output by the full scale scaling. The scaling is valid for both flow directions. -
Page 25: Filter (Damping)
Parameter setting Page 22/37 5.2.3.7 Filter (damping) This option is used for damping of all output signals. The damping factor can be set from „inactive“ up to max. level 6. The damping corresponds a low pass filter. The level time constant of the low pass filter is the same as 2 in seconds. -
Page 26: Interfaces
Interfaces Page 23/37 6. Interfaces 6.1 RS232 The RS232 interfaces do not need to be set up. RS 232 9 pol. plug Configuration of the COM interface Baud = 9600 Data bits Stopbits Parity = none Protocol = none 6.2 HART-protocol TP21 GND_I Reset... -
Page 27: Hart Connection
Interfaces Page 24/37 6.2.1 HART Connection The connection of a HART interface is done upon the 4- 20 mA output (see also chap. 5.2.2.1). Loop resistance should show at least the value of >250 ohms. Power output 4...20 mA RL >250 ohms HART-communication can either be mounted over a handheld device or over a modem with a computer. -
Page 28: Error Indication And Clearance
Error indication and clearance Page 25/37 7. Error indication and clearance Error indication of the meter is indicated on the display (line 4) as well as via relay 3. The relay is closed during normal operation and opens as soon as an error is occuring. The type and frequencies of the errors are protocolled in the error list in the parameter setting mode and can be called from there. -
Page 29: Replacing The Meter Fuse
Error indication and clearance Page 26/37 7.1 Replacing the meter fuse Warning: Do not exchange the fuse under applied power supply. Fuse Fuse type: 85 - 265 VAC, 2 A (slow blow) 24 VDC, 2A (slow blow) 24 VDC 85 – 265 VAC 7.2 Replacing the amplifier electronic Warning: Switch off the auxiliary power before opening the casing cover. -
Page 30: Technical Data
Technical data Page 27/37 8. Technical data 8.1 Detector type II Technical data Size DN 6 – 1400 (1/4“...56“) Process connections Flange: DIN, ANSI, JIS, AWWA etc. Nominal pressure Up to PN 100 Protection class IP 65, optional IP 68 Min. - Page 31 Technical data Page 28/37 Dimensions (mm) with ANSI flanges with DIN flanges Ø D Ø K Ø d2 x n Ø D Ø K Ø d2 x n 1/2“ 88,9 60,3 15,9 x 4 14 x 4 3/10“ 170 88,9 60,3 15,9 x 4 14 x 4...
-
Page 32: Detector Type Food
Technical data Page 29/37 8.2 Detector type food Technical data Size DN 10 – 100 (3/8“...4“) Process connections Tri-Clamp®, DIN 11851, ISO 2852, etc. Nominal pressure PN 10 Protection class IP 65, optional IP 68 Min. conductivity 5 µS/cm (20 µS/cm for demineralized water) Liner materials PTFE -40 up to +150°C... - Page 33 Technical data Page 30/37 ® Tri-Clamp process connection DIN 11851 process connection ® ® Primo meter mounted Primo meter mounted ® Dimensions (mm) type food Tri-Clamp 1/2“ 1 1/2“ 1“ 1 1/2“ 2“ 2 1/2“ 3“ 4“ Pressure rating PN10 Dimensions (mm) type food dairy pipe DIN 11851 3/8“...
-
Page 34: Detector Type Iii
Technical data Page 31/37 8.3 Detector type III Technical data Size DN 25 – 100 (1“...4“) Process connections Wafer connection, (in-between flange mounting) Nominal pressure PN 40 Protection class IP 65, optional IP 68 Min. conductivity 5 µS/cm (20 µS/cm for demineralized water) Liner materials PTFE -40 up to +150°C... -
Page 35: Amplifier Type Primo Advanced
Technical data Page 32/37 ® 8.4 Amplifier type Primo Advanced Technical data ® Type Primo Advanced Power 85 – 265 VAC, 45 – 65 Hz Optional 24 VDC (-10% … +20%), 900 mA Analog output 0/4 – 20 mA, ≤ 800 Ohm Flow direction is displayed via separated status output. -
Page 36: Error Limits
Technical data Page 33/37 8.5 Error limits Flow range 0,03 m/s to 12 m/s ≥ 0,5 m/s ± 0,25% of actual flow Pulse output < 0,5 m/s ± 1,25 mm/s of actual flow ± 0,01 mA Analog output ± 0,1% of actual flow Repeatability Error graph MAG Meter Primo Advanced 0,25%... -
Page 37: Size Selection
Technical data Page 34/37 8.6 Size selection DN 6 - DN 100 0,01 0,01 1.000 10.000 L/min DN 125 - DN 1400 0,01 1000 10.000 100.000 m³/h MID_PrimoAdvanced_Bedienungsanleitung_0704_e.doc... -
Page 38: Program Structure
Program structure Page 35/37 9. Program structure 9.1 Parameter setting mode TOT1 TOT2 Factors Measurement Factors Outputs/totals Measurement Outputs Unit Reset Totals Detector factor Totalizer unit Analog output Full scale Pipe diameter Full scale Low flow cut-off Pulse output Pulse value Password Pulse value Empty pipe det. -
Page 39: Test Mode
Program structure Page 36/37 9.2 Test mode Press button E and turn on the meter Signal 50 % Language T121 Signal 0 % T122 Signal 100 % Signal -50 % T123 Calibration Signal -100 % Analog output T124 Calibration Empty pipe det. TOT1 TOT2 MID_PrimoAdvanced_Bedienungsanleitung_0704_e.doc... -
Page 40: Return Of Goods / Harmlessness Declaration
Return of goods Page 37/37 10. Return of goods for repair Please copy, fill in and sign hereafter harmlessness declaration and enclose it for any return of goods you may send back for repair. No repair will be performed prior to receiving the harmlessness declaration duly filled and signed. - Page 41 Hotline Tel. +49-7025-9208-0 or -30 +49-7025-9208-15 Badger Meter Europa GmbH ® Subsidiary of Badger Meter, Inc., USA Nürtinger Strasse 76 72639 Neuffen (Germany) E-mail: badger@badgermeter.de www.badgermeter.de...
Need help?
Do you have a question about the Primo Advanced BMAG-350-icpf and is the answer not in the manual?
Questions and answers