Table of Contents
Advertisement
Quick Links
Advertisement
Table of Contents
Troubleshooting

Related Manuals for Fluke 9116A

Summary of Contents for Fluke 9116A
- Page 1 Hart Scientific 9116A Furnace User's Guide Rev. 842101...
- Page 2 Limited Warranty & Limitation of Liability Each product from Fluke Corporation, Hart Scientific Division ("Hart") is warranted to be free from de- fects in material and workmanship under normal use and service. The warranty period is 1 year for the Furnace.
-
Page 3: Table Of Contents
Table of Contents 1 Before You Start ......1 Introduction ......1 Symbols Used . - Page 4 6.3.2 Set-point Value ....... . . 26 Scan ....... . . 26 6.4.1 Scan Control .
- Page 5 IEEE-488 Communication ..... 41 7.2.1 Setup ........41 7.2.2 IEEE-488 Interface Address .
- Page 6 Figures and Tables Table 1 International Electrical Symbols ..... 1 Figure 1. Furnace Core Diagram ......10 Figure 2 HTPRT control probe and cutout thermocouple wire routing and heat pipe ground wire placement..
-
Page 7: Before You Start
Introduction Before You Start Introduction The Hart Scientific 9116A Furnace has a temperature range of 550°C to 1100°C and is designed for use in achieving aluminum, silver, or copper freez- ing point measurements. The furnace utilizes a sodium heat pipe to maintain a uniform temperature over the length of the metal freeze point cell. -
Page 8: Safety Information
9116A Furnace User’s Guide Symbol Description Fuse PE Ground Hot Surface (Burn Hazard) Read the User’s Manual (Important Information) Canadian Standards Association OVERVOLTAGE (Installation) CATEGORY II, Pollution Degree 2 per IEC1010-1 re- fers to the level of Impulse Withstand Voltage protection provided. Equipment of OVERVOLTAGE CATEGORY II is energy-consuming equipment to be supplied from the fixed installation. - Page 9 1 Before You Start Safety Information • DO NOT connect this unit to a non-grounded, non-polarized outlet. • DO USE a ground fault interrupt device. • HIGH VOLTAGE is used in the operation of this equipment. SEVERE INJURY OR DEATH may result if personnel fail to observe safety pre- cautions.
-
Page 10: Cautions
• Use only grounded AC mains supply of the appropriate voltage to power the instrument. See Section 2.1, Specifications, for power requirements. • The 9116A Furnace utilizes high voltages and currents to create high tem- peratures. Caution should always be maintained during installation and use of this instrument to prevent electrical shock and burns. -
Page 11: Authorized Service Centers
Authorized Service Centers Please contact one of the following authorized Service Centers to coordinate service on your Hart product: Fluke Corporation, Hart Scientific Division 799 E. Utah Valley Drive American Fork, UT 84003-9775 Phone: +1.801.763.1600 Telefax: +1.801.763.1010... - Page 12 9116A Furnace User’s Guide CHINA Phone: +86-10-6-512-3436 Telefax: +86-10-6-512-3437 E-mail: xingye.han@fluke.com.cn Fluke South East Asia Pte Ltd. Fluke ASEAN Regional Office Service Center 60 Alexandra Terrace #03-16 The Comtech (Lobby D) 118502 SINGAPORE Phone: +65 6799-5588 Telefax: +65 6799-5588 E-mail: antng@singa.fluke.com...
-
Page 13: Specifications And Environmental Conditions
Specifications and Environmental Conditions Specifications 550°C to 1100°C (1022°F to 2012°F) Temperature Range ±3.0°C Accuracy ±0.15°C Stability ±0.05°C Uniformity 10Ω HTPRT Control Probe 0.1°C/°F below 1000°C/°F Resolution 1°C/°F above 1000°C/°F Switchable °C or °F Readout Digital controller with data retention Controller High temperature cutout (Type R cutout thermocouple) Fault Protection... - Page 14 • vibrations in the calibration environment should be minimized • altitude less than 2,000 meters • indoor use only If the unit is operating at temperatures above 600°C, cooling coils are accessi- ble on the rear of the chassis to prevent the furnace heat from loading down the room air conditioning system.
-
Page 15: Installation
Power The 9116A furnace power requirements are listed in Section 2.1 on page 7. The furnace is supplied with a 14-gauge, 2-conductor plus ground cable and con- nector. Since building electrical installations may vary, the connector and cable... -
Page 16: Figure 1. Furnace Core Diagram
SPRT Top Support Thermal Guard Block Assembly Retaining Plate Retaining Plate Top Cover Cutout Thermocouple Top Support Block Cooling Coils Top Thermal Shunt Disk Heating Element Control Probe Metal Freeze Point Cell Basket and Cover Metal Freeze Point Cell Heat Pipe Ceramic Fiber Insulation 1.27 cm Fiber... -
Page 17: Plumbing
Plumbing The cooling coils are accessible from the back panel of the 9116A chassis (See Figure 5, Back Panel on page 19). The cooling tubes are 6.35 mm (0.25 in) copper. Water cooling prevents much of the furnace heat from loading down air conditioning systems. - Page 18 Locate the heat pipe (5) and the heat pipe installation tool. Use cotton gloves to handle the heat pipe. Finger prints will cause corrosion of the Inconel at high temperatures. The installation tool has a handle with heavy gauge wire hooks which fit into the tabs on the top of the furnace. Remove any packing materials from the heat pipe.
-
Page 19: Figure 2 Htprt Control Probe And Cutout Thermocouple Wire Routing And Heat Pipe Ground Wire Placement
Re-attach the metal retaining plate (2) using the four screws. The ground wire from the heat pipe must be routed through the right rear access hole in the plate and attached to the closest screw using two star washers and a screw. - Page 20 Reinstall the control HTPRT (6) and the cutout thermocouple (7) as shown in Figure 2 on page 13. They must be inserted far enough to clear the top cover. They should also be centered in the air space between the element and the heat pipe.
-
Page 21: Figure 3 Attachment Of Thermocouples
Become familiar with the operation of the furnace before installing the metal freeze point cell. Green RED - CUTOUT (-) White BLACK - CUTOUT (+) Black Figure 3 Attachment of thermocouples... -
Page 22: Parts And Controls
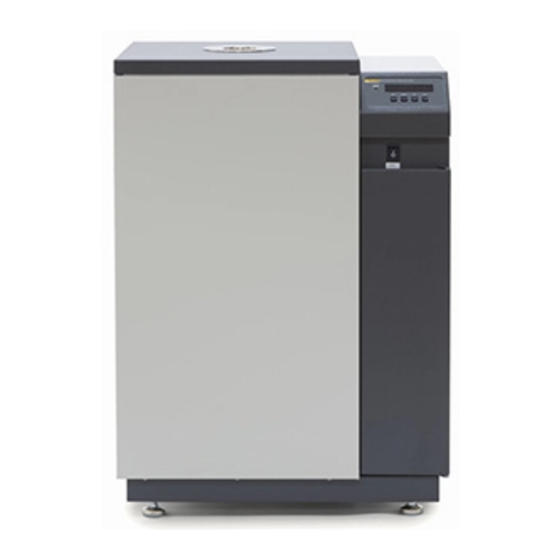
Parts and Controls The 9116A consists of a control panel, furnace core, and a back panel. Each part and control is described below. Control Panel 9116A FREEZE POINT FURNACE 550°C to 1000°C The controls to the furnace are located on panels to the right of the instrument. -
Page 23: Furnace Core
A brief description of the functions of the buttons follows: SET - Used to display the next parameter in a menu and to store parameters to the displayed value. DOWN - Used to decrement the displayed value of parameters. UP - Used to increment the displayed value. EXIT - Used to exit from a menu. - Page 24 Figure 5. Back Panel...
-
Page 25: Access Well
Access Well The furnace access well is visible on top of the furnace. The furnace access well is where the freeze point cell is inserted and removed from the furnace. After a freeze point cell is inserted into the furnace, a thermal shunt disk and thermal guard assembly are installed over it. -
Page 26: General
General Sodium Heat Pipe Information 5.1.1 Minimum Temperature and Heat-Up Rate The heat pipe should not be inserted into a hot furnace. The minimum operat- ing temperature is 500°C. The heat pipe should be installed in a cold furnace and heated to the minimum operating temperature over a minimum 1 hour pe- riod. -
Page 27: Controller Operation
6 Controller Operation Well Temperature Controller Operation This chapter discusses in detail how to operate the furnace temperature control- ler using the front control panel. Using the front panel key-switches and LED display the user may monitor the well temperature, set the temperature set-point in degrees C or F, monitor the heater output power, adjust the control- ler proportional band, set the cut-out set-point, and program the probe calibra- tion parameters, operating parameters, serial and IEEE-488 interface... -
Page 28: Figure 6. Controller Flow Chart
9116A Furnace User’s Guide Figure 6. Controller Flow Chart... -
Page 29: Temperature Set-Point
6 Controller Operation Temperature Set-point Access cut-out reset function The display indicates the reset function. Cut-out reset function RESET? Press “SET” once more to reset the cut-out. Reset cut-out This also switches the display to the set temperature function. To return to dis- playing the temperature press the “EXIT”... -
Page 30: Set-Point Value
9116A Furnace User’s Guide 6.3.2 Set-point Value The set-point value may be adjusted after selecting the set-point memory and pressing “SET”. The set-point value is displayed with the units, C or F, at the left. C 600.00 Set-point 4 value in °C If the set-point value does not need to be changed, press “EXIT”... -
Page 31: Ramp And Soak Program Menu
6 Controller Operation Ramp and Soak Program Menu The scan rate function appears in the main menu after the scan control function. The scan rate units are in degrees per minute, degrees C or F depending on the selected units. Sr= 10.0 Scan rate in °C/min. -
Page 32: Set-Points
9116A Furnace User’s Guide Save new setting 6.5.2 Set-points The next parameters are the program set-points. First set-point 1 25.00 Use the “UP” or “DOWN” buttons to select any of the set-points. Third set-point 3 500.00 Press “SET” to be able to change the set-point. -
Page 33: Program Function Mode
6 Controller Operation Ramp and Soak Program Menu 6.5.4 Program Function Mode The next parameter is the program function or cycle mode. There are four pos- sible modes that determine whether the program scans up (from set-point 1 to n) only or both up and down (from set-point n to 1), and also whether the pro- gram stops after one cycle or repeats the cycle indefinitely. -
Page 34: Secondary Menu
9116A Furnace User’s Guide Secondary Menu Functions that are used less often are accessed within the secondary menu. The secondary menu is accessed by pressing “SET” and “EXIT” simultaneously and then releasing. The first function in the secondary menu is the heater power display. -
Page 35: Figure 7. Proportional Band Settings
6 Controller Operation Proportional Band controller cannot respond very well to changing conditions or noise in the sys- tem. If the proportional band is too narrow the temperature may swing back and forth because the controller overreacts to temperature variations. For best control stability the proportional band must be set for the optimum width. -
Page 36: Cut-Out
9116A Furnace User’s Guide Accept the new proportional band setting Cut-out As a protection against software or hardware fault, shorted heater triac, or user error, the calibrator is equipped with an adjustable heater cut-out device that shuts off power to the heater if the well temperature exceeds a set value. This protects the instrument and probes from excessive temperatures. -
Page 37: Controller Configuration
6 Controller Operation Controller Configuration 6.10 Controller Configuration The controller has a number of configuration and operating options and calibra- tion parameters that are programmable via the front panel. These are accessed from the secondary menu after the cut-out set-point function by pressing “SET”. -
Page 38: Temperature Scale Units
9116A Furnace User’s Guide Operating parameters menu Press “UP” to enter the menu. The operating parameters menu contains the units scale setting, cut-out reset mode setting, approach setting, and soak stabil- ity setting. 6.12.1 Temperature Scale Units The temperature scale units of the controller may be set by the user to degrees Celsius (°C) or Fahrenheit (°F). -
Page 39: Soak Stability
6 Controller Operation Serial Interface Parameters 6.12.4 Soak Stability The soak stability controls the required stability of the well temperature for the soak time (see Section 6.5.3). The stability is in degrees Celsius. The default is 0.1°C. This value can be changed in the parameter menu. 6.13 Serial Interface Parameters The serial RS-232 interface parameters menu is indicated by,... -
Page 40: Duplex Mode
9116A Furnace User’s Guide Press “SET” to choose to set the sample period. The current sample period value is displayed. Current sample period (seconds) SA= 1 Adjust the value with “UP” or “DOWN” and then use “SET” to set the sample rate to the displayed value. -
Page 41: Ieee-488 Parameters
6 Controller Operation IEEE-488 Parameters 6.14 IEEE-488 Parameters The calibrator may optionally be fitted with an IEEE-488 GPIB interface. In this case the user may set the interface address and termination within the IEEE-488 parameter menu. This menu does not appear on instruments not fit- ted with the interface. -
Page 42: Calibration Parameters
9116A Furnace User’s Guide 6.15 Calibration Parameters The user has access to a number of the instrument calibration constants namely CTO, C0, and CG. These values are set at the factory and must not be altered. The correct values are important to the accuracy and proper and safe operation of the calibrator. -
Page 43: Digital Communication Interface
7 Digital Communication Interface Serial Communications Digital Communication Interface The furnace calibrator is capable of communicating with and being controlled by other equipment through the digital interface. Two types of digital interface are available — the RS-232 serial interface and the optional IEEE-488 GPIB interface. -
Page 44: Baud Rate
9116A Furnace User’s Guide “Probe”. This is the menu selection. Press “UP” repeatedly until the serial in- terface menu is indicated with “SERIAL”. Finally press “SET” to enter the se- rial parameter menu. In the serial interface parameter menu are the BAUD rate, the sample rate, the duplex mode, and the linefeed parameter. -
Page 45: Ieee-488 Communication
7 Digital Communication Interface IEEE-488 Communication face commands are discussed in Section 7.3. All commands are ASCII charac- ter strings terminated with a carriage-return character (CR, ASCII 13). IEEE-488 Communication The IEEE-488 interface is available as an option. Instruments supplied with this option may be connected to a GPIB type communication bus that allows many instruments to be connected and controlled simultaneously. - Page 46 9116A Furnace User’s Guide data. Numeric data, denoted by “n”, may be entered in decimal or exponential notation. Characters are shown in lower case although upper case may be used. Spaces may be added within command strings and are ignored. Backspace (BS, ASCII 8) may be used to erase the previous character.
-
Page 47: Table
7 Digital Communication Interface Interface Commands Table 3. Digital Interface Command Summary Command Command Returned Acceptable Command Description Format Example Returned Example Values Display Temperature Read current set-point s[etpoint] set: 9999.99 {C or F} set: 150.00 C Set current set-point to n s[etpoint]=n s=450 Instrument... - Page 48 9116A Furnace User’s Guide Digital Interface Command Summary continued Command Command Returned Acceptable Command Description Format Example Returned Example Values GO or STOP or Set program control mode: pc=g[o]/s[top]/c[ont] CONT Start program pc=g[o] pc=g Stop program pc=s[top] pc=s Continue program...
- Page 49 7 Digital Communication Interface Interface Commands Digital Interface Command Summary continued Command Command Returned Acceptable Command Description Format Example Returned Example Values Set serial sampling setting to n sa[mple]= n sa=0 0 to 4000 seconds Set serial duplex mode: du[plex]=f[ull]/h[alf] FULL or HALF Set serial duplex mode to full du[plex]=f[ull]...
-
Page 50: Fixed Point Cell Installation Instructions
8 Fixed Point Cell Installation Instructions Installing the Metal Freeze Point Cell Fixed Point Cell Installation Instructions CAUTION: An Inconel basket is used as the example for the installation instructions in this section. The furnace is shipped with an Alumina basket which does not have a locking mechanism for the lid. -
Page 51: Figure 9. Metal Freeze Point Cell Installed In Canister
9116A Furnace User’s Guide Insulated Reflector Assy Insulation Top Thermal Shunt Disk Insulation Alumina Cap Insulation Alumina Support Canister or “Basket” Fiber Ceramic Paper to center cell in canister Quartz Shell Metal Freeze Point Cell (cell interior construction shown) Graphite Crucible... -
Page 52: Procedure
8 Fixed Point Cell Installation Instructions Procedure ♦ Circular 2.54 cm (1 in) thick for below cell in basket ♦ Circular 0.64 cm (0.25 in) thick with hole in center for over the cell ♦ 12.7 cm x 5.72 cm x 0.004 cm (5 in x 2.25 in x 0.016 in) fiber ceramic paper for cushioning around cell ♦... -
Page 53: Figure 11 Cotton Gloves Must Be Used
9116A Furnace User’s Guide Put on cotton gloves to avoid contaminating cell with body oils. Figure 11 Cotton gloves MUST be used. -
Page 54: Figure 12 Preparing Paper Towel With Reagent Grade Alcohol
8 Fixed Point Cell Installation Instructions Procedure Clean cell with reagent grade alcohol to remove any dust or oil that may be on the cell. Figure 12 Preparing paper towel with reagent grade alcohol. -
Page 55: Figure 13 Clean Cell Completely
9116A Furnace User’s Guide Figure 13 Clean cell completely. Return cell to stand(see Figure 10). Place the 0.64 cm (0.025 in) diameter piece of insulation in the re-entrant well of the cell. -
Page 56: Figure 14 Place Insulation In Re-Entrant Well
8 Fixed Point Cell Installation Instructions Procedure Figure 14 Place insulation in re-entrant well. -
Page 57: Figure 15 Push Insulation To Bottom Of Re-Entrant Well
9116A Furnace User’s Guide Using quartz rod move insulation to the bottom of the cell. Figure 15 Push insulation to bottom of re-entrant well. -
Page 58: Figure 16 Clean The Basket Thoroughly
8 Fixed Point Cell Installation Instructions Procedure Clean cell basket with reagent grade alcohol Figure 16 Clean the basket thoroughly... -
Page 59: Figure 17 Place Insulation In Cell Basket
9116A Furnace User’s Guide Place 2.54 cm (1 in) thick piece of insulation in the cell basket. Figure 17 Place insulation in cell basket... -
Page 60: Figure 18 Insure The Insulation Is Flat At The Bottom Of The Cell Basket
8 Fixed Point Cell Installation Instructions Procedure Use quartz rod to verify that insulation is at the bottom of the basket and flat. Figure 18 Insure the insulation is flat at the bottom of the cell basket. - Page 61 9116A Furnace User’s Guide 10. Make a 21.6 x 14 cm (8.5 x 5.5 in) piece of paper from standard printer paper. This paper is used to protect the cell from being scratched while installing the cell into the basket..
- Page 62 8 Fixed Point Cell Installation Instructions Procedure 11. Roll the paper lengthwise and place it in the opening of the basket. Figure 20 Paper placement.
-
Page 63: Figure 21 Insert Cell Into Basket
9116A Furnace User’s Guide 12. Hold basket horizontally and slide cell into basket. Push with your fin- ger until cell reaches bottom of the basket. Figure 21 Insert cell into basket. 13. Remove paper and return cell and basket to stand in the vertical position. - Page 64 8 Fixed Point Cell Installation Instructions Procedure 14. Roll a 12.7 x 5.72 x 0.04 cm (5 x 2.25 x 0.016 in) piece of fiber ceramic paper width wise and place it in the cell basket. Figure 22 Place fiber ceramic paper to center the cell in cell basket.
-
Page 65: Figure 23 Fiber Ceramic Insulation Installed On Top Of Cell
9116A Furnace User’s Guide 15. Slide fiber ceramic paper into basket. Figure 24 Fiber ceramic paper pushed below cell basket top. 16. Place a circular 0.64 cm (0.25 in) thick piece of insulation on top of the cell and use rod to verify the alignment of the hole in the insulation. -
Page 66: Figure 25 Preparing Basket Assembly For Installation In Furnace
8 Fixed Point Cell Installation Instructions Procedure CAUTION: An Inconel basket is used as the example for the installation instructions in this section. The furnace is shipped with an Alumina basket which does not have a locking mechanism for the lid. DO NOT install the basket into the furnace with the lid installed, otherwise the cell and the basket may be broken. -
Page 67: Figure 26 Installing Basket Assembly In Furnace
9116A Furnace User’s Guide 18. Slowly insert cell into furnace. Figure 26 Installing basket assembly in furnace. -
Page 68: Figure 27 Width Of Insulation Placed On Top Of Basket Assembly
8 Fixed Point Cell Installation Instructions Procedure 19. Place the cell removal/installation tool into the holes on the lid. Carefully install the lid onto the basket, where the basket was installed previously in the furnace. 20. Place one circular 2.54 cm (1 in) thick piece of insulation on top of bas- ket. -
Page 69: Figure 28 Basket, Insulation, And Furnace Lid Installed
9116A Furnace User’s Guide 23. Install the furnace lid (Figure 28). Figure 28 Basket, insulation, and furnace lid installed . -
Page 70: Figure 29 Heat Radiation Guard Installed
8 Fixed Point Cell Installation Instructions Procedure 24. Install the heat radiation guard (Figure 29). Figure 29 Heat radiation guard installed. -
Page 71: Freeze Point Realization
9 Freeze Point Realization General Freeze Point Realization General This discussion assumes SPRT calibrations at the copper point. Other freeze points are similar. Successful copper point realization requires a cell of the following specifications: • The purity of copper: 99.9999% •... - Page 72 9116A Furnace User’s Guide 3) Initiating the Freeze and Making Measurements: The freezing curve usu- ally lasts more than 4 hours and the temperature in the first half of the freezing curve is usually stable within 0.2 mK or 0.3 mK. If the tempera- ture of the furnace is closer to the freezing point, a longer freezing point can be obtained.
-
Page 73: Calibration Procedure
10 Calibration Procedure Two Point Calibration Procedure Calibration Procedure CAUTION: The vertical gradient needs to be checked before calibrating the furnace. Checking the vertical gradient insures that the sodium heat-pipe is working properly. CAUTION: DO NOT change the value of the calibration parameter Delta. -
Page 74: Accuracy & Repeatability
9116A Furnace User’s Guide − rzero − − alpha − - Measured temperature using thermometer. - Value of R from display of furnace (Press SET and DOWN at the same time.) where and R are the measured temperature and resistance at 800.0 °C and R are the measured temperature and resistance at 1060.0 °C... -
Page 75: Maintenance
Maintenance The calibration instrument has been designed with the utmost care. Ease of op- eration and simplicity of maintenance have been a central theme in the product development. Therefore, with proper care the instrument should require very little maintenance. Avoid operating the instrument in an oily, wet, dirty, or dusty environment. -
Page 76: Figure 30. Testing Uniformity
Thermocouple Adjust amount of insulation to adjust uniformity Insulation Melted Cell 1.2 cm (0.5 in) Fiber Ceramic board Figure 30. Testing Uniformity... - Page 77 opening. The fiber ceramic insulation provided may be added or removed to do this. Generally the bottom position must be filled and additional spaces above may be filled as required. • Check of the Controller Set-point Accuracy: This test is carried out in a metal freeze point cell where the metal has been completely melted.
-
Page 78: Troubleshooting
12 Troubleshooting Troubleshooting Troubleshooting If problems arise while operating the 9116A, this section provides some sug- gestions that may help you solve the problem. 12.1 Troubleshooting Below are several situations that may arise followed by suggested actions to take for fixing the problem. - Page 79 9116A Furnace User’s Guide Causes and Solutions Problem The display flashes The problem may be that the controller’s voltmeter circuit is not function- “Cut-out” and an incorrect ing properly. process temperature A problem with the thermocouple probe, the cutout operation, or the cut- out circuitry may cause the cutout to remain in this condition.
-
Page 80: Troubleshooting
12 Troubleshooting Troubleshooting Causes and Solutions Problem The controller controls or The controller operates normally except when controlling at a specified attempts to control at an set-point. At this set-point, the temperature displayed does not agree with inaccurate temperature the temperature measured by the user’s reference thermometer to within the specified accuracy.
Need help?
Do you have a question about the 9116A and is the answer not in the manual?
Questions and answers