Advertisement
Quick Links
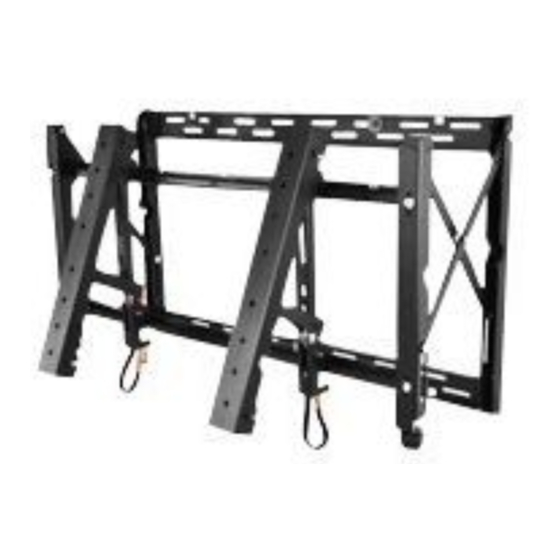
Installing 46-55" flat
panel screens on the
ML10/MP10 wall mount
The ML10/MP10 is a full-service video wall mount that can accommodate the FHD462-X and FHD552-X
LCD flat panels.
The ML10 mount is used for landscape orientations and the MP10 mount is used for portrait
orientations. The modular mount system features an innovative pull-out and prop-open hinge
mechanism that provides rear screen access, the ability to adjust the X, Y, and Z axis alignment, and
wall plate spacers that set each mount into position.
Features
Use the ML10 and MP10 wall mounts to hang and adjust the flat panels, and to access the rear of the
panels.
•
Modular mount for large video wall display configurations.
•
Tool-less adjustments of panels for optimal gaps.
•
Spring-loaded mechanisms secure displays.
Installing Flat Panels on the ML10/MP10 Wall Mount Instruction Sheet
020-101712-03 Rev. 1 (07-2015)
1
Advertisement

Related Manuals for Christie ML10


Summary of Contents for Christie ML10
- Page 1 X, Y, and Z axis alignment, and wall plate spacers that set each mount into position. Features Use the ML10 and MP10 wall mounts to hang and adjust the flat panels, and to access the rear of the panels. •...
-
Page 2: Safety Warnings And Cautions
• Adjustable VESA mounting hole patterns in 100 mm (3.9”) increments, starting at 200 x 200 mm (7.9” x 7.9”) up to 700 x 400 mm (27.5” x 15.7”) for ML10 LCD mounts. Additional patterns supported with adapter plates. ®... -
Page 3: Required Kits
Installing 46-55" flat panel screens on the ML10/MP10 wall mount Required kits Learn the kits that are required for installing the wall mounts. • LCD Mount 40-65” ML10 (Landscape) P/N: 135-101103-xx • LCD Mount 40-65” MP10 (Portrait) P/N: 135-104106-xx Optional kits •... -
Page 4: Required Tools
Installing 46-55" flat panel screens on the ML10/MP10 wall mount Adapter Bracket (Qty. 2) M8 x 16 mm socket pin screw (Qty. 4) #14 x 2.5” hex head wood screw (Qty. 5) 4mm Allen wrench (Qty. 1) Fender washer (Qty. 4) Mesh sleeve (not shown) (Qty. - Page 5 Installing 46-55" flat panel screens on the ML10/MP10 wall mount 3. To identify where the mount for the display to the right of the first display should be installed, measure the width of the display panel from the center of the first display to the center of the second display (X).
- Page 6 Installing 46-55" flat panel screens on the ML10/MP10 wall mount 5. To identify where the mount for the second row of displays should be installed, measure the height of the display panel from the top of the bottom left display to the top of the first display in the second row (Y).
- Page 7 Installing 46-55" flat panel screens on the ML10/MP10 wall mount In the landscape orientation, make sure there is a minimum 16” (406.4 mm) horizontal distance between the #14 x 2.5” screws. Landscape orientation Portrait orientation 5. Drill four 5/32" (4 mm) diameter holes 2-1/2" (65 mm) deep.
- Page 8 Installing 46-55" flat panel screens on the ML10/MP10 wall mount 3. Use a standard electric drill on slow setting to drill four 5/16” (8 mm) diameter holes to a minimum depth of 2.5” (64 mm). To avoid breaking out the back of the hole when entering a void or cavity, do not use a hammer drill.
- Page 9 Installing 46-55" flat panel screens on the ML10/MP10 wall mount Installing the mount to the F100 frame Learn how to install the wall mounts onto the F100 frame. 1. Make sure all components within the video wall are level, starting with the P100 Pedestal. If the floor surface is not level adjust the feet on the pedestal.
- Page 10 Installing 46-55" flat panel screens on the ML10/MP10 wall mount 6. For good screen planarity within a video wall adjust the top knob of the adapter bracket to achieve a 9 mm (0.35”) gap. 7. Adjust the bottom knob of the adapter bracket to achieve a 14 mm (0.55”) gap. If further adjustment is required, leave a 1 mm (0.04”) minimum clearance to allow the bracket to be...
- Page 11 Installing 46-55" flat panel screens on the ML10/MP10 wall mount 8. Mount the adapter bracket and use a level to ensure it is flush. 9. Turn the knobs located on the bottom of the mount to adjust the position until it is vertically centered.
- Page 12 Installing 46-55" flat panel screens on the ML10/MP10 wall mount 10. Check that the mount is level. If necessary fine adjust the vertical position. 11. Adjust the vertical position of the panel to leave a minimum 1 mm (0.04”) gap between panels so the weight of the panels do not rest on the panels underneath.
- Page 13 Installing 46-55" flat panel screens on the ML10/MP10 wall mount Attaching the adapter brackets to the display The panel must have the adapter brackets installed before it can be attached to the wall bracket. Attach the adapter brackets to the back of the panel using four M6 x 12 mm socket pin screws with a nylon shoulder washer, or four M8 x 15 mm socket pin screws, as shown below.
- Page 14 Installing 46-55" flat panel screens on the ML10/MP10 wall mount Attaching the panel to the wall mount Install the panel with the brackets onto the wall mount. 1. Slide the adapter brackets into position. 2. Loosely fasten the panel in place using the security screw.
- Page 15 Installing 46-55" flat panel screens on the ML10/MP10 wall mount Adjusting the adapter bracket Align the panel adapter brackets. Use the knob to make fine-tuned adjustments to the panel alignment. • Turn the knob clockwise to raise a side. •...
- Page 16 Installing 46-55" flat panel screens on the ML10/MP10 wall mount Securing the display cables Display cables can be routed through the top or bottom of the pull out mount assembly. 1. Use the cable ties and cable management slots on the pull out mount assembly to secure the display cables.
- Page 17 Installing 46-55" flat panel screens on the ML10/MP10 wall mount To avoid damaging the LCD panel always release both locking tabs at the same time and move the panel forwards evenly. Landscape orientation Portrait orientation Opening the adapter brackets Lift the bottom of the panel up and away from the pull out mount.
- Page 18 Installing 46-55" flat panel screens on the ML10/MP10 wall mount Closing the adapter brackets Take caution when closing the adapter brackets to ensure the LCD panel is not damaged. 1. Pull down on the short front release cords. Once the short cords are pulled, the kick stand will disengage. You may need to slightly pull the display away from the wall to release the kick stand.
- Page 19 Installing 46-55" flat panel screens on the ML10/MP10 wall mount 2. Gently guide it back into place as you close the brackets. Securing the pull out mount assembly (Optional) Prevent the locking tabs from releasing. Insert and tighten two M5 x 10 mm socket pin type-F screws into the locking tab.
Need help?
Do you have a question about the ML10 and is the answer not in the manual?
Questions and answers