Advertisement
Quick Links
I N S T A L L A T I O N I N S T R U C T I O N S
Instrucciones de instalación
Installationsanleitung
Instruções de Instalação
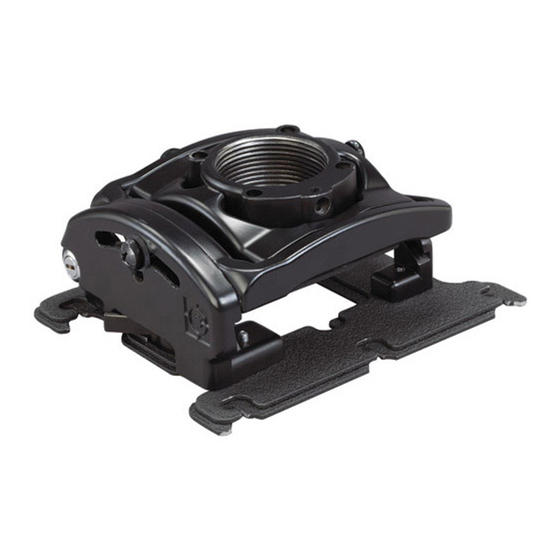
RPA Elite Series Projector Mounts
RPMA/RPMB/RPMC Series
Istruzioni di installazione
Installatie-instructies
Instructions d´installation
Spanish Product Description
German Product Description
Portuguese Product Description
Italian Product Description
Dutch Product Description
French Product Description
Advertisement

Related Manuals for Christie RPMA series


Summary of Contents for Christie RPMA series
- Page 1 I N S T A L L A T I O N I N S T R U C T I O N S Instrucciones de instalación Istruzioni di installazione Installationsanleitung Installatie-instructies Instruções de Instalação Instructions d´installation RPA Elite Series Projector Mounts Spanish Product Description German Product Description Portuguese Product Description...
-
Page 2: Important Safety Instructions
1-1/2" NPT or NPSM threaded extension information contained in this document is subject to change column (not included); without notice or obligation of any kind. Christie makes no • mounted to a wood framework; representation of warranty, expressed or implied, regarding the •... -
Page 3: Tools Required For Installation
Installation Instructions RPMA/RPMB/RPMC Series DIMENSIONS 6.50 4.50 5.50 1.50" DIA NPT 5.50 YAW ADJUSTMENT POINT 20 PITCH ADJUSTMENT POINT 20 1.00 5.24 SECURITY LOCK 2.79 ROLL ADJUSTMENT SECURITY SWITCH POINT 3 TOOLS REQUIRED FOR INSTALLATION 7/16" 1/8" (3mm) dia. (wood) 3/8"... - Page 4 RPMA/RPMB/RPMC Series Installation Instructions LEGEND Pencil Mark Tighten Fastener Marquage au crayon Serrez les fixations Segno a matita Serrare il fissaggio Stiftmarkierung Befestigungsteil festziehen Marcar con lápiz Apretar elemento de fijación Potloodmerkteken Bevestiging vastdraaien Marcar com lápis Apertar fixador Drill Hole Loosen Fastener Percez un trou Desserrez les fixations...
- Page 5 Installation Instructions RPMA/RPMB/RPMC Series PREPARATION The RPMX projector mounts are designed to be installed in one Threaded of the following common applications: extension • mounted to a 1-1/2" NPT or NPSM (Schedule 40, column 0.154" minimum thickness aluminum - ASTM B221) (not included) threaded extension column (not included);...
- Page 6 RPMA/RPMB/RPMC Series Installation Instructions Installing to Wood Framework (Joists) Using the RPMX as a guide, mark four mounting hole locations. (See Figure 3) Drill four 1/8" (3mm) dia. pilot holes to a depth of 1-3/4" (45mm) deep. Ø 3mm Pilot (Ø...
-
Page 7: Projector Installation
Installation Instructions RPMA/RPMB/RPMC Series IMPORTANT ! : When RPMX is properly positioned, the set screw access hole should be pointing directly at Secure using target, or 180° AWAY from target. jam nuts (not included) Install four Toggler A10 Alligator concrete anchors (not included) by inserting into pilot holes and hammering in until flush with mounting surface. - Page 8 RPMA/RPMB/RPMC Series Installation Instructions ADJUSTMENTS Installing Projector with Interface Bracket Orient projector with interface bracket. The RPMX projector mount can be adjusted for pitch (vertical elevation), roll (horizontal tilt), and yaw (rotation). Lift projector so that screws with thumb nuts are aligned with mounting slots in mount base.
- Page 9 Installation Instructions RPMA/RPMB/RPMC Series Pitch Adjustment (Vertical Elevation) Loosen PITCH adjustment locking screw using a #2 Phillips screwdriver. (See Figure 10) Turn PITCH micro-adjustment screw right or left using a #2 Phillips screwdriver until image is properly aligned on target. Tighten PITCH adjustment locking screw using a #2 Phillips screwdriver.
- Page 10 RPMA/RPMB/RPMC Series Installation Instructions...
- Page 11 Installation Instructions RPMA/RPMB/RPMC Series...
- Page 12 RPMA/RPMB/RPMC Series Installation Instructions Christie Digital Systems USA, Inc. United Kingdom PH: +44 (0) 118 977 8111 FX: +44 (0) 118 977 8112 Toll Free: 1-800-221-8025 Monday - Friday 8:30 am - 5:00 pm GMT PH: 519-744-8005 FX: 519-749-3302 France...