Advertisement
Quick Links
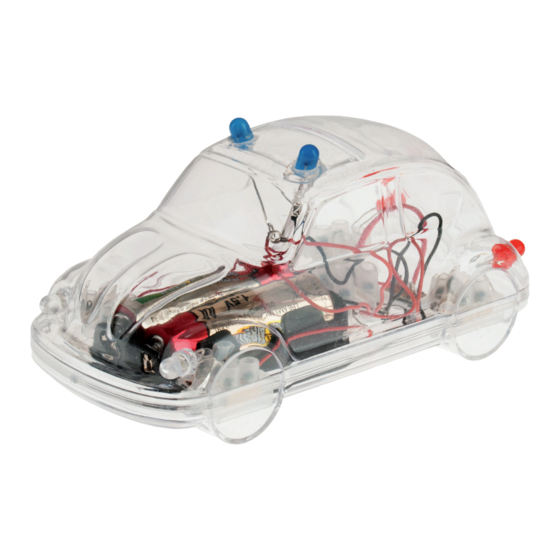
A c r y l i c c a r w i t h L E D -
PARTS LIST
Plastic car
Light Emitting Diode
Flashing LED blue
FLashing LED red
Connector 12pole.
Cable red
Cable black
Battery holder
Micro switch
E114033#2
114.033
l i g h t i n g
The OPITEC range of projects are not intended as toys for young children.
They are primarily intended as teaching aids for Design Technology and to
develop young peoples practical skills. They should not be attempted un-
less under the guidance of a qualified adult. They are not suitable for child-
ren under 3 yeas old as they may contain small parts that can be swallowed
1
2
2
2
1
1
1
1
1
Please Note
- danger of suffocation.!
130 Car
ø5 Lighting front
ø5 Lighting front
ø5 Lighting rear
1,5-2,5mm Wiring
500 Wiring
500 Wiring
Power source
19x6 Switch
Necessary tools:
Drills ø2/4 and 5mm
Fretsaw
Hot glue gun
Wire strippers
File
Scissors
1
2
3
4
5
6
7
8
9
1
Advertisement

Related Manuals for Opitec 114.033


Summary of Contents for Opitec 114.033
- Page 1 File Scissors Please Note The OPITEC range of projects are not intended as toys for young children. They are primarily intended as teaching aids for Design Technology and to develop young peoples practical skills. They should not be attempted un- less under the guidance of a qualified adult.
- Page 2 Instructions Step 1: Take hold of the acrylic car (1) and drill the two holes 5mm dia. in ( front lights ) ! Turn the car over and drill the two rear lights 5mm dia. Cut out for The drill the two 5mm holes in the roof switch 5mm dai.
- Page 3 Instructions Step 6: Connect up the various components with wire (6/7). Cut the cable to length as shown (see diagram) strip the insulati- on from the ends LED blue ca. 60mm red ca. 60mm black ca. 40mm black ca. 80mm black ca.
Need help?
Do you have a question about the 114.033 and is the answer not in the manual?
Questions and answers