Table of Contents
Advertisement
Quick Links
Installation Guide
1. Please unpack the range hood and accessories carefully.
2. Remove the baffle filters, check any dent or damage inside and outside.
3. If found any loosing parts, please remove them.
4. Place the range hood and the Blower unit on a flat stable surface; connect the Speed
Control Cord from the Hood unit to the Blower unit's 5 wires corresponding to the
colors inside the top connection box.
5. Plug in 120V AC power source. Press the power button and the speed buttons to
turn on.
6. Check if any unusual metal touching noise, check the speed variation, and press the
Light button to check the lights.
7. Verify all functions per Section 9 RANGE HOOD OPERATIONS.
8. Refer to Section 10 TROUBLESHOOTING if any malfunction was found.
9. The baffle filter are stainless steel covered by white protective film,
please remove the film before using the range hood.
IMPORTANT:
NOTICE:
Installer: Leave this guide with the homeowner
Homeowner: Keep this guide for future reference
& User Manual
Version: RH-SP08-201810
Super Quiet Split Series
Under Cabinet Range Hoods
Models: RH-SP08 (30", 36")
6" High, 8" Top Vent, 1mm Thickness
STOP and read! Test before installing
Read and save these instructions.
Advertisement
Table of Contents

Related Manuals for Awoco Super Quiet Split Series


Summary of Contents for Awoco Super Quiet Split Series
- Page 1 Installation Guide & User Manual Version: RH-SP08-201810 Super Quiet Split Series Under Cabinet Range Hoods Models: RH-SP08 (30”, 36”) 6” High, 8” Top Vent, 1mm Thickness STOP and read! Test before installing 1. Please unpack the range hood and accessories carefully.
-
Page 2: Table Of Contents
PLEASE READ AND SAVE THESE INSTRUCTIONS. Strongly recommend to test the unit before installation for any defective or damage during shipment. WARNING – TO REDUCE THE RISK OF FIRE, ELECTRIC SHOCK, OR INJURY TO PERSONS, READ THE FOLLOWING CAREFULLY before attempting to assemble, install, operate or maintain the product. -
Page 3: Know Before Installation
1. KNOW BEFORE INSTALLATION Research, plan and prepare the optional accessories & tools. Duct venting and accessories (NOT INCLUDED) • If for new installation or your old range hood doesn’t have exhaust duct, prepare to cut the openings through the bottom of the cabinet, wall, or top cabinet to ceiling. -
Page 4: Included Parts & Accessories
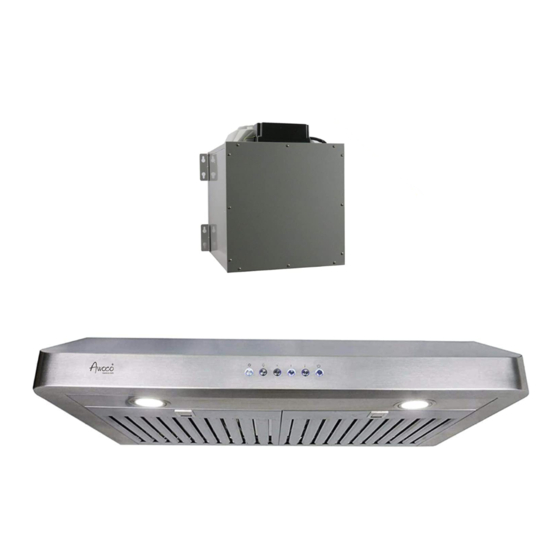
2. INCLUDED PARTS & ACCESSORIES Top Connection Box Under Cabinet Hood Unit (no blower inside) Blower Unit Baffle Filters Note: The Blower unit must be kept inside the home, attic or crawl space etc. Never try to install the Blower outside of the home. The supplied are subjected to change without notice due to product development. -
Page 5: Important Safety Notice
3. IMPORTANT SAFETY NOTICE Read all Instructions before Installing and operating this appliance Installation Cautions • The installation in this manual is intended for qualified installers, service technicians or persons with similar qualified background. Installation and electrical wiring must be done by qualified professionals and in accordance with all applicable codes and standards, including fire-rated construction. - Page 6 • Always use appropriate cookware and utensils size. • Always use cookware appropriate for the size of the surface element. To reduce the risk of injury to persons in the event of a stove top grease fire: • SMOTHER FLAMES with a close-fitting lid, cookie sheet, or metal tray, then turn OFF the burner. BECAREFUL TO PREVENT BURNS.
-
Page 7: Venting Height Requirements
4. VENTING HEIGHT REQUIREMENTS • Vent system must terminate to the outside (roof or side wall). • DO NOT terminate the vent system in an attic or other enclosed area. • DO NOT use 4” (10.2 cm) laundry-type wall caps. •... - Page 8 IMPORTANT • Please use Duct Run Calculation below to compute total available duct run when using elbows, transitions and caps. • ALWAYS, when possible, reduce the number or transitions and turns. If a reducer is used, install a long reducer instead of a pancake reducer. Reducing duct size will restrict airflow and decrease airflow, thus reduce duct size as far away from opening as possible.
-
Page 9: Venting Methods
5. VENTING METHODS • The Blower unit must be kept inside the home, attic or crawl space etc. Never try to install the Blower unit outside of the home. • This range hood is 8” top venting through the roof or wall. •... -
Page 10: Electrical Requirements & Specifications
6. ELECTRICAL REQUIREMENTS & SPECIFICATIONS IMPORTANT: Observe all governing codes and ordinances. • It is the customer’s responsibility to contact a qualified electrical installer. • A 120 Volt, 60 Hz, AC only, fused electrical supply is required on a 15-amp circuit. •... -
Page 11: Installation Preparation
7. INSTALLATION PREPARATION Test before installing: • Please unpack the range hood and accessories carefully. Remove the baffle filters. • Check for any dent or damage inside and outside. If found any loosing parts, please remove them. • Place the range hood and the Blower unit on a flat stable surface; connect the Speed Control Cord from the range hood to the Blower unit’s connector inside the top connection box. - Page 12 • For safety purpose, mount the screws through the pre-drilled mounting holes or/and drill new holes from inside the back of the hood to the studs or lumbers. For a more secure installation, use as many mounting holes as needed to secure from the inside of hood. 6) Securely mount the Blower Unit to the lumber inside the attic (above the ceiling and under the roof).
-
Page 13: Range Hood Operations
9. RANGE HOOD OPERATIONS Control Panel Layout and Buttons Configurations: Light Control: • Press Light Control button once to turn on the lights, and once again to turn off the lights. • The Light Control button operates independently from the Power Control (On/Off) button. Pressing the Power Control button will not turn LED lights ON or OFF. -
Page 14: Troubleshooting
Operation Cautions: • Read and understand all instructions and warnings in this manual before operating the appliance. • Always leave safety grills and filters in place. Without these components, operating blowers could catch on to hair, fingers and loose clothing. •... -
Page 15: Maintenance And Cleaning
11. MAINTENANCE AND CLEANING Cleaning: • The saturation of greasy residue in the blower and filters may cause increased inflammability. Keep unit clean and free of grease and residue build-up at all times to prevent possible fires. • For optimal operation, clean range hood and all baffle/spacer/filter/grease tunnel/oil container regularly. Regular care will help preserve the appearance of the range hood. -
Page 16: Warranty
Replacing the Light Bulbs: • This range hood uses LED bulbs: 3W 12V. • Make sure the range hood is unplugged or turn OFF breaker. 1. Gently pull the defective bulb assembly straight out from the edge, and then disconnect the wires. 2. -
Page 17: Support And Contact
You must also include proof of the date of original retail purchase as evidence that the product is within the applicable warranty period. 13. SUPPORT AND CONTACT Contact your local seller for exchange or repair. Visit www.awoco.com for most updated information. Email to sales@awoco.com for technical support and sales activity.
Need help?
Do you have a question about the Super Quiet Split Series and is the answer not in the manual?
Questions and answers