Advertisement
Quick Links
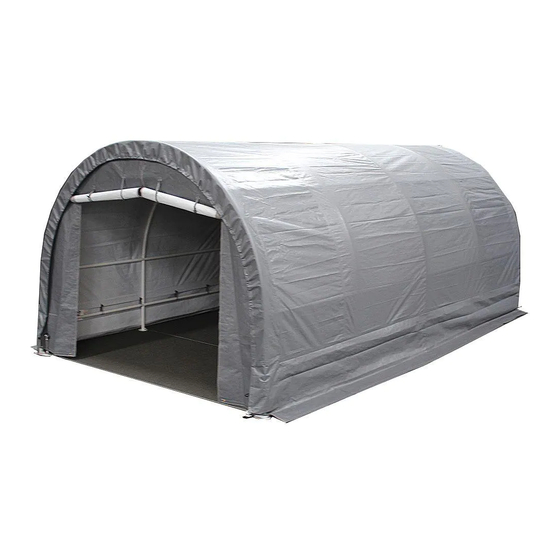
10'X20' Dome Garage
ITEM #: G10208
Dimensions:
10ft. Wide x 20ft. Deep x 8ft. Center Height
WARNING:
Keep all flame and heat
sources away from this tent
fabric. It is not fire proof
Distributed by: PIC America, LTD.
The fabric will burn if left in
8009 Purfoy Road • Fuquay-Varina, NC 27526
continuous contact with any
1-800-800-6296 • www.kingcanopy.com
flame source.
Advertisement

Summary of Contents for KING CANOPY G10208
- Page 1 10’X20’ Dome Garage ITEM #: G10208 Dimensions: 10ft. Wide x 20ft. Deep x 8ft. Center Height WARNING: Keep all flame and heat sources away from this tent fabric. It is not fire proof Distributed by: PIC America, LTD. The fabric will burn if left in 8009 Purfoy Road •...
- Page 2 PARTS FOOT15PC-X FOOT15PC-T FOOT15PC-T 3W13PC-T 4W13PC-X G102008-EWWZ G102008-EWWW 2X10-15PC G10208-C BALL A15-CC 3X9-15PC-C AC-G1020 ROPE60 TB-GAR STAKE-GAR 4X10-15PC FOOT15PC-T 2-way Corner Foot Pads FOOT15PC-X 3-way Center Foot Pads 3W13PC-T (10) 3-way Connectors (ends) 4W13PC-X (15) 4-way Connectors (centers) 4X10-15PC (28) 58”...
-
Page 3: Frame Assembly
4-way are used to form the length. 1) Start by laying out all of the parts and pieces to your King Canopy. Please refer to the parts list to ensure that your kit is complete. When all the parts have been accounted for, begin to layout your frame according to the photo above. - Page 4 FRAME ASSEMBLY 2) Assemble the center section of frame using the 3X9-15PC-C curved pipe and the 4X10-15PC 58´´ straight pipe. (See photo above) Make sure longest part of the 3-ways and 4-ways are used to form length. Continue assembly until you have four sections complete, which is the full length of the unit.
- Page 5 FRAME ASSEMBLY 3) Continue assembly by completing the next curved section on each side of the top section. (See Photo Above) Hold frame together by tying frame from end to end like in step 2 before. NOTE: PuSh FRAmE INWARD FROm EACh SIDE TO KEEP CuRvE ShAPE. 4) Once you have completely assembled all the curved sections of the canopy, (See Photo Above) you are now ready to put the cover on.
- Page 6 COVER & LEG ASSEMBLY Diagram F 5) Remove the cover from plastic bag and unfold. Next fold half the cover over the other half with the white side out. Match the corners (See Diagram F) and mark the top center of cover at the grommet line at both ends.
- Page 7 COVER & LEG ASSEMBLY 8) Now that you have completed the frame assembly and your Diagram L canopy is standing, take the cables provided and hook one end to each foot (See Diagram L) over to the foot on the opposite side.
- Page 8 COVER & END WALL ASSEMBLY Diagram N 10) To complete your canopy, secure the top down each side on the bottom pipe and around each end with ball bungee straps. (See Diagram N) 11) Add the canopy endwalls using the hook &...
- Page 9 COVER & END WALL ASSEMBLY Diagram O NOTE: your canopy sidewalls and rear endwall are long enough to be buried in the ground. This will help prevent water from running inside.
- Page 10 ANCHORING YOUR UNIT This canopy is designed for use as a temporary structure. After assembly, the canopy MUST BE securely anchored to the ground to prevent damage from winds. Your canopy will act like a kite in the wind if not properly and securely anchored to the ground. Severe winds will cause the frame to twist and unanchored legs will fall, thereby collapsing the canopy.
- Page 11 IMPORTANT NOTICE: PLEASE READ CAREFULLY We are confident that you will be completely satisfied with your King Canopy unit. Please take a moment to read the very important information below, and call us with any questions you may have. King Canopy/PIC America, LTD. has no control over wind, snow, ice, rain or any other weather condition and we are in no way responsible for any damage caused by the canopy or to the canopy.
-
Page 12: Warranty Information
Improper Anchoring, Strong Winds, Rain Snow, or Ice King Canopy/PIC America, LTD. does not guarantee these canopies under strong weather conditions. These canopies are designed to protect against damages caused by sun, rain, tree sap, birds, etc. They are not designed to hold roof loads that accompany snow, ice or heavy rains.


Need help?
Do you have a question about the G10208 and is the answer not in the manual?
Questions and answers