Table of Contents
Advertisement
Quick Links
For more information on this
and other Winmate products,
please visit our website at:
www.winmate.com
Document Part Number: 91521110103H
Please read this instructions before operating the device and retain them for future reference.
27.6"/ 28.6"/ 38"
Chassis Display
User Manual
Bar-Type
W27L100-CHC1
W28L100-CHA2
W38L100-CHA1
V1.0
Advertisement
Table of Contents

Related Manuals for Winmate W27L100-CHC1


Summary of Contents for Winmate W27L100-CHC1
- Page 1 Chassis Display W27L100-CHC1 W28L100-CHA2 W38L100-CHA1 User Manual V1.0 For more information on this and other Winmate products, please visit our website at: www.winmate.com Document Part Number: 91521110103H Please read this instructions before operating the device and retain them for future reference.
-
Page 2: Table Of Contents
USER MANUAL CONTENTS CONTENTS PREFACE ......................- 3 - ABOUT THIS USER MANUAL ................- 10 - CHAPTER 1: INTRODUCTION ................- 12 - 1.1 Product Features ................- 12 - 1.2 Package Content ................- 13 - 1.3 Schematics and Dimensions ............... - 14 - 1.3.1 Schematics and Dimensions 27.6”... -
Page 3: Preface
USER MANUAL PREFACE PREFACE Copyright Notice No part of this document may be reproduced, copied, translated, or transmitted in any form or by any means, electronic or mechanical, for any purpose, without the prior written permission of the original manufacturer. Trademark Acknowledgement Brand and product names are trademarks or registered trademarks of their respective owners. - Page 4 USER MANUAL PREFACE Customer Service We provide a service guide for any problem by the following steps: First, visit the website of our distributor to find the update information about the product. Second, contact with your distributor, sales representative, or our customer service center for technical support if you need additional assistance.
- Page 5 USER MANUAL PREFACE Advisory Conventions Four types of advisories are used throughout the user manual to provide helpful information or to alert you to the potential for hardware damage or personal injury. These are Notes, Important, Cautions, and Warnings. The following is an example of each type of advisory.
- Page 6 USER MANUAL PREFACE Safety Information WARNING! / AVERTISSEMENT! Always completely disconnect the power cord from your chassis whenever you work with the hardware. Do not make connections while the power is on. Sensitive electronic components can be damaged by sudden power surges. Only experienced electronics personnel should open the PC chassis.
- Page 7 USER MANUAL PREFACE Safety Precautions For your safety carefully read all the safety instructions before using the device. Keep this user manual for future reference. • Always disconnect this equipment from any AC outlet before cleaning. Do not use liquid or spray detergents for cleaning. Use a damp cloth.
- Page 8 USER MANUAL PREFACE CAUTION/ATTENTION Use the recommended mounting apparatus to avoid risk of injury. Utiliser l’appareil de fixation recommandé pour éliminer le risque de blessure. WARNING! / AVERTISSEMENT! Only use the connection cords that come with the product. When in doubt, please contact the manufacturer. Utiliser seulement les cordons d’alimentation fournis avec le produit.
- Page 9 USER MANUAL PREFACE Important Information Federal Communications Commission Radio Frequency Interface Statement This device complies with part 15 FCC rules. Operation is subject to the following two conditions: This device may not cause harmful interference. ⚫ This device must accept any interference received including ⚫...
-
Page 10: About This User Manual
USER MANUAL ABOUT THIS USER MANUAL ABOUT THIS USER MANUAL This User Manual provides information about using the Winmate® Bar-Type Chassis Display. This User Manual applies to Bar-Type Chassis Display W27L100- CHC1, W28L100-CHA2 and W38L100-CHA1. The documentation set for the Bar-Type Chassis Display provides information for specific user needs, and includes: •... -
Page 11: Chapter 1: Introduction
USER MANUAL CHAPTER 1 IINTRODUCTION INTRODUCTION This chapter gives you product overview, describes features and hardware specification. You will find all accessories that come with the display in the packing list. Mechanical dimensions and drawings included in this chapter. - 11 -... -
Page 12: Product Features
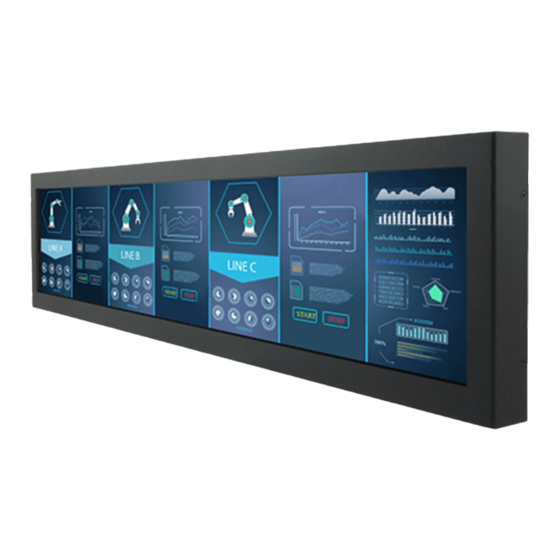
Bar-Type Chassis Display is a fascinating ultra-wide series. The ultra-wide aspect ratio display and high resolution is perfectly fit to replace traditional LED signage. Depending on different applications, Winmate® Bar-Type can be used in both horizontal and vertical installation to show different content with one single image or split screens in different places. -
Page 13: Package Content
USER MANUAL CHAPTER 1 IINTRODUCTION 1.2 Package Content Carefully remove the box and unpack your device. Please check if all the items listed below are inside your package. If any of these items are missing or damaged contact us immediately. Standard factory shipment list: Bar-Type User Manual... -
Page 14: Schematics And Dimensions
USER MANUAL CHAPTER 1 IINTRODUCTION 1.3 Schematics and Dimensions This section describes mechanical dimensions of Bar-Type Display. Notice that this is a simplified drawing and some components are not marked in detail. Please contact our sales representative if you need further product information. 1.3.1 Schematics and Dimensions 27.6”... -
Page 15: Schematics And Dimensions 28.6
USER MANUAL CHAPTER 1 IINTRODUCTION 1.3.2 Schematics and Dimensions 28.6” Unit: mm Description Description ① ④ 5 Button OSD Control Panel VGA x 1 ② ⑤ Audio (Optional) DVI-D x 1 9-36V DC Terminal Block ③ ⑥ HDMI 1.4a x 1 (Phoenix Type) - 15 -... -
Page 16: Schematics And Dimensions 38
USER MANUAL CHAPTER 1 IINTRODUCTION 1.3.3 Schematics and Dimensions 38” Unit: mm Description Description ① ④ 5 Button OSD Control Panel VGA x 1 ② ⑤ Audio (Optional) DVI-D x 1 9-36V DC Terminal Block ③ ⑥ HDMI 1.4a x 1 (Phoenix Type) - 16 -... -
Page 17: Physical Buttons And Led Indicators
USER MANUAL CHAPTER 1 IINTRODUCTION 1.4 Physical Buttons and LED Indicators The OSD Control Panel is located on the rear side of the Bar-Type Display. Physical Buttons Icon Button Description Volume Down / Press to lower down the volume Select up Volume Up / Press to increase the volume Select down... -
Page 18: Chapter 2: Installation
USER MANUAL CHAPTER 2 INSTALLATION INSTALLATION This chapter provides hardware installation instructions and mounting guide for all available mounting options. Pay attention to cautions and warning to avoid any damages. -
Page 19: Safety Precautions
USER MANUAL CHAPTER 6 TECHNICAL SUPPORT CHAPTER 2: INSTALLATION This chapter provides information on how to connect the Display to the source of power, connector pinouts and the guideline to turn on/off the device. 2.1 Safety Precautions Observe the following common safety precautions before installing any electronic device: •... -
Page 20: Vesa Mounting Guide
USER MANUAL CHAPTER 6 TECHNICAL SUPPORT 2.3 VESA Mounting Guide The Bar-Type Display supports VESA Mount suitable for most of the industrial and commercial applications. The device supports flexible mounting in both horizontal and vertical installations. Refer to sub-sections below for more details. CAUTION/ ATTENTION Follow mounting instructions and use recommended mounting hardware to avoid the risk of injury. -
Page 21: Powering On
USER MANUAL CHAPTER 6 TECHNICAL SUPPORT 2.4 Powering On 2.4.1 AC Adapter Components 3 Pin Terminal Block to Power Cord AC Adapter DC Jack Safety Precautions: • Do not use the adapter in a high moisture environment • Never touch the adapter with wet hands or foot •... -
Page 22: Power Considerations
USER MANUAL CHAPTER 6 TECHNICAL SUPPORT ALTERNATING CURRENT / MISE À LE TERRE! This product must be grounded. Use only a grounded AC outlet. Install the additional PE ground wire if the local installation regulations require it. *If you do not use a grounded outlet while using the device, you may notice an electrical tingling sensation when the palms of your hands touch the device. -
Page 23: Connecting The Power
USER MANUAL CHAPTER 6 TECHNICAL SUPPORT 2.4.3 Connecting the Power The Bar-Type Display operates on external power. Follow the instructions below to connect the device to the source of power. To connect the Display to the source of power: Connect a 3-pin terminal block to the connector on the Display. Connect the other side of the terminal block to the AC adapter. -
Page 24: Connecting Peripherals
USER MANUAL CHAPTER 6 TECHNICAL SUPPORT 2.5 Connecting Peripherals The panel control port is designed for monitors that work with a variety of compatible video sources. Due to the possible deviations between these signal sources, you may have to make adjustments to the monitor settings from the OSD menu when switching between these sources. -
Page 25: Hdmi Connector
USER MANUAL CHAPTER 6 TECHNICAL SUPPORT 2.5.3 HDMI Connector Plug HDMI signal cable to the HDMI connector on the rear side of the PC system, and plug the other end to the monitor. Pin Assignment and signal names for HDMI connector Pin №... -
Page 26: Chapter 3: Operating The Device
USER MANUAL CHAPTER 6 TECHNICAL SUPPORT CHAPTER 3: Operating the Device This chapter includes the directory for technical support. Free technical support is available from our engineers every business day. We are always ready to give advice on application requirements or specific information on the installation and operation of any of our products. -
Page 27: Osd Menu Navigation
USER MANUAL CHAPTER 6 TECHNICAL SUPPORT 3.2 OSD Menu Navigation OSD Icon Sub-menu Settings Note BRIGHTNESS slider bar Default 50 Use to adjust the screen’s brightness. Range 0 to 100 CONTRAST slider bar Default 50 BRICONTRAST Use to adjust the screen’s contrast. Range 0 to 100 H POSITION slider bar Default 50... - Page 28 USER MANUAL CHAPTER 6 TECHNICAL SUPPORT Speaker ON/OFF Default OFF Use to set value of Volume Speaker OSD Icon Sub-menu Settings Note AUTO SCAN Select and execute Default mode Auto detect the input source ANALOG Select and execute Switch the setting of signal input to Analog mode CHANNEL HDMI Select and execute...
-
Page 29: Troubleshooting Guide
USER MANUAL CHAPTER 6 TECHNICAL SUPPORT 3.3 Troubleshooting Guide If your monitor fails to operate correctly, check the following chart for possible solution before calling for repairs: Condition Check Point • Check if the signal cable is firmly seated in the socket. The picture does not •... - Page 30 USER MANUAL APPENDIX A PRODUCT SPECIFICATIONS Product Specifications This section includes product specifications. Appendix - 30 -...
-
Page 31: Appendix A: Product Specifications
USER MANUAL APPENDIX A PRODUCT SPECIFICATIONS APPENDIX A: PRODUCT SPECIFICATIONS Model Name W27L100-CHC1 W28L100-CHA2 W38L100-CHA1 Display 27.6” 28.6” 38” Size / Type Resolution 1920×360 1920 x 540 1920 x 540 Brightness 1000 nits 1000 nits 1000 nits Contrast Ratio 1000:1 (typ.) 1000:1 (typ.) - Page 32 Winmate Inc. 9F, No.111-6, Shing-De Rd., San-Chung District, New Taipei City 24158, Taiwan, R.O.C Tel: 886-2-8511-0288 Fax: 886-2-8511-0211 Email: sales@winmate.com.tw Official website: www.winmate.com...
Need help?
Do you have a question about the W27L100-CHC1 and is the answer not in the manual?
Questions and answers