Table of Contents
Advertisement
Quick Links
Download this manual
See also:
User Manual
Advertisement
Table of Contents

Related Manuals for Winmate R15L600-MRA3FP


Summary of Contents for Winmate R15L600-MRA3FP
-
Page 1: Quick Start Guide
15/19/24/26” Display ECDIS Marine Quick Start Guide V1.0 R15L600-MRA3FP R19L300-MRA1FP Model No.: W24L100-MRA1FP W26L100-MRA1FP Document Part Number: 91521110100D Please read these instructions carefully before using this product, and save this manual for future use. - Page 2 Warranty Winmate Inc. warranty guarantees that each of its products will be free from material and workmanship defects for a period of one year from the invoice date. If the customer discovers a defect, we will, at his/her option, repair or replace the defective product at no charge to the customer, provide it is returned during the warranty period of one year, with transportation charges prepaid.
-
Page 3: Table Of Contents
6 ECDIS Mode Brightness Adjustment ECDIS Mode Brightness Adjustment Switching to DAY Mode Switching to DUSK Mode Switching to NIGHT Mode 7 OSD Menu Introduction 8 Technical Specifications Display Technical Specification Available Input Signals 9 Technical Support Winmate Download Center Winmate File Share... -
Page 4: Getting Started
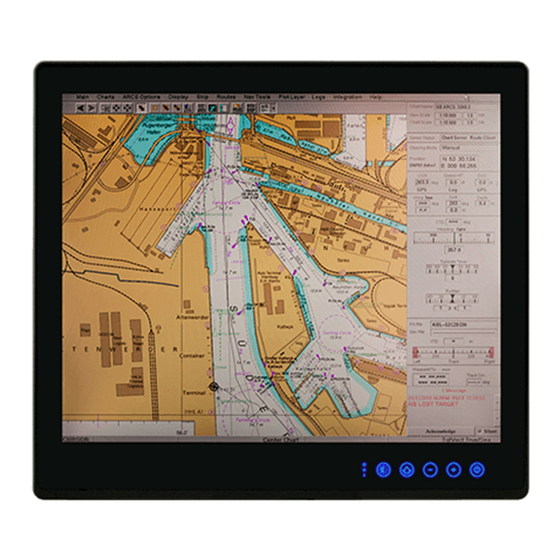
IEC60945 4th Edition, DNV2.4, IACS E10. Modern marine sector requires durable devices that can withstand long periods submersed in water. Winmate® ECDIS Marine Series Display is suitable for navigation, ship automation, and surveillance, rugged industrial and light military applications. -
Page 5: Unpacking
*AC adapter, 3-pin terminal block, and power cord shipped with the display for testing purposes only. **Notice: Screw bolts provided by Winmate only to be used to screw the display onto a console from the rear side. If you prefer your own bolts, please make sure to use M4 and 30mm in length. -
Page 6: Description Of Parts
Description Of Parts Appearance and Layout 15” No Description No Description ① ⑥ USB (Touchscreen) Display Port 1.2 ② ⑦ RS232 (Remote control) ③ ⑧ DVI-D Audio ④ ⑨ HDMI 2.0 DC Input ⑤ HDMI 1.4... -
Page 7: Appearance And Layout 19
Appearance and Layout 19” Description Description ① USB (Touchscreen) ⑥ Display Port 1.2 ② RS232 (Remote control) ⑦ VGA ③ DVI-D ⑧ Audio ④ HDMI 2.0 ⑨ DC Input ⑤ HDMI 1.4 Please read these instructions carefully before using this product, and save this guide for future use. -
Page 8: Appearance And Layout 24" And 26
③ DVI-D ⑧ Audio ④ HDMI 2.0 ⑨ DC Input ⑤ HDMI 1.4 For schematics and mechanical dimensions refer to the ECDIS Marine Display User Manual. You can download the User Manual from Winmate Download Center or Winmate File Share. -
Page 9: Capacitive Touch Osd Control Panel
Capacitive Touch OSD Control Panel Capacitive touch OSD control panel and ECDIS indicators located on the front of your Display. Refer to the Description of Parts section of this guide to see the location. ECDIS Mode Indicator Capacitive Touch Keys Icon Function Description... -
Page 10: Mounting
VESA Mount. This section explains how to mount ECDIS Marine Display. Panel Mount Winmate® provides mounting clips for installation onto a wall or into console by request. Make sure you console cutout matches the display cutout dimensions. Use either short or long screws based on the thickness of the fixture. -
Page 11: Vesa Mount
VESA Mount Winmate® provides VESA and Wall Mount Kits by request. VESA Plate Dimensions 15” 19” 24” 26” 100 x 100 100 x 100 100 x 100 100 x 100 100 x 200 100 x 200 Screw Hole Diameter M4 D=3mm... -
Page 12: Connector Description
3 Connector Description This section describes how to connect ECDIS Marine Display to various interfaces and describes connector pinouts. WARNING!/ AVERTISSEMENT! Make sure the power is off when connecting and disconnecting the connectors. Assurez-vous que l'alimentation est coupée lors de la connexion et la déconnexion des connecteurs. -
Page 13: Dvi Connector
DVI Connector Use DVI to connector in the rear of PC system, and plug the other end to the TFT LCD display. Fasten cable connectors with screws. Pin № Pin № Signal Name Signal Name DVI_RX2- DVI_RX2+ DVI SCL DVI SDA DVI_RX1- DVI_RX1+ DVI_CON_CA... -
Page 14: Hdmi 1.4 Connector
HDMI 1.4 Connector Use HDMI to connector in the rear of PC system, and plug the other end to the TFT LCD display. Fasten cable connectors with screws. Pin № Pin № Signal Name Signal Name HDMI_RX2+ HDMI_RX2- HDMI_RX1+ HDMI_RX1- HDMI_RX0+ HDMI_RX0- HDMI_RXC+... -
Page 15: Vga Connector
VGA Connector ECDIS Marine Display has VGA connector (D-Sub 15pin Female). Use VGA cable to connect the display to the PC system. Fasten cable connectors with screws. Pin № Signal Name Pin № Signal Name GREEN BLUE RED_RTN GREEN_RTN BLUE_RTN KEY/PWR H Sync V Sync... -
Page 16: Powering On Or Off
4 Powering On or Off Connecting to AC Power Source (For Testing) 1. Plug one end of the terminal block cable firmly to the DC IN Jack. 2. Plug the other end of the terminal block plug to the AC adapter (12V 80W). 3. -
Page 17: Turning On Or Off
5 Turning On or Off Turning On Perform the following procedure to turn on the screen: Press and hold the capacitive power key ( ) until the image appears on the monitor. IMPORTANT: Make sure the signal source from system is correct (VGA / DVI/ HDMI/ Display Port). -
Page 19: Ecdis Mode Brightness Adjustment
6 ECDIS Mode Brightness Adjustment Winmate provides quickly adjustable keys for the ECDIS mode switch (DAY, DUSK, NIGHT). ECDIS Mode Brightness Adjustment Switch the ECDIS mode by tapping capacitive touch key. Tap the ECDIS Mode Quick Button ), and the level of brightness will be automatically adjusted according to ECDIS standard. -
Page 20: Switching To Day Mode
Switching to DAY Mode The brightness was adjusted to DAY Mode DAY Mode LED Indicator Switching to DUSK Mode The brightness was adjusted to DUSK Mode DUSK Mode LED Indicator Switching to NIGHT Mode The brightness also be adjusted to NIGHT Mode NIGHT Mode LED Indicator... -
Page 21: Osd Menu Introduction
7 OSD Menu Introduction OSD Menu is a tool that is used to control system settings. Icon Function Description You can adjust brightness, contrast, sharpness, saturation, Display temperature from this menu. You can adjust position (VGA only), clock (VGA only), phase Adjust (VGA only), white balance (VGA only) from this menu. -
Page 22: Technical Specifications
8 Technical Specifications Display Technical Specification Model Name R15L600-MRA3FP R19L300-MRA1FP W24L100-MRA1FP W26L100-MRA1FP Display 19” 24” 26” Panel Size 15" Resolution 1024 x 768 1280 x 1024 1920 x 1080 1920 x 1200 Pixel Pitch 0.2947 x0.2947 0.294x0.294 0.276x0.276 0.2865x0.2865 (H x V, mm) - Page 23 DC Input 1 x Terminal block 3pin (Phoenix type) User Controls OSD Control Via programmable capacitive touch keys: ECDIS, Home, Brightness (+/-), Power Remote Via RS232 serial interface Control Power Specifications Power Input 24V DC-in with Isolation (9~36V acceptable) Power 80W (Max) Consumption Environment...
-
Page 24: Available Input Signals
Available Input Signals The choice of supported modes depends on the monitor native resolution. Refer to the table below for more information about available input signals. Resolution Frequency (Hz) Resolution Frequency (Hz) 640x480 1024x768 640x480 1280x768 640x480 1280x1024 720x400 1600x1200 800x600 1920x1200 1366x768... - Page 25 HDMI 1.4 HDMI 2.0 Resolution Frequency (Hz) Resolution Frequency (Hz) 640x480 640x480 800x600 800x600 1024x768 1024x768 1280x768 1280x768 1280x1024 1280x1024 1366x768 1366x768 1400x1050 1400x1050 1440x900 1440x900 1600x900 1600x900 1600x1200 1600x1200 1680x1050 1680x1050 1920x1080 1920x1080 1920x1200 1920x1200 2560x1600 2560x1600 3840x2160 3840x2160 4096x2160 4096x2160 Display Port 1.2...
-
Page 26: Technical Support
Support > Download Center > Marine Grade > ECDIS Marine Display Or follow the link below: http://www.winmate.com/DownCenter/DownLoadCenter.asp?DownType=0618&OnlyContent= Winmate File Share http://www.winmate.com/> File Share > Public Documents > Display > Marine Display > ECDIS Marine Display Or follow the link below: https://winmate.box.com/v/Winmate-ECDIS-Marine-Display... - Page 27 Winmate Inc. 9F, No.111-6,Shing-De Rd., San-Chung District, New Taipei City 24158, Taiwan, R.O.C Tel: 886-2-8511-0288 Fax: 886-2-8511-0211 Email: sales@winmate.com.tw Official website: www.winmate.com...
Need help?
Do you have a question about the R15L600-MRA3FP and is the answer not in the manual?
Questions and answers